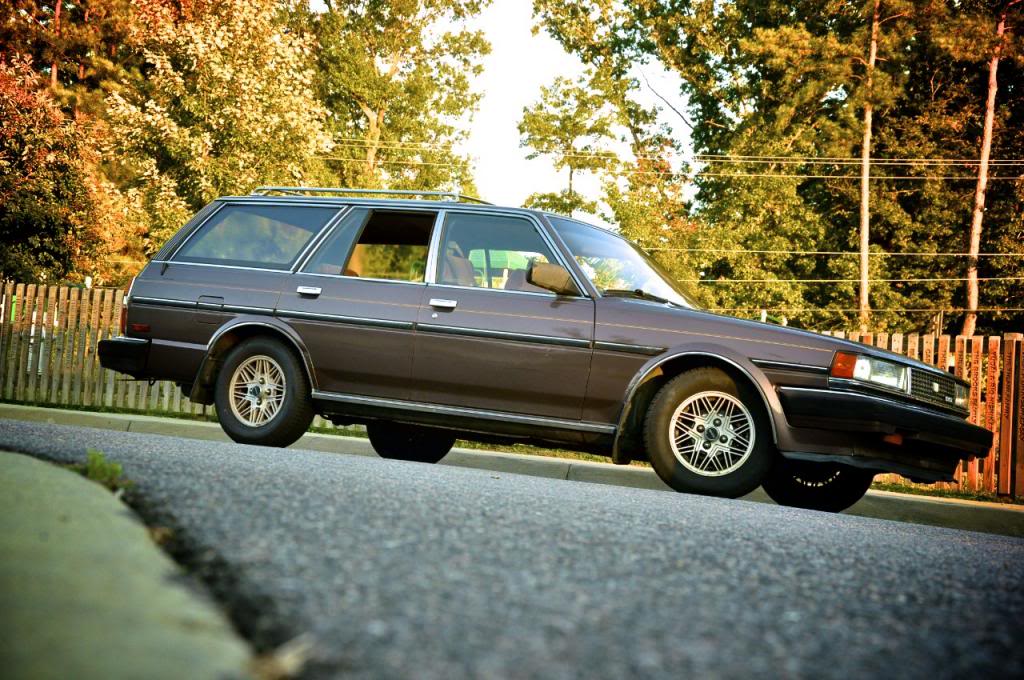
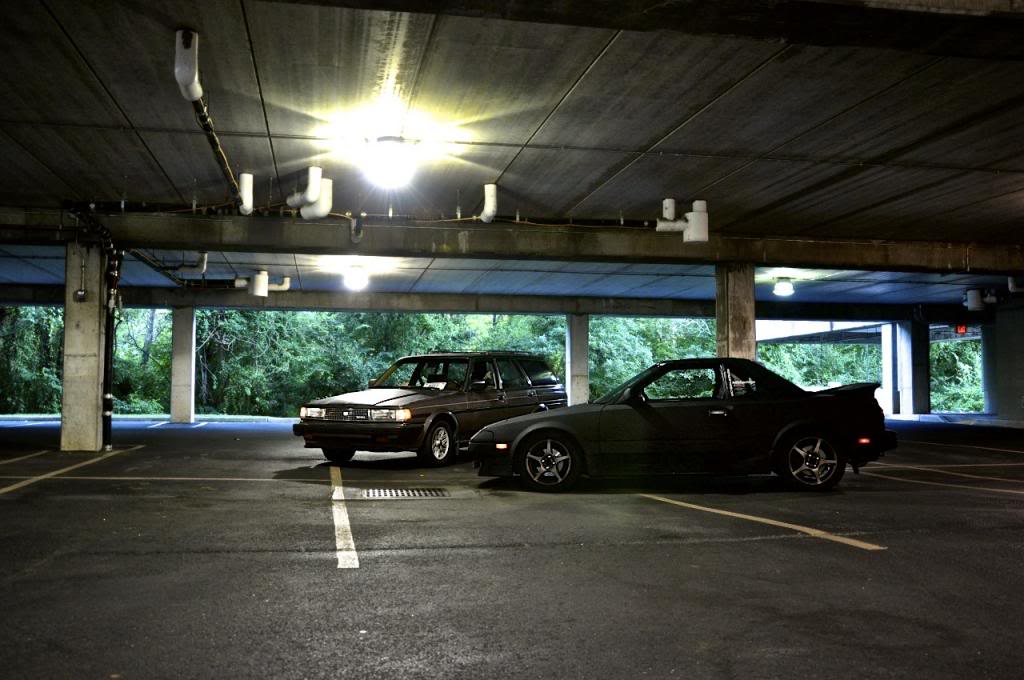
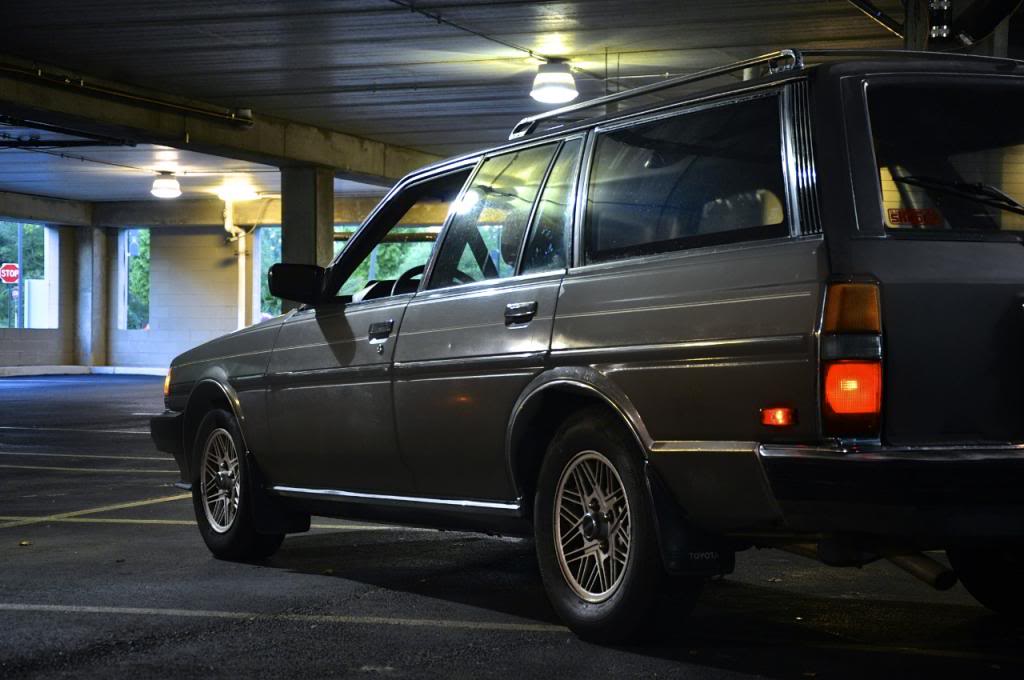
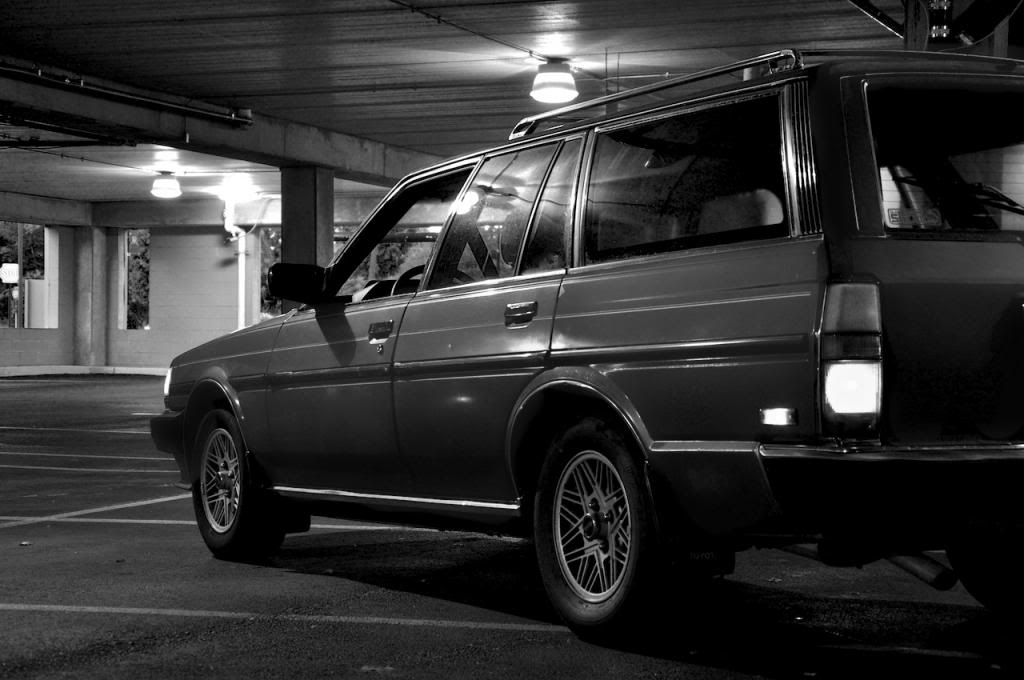
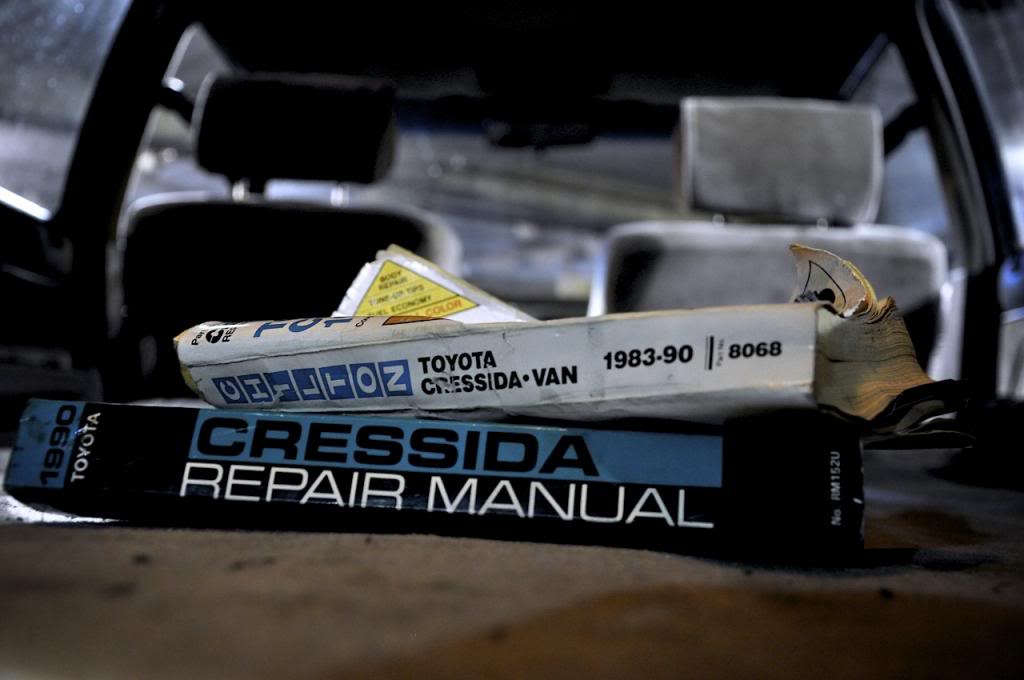
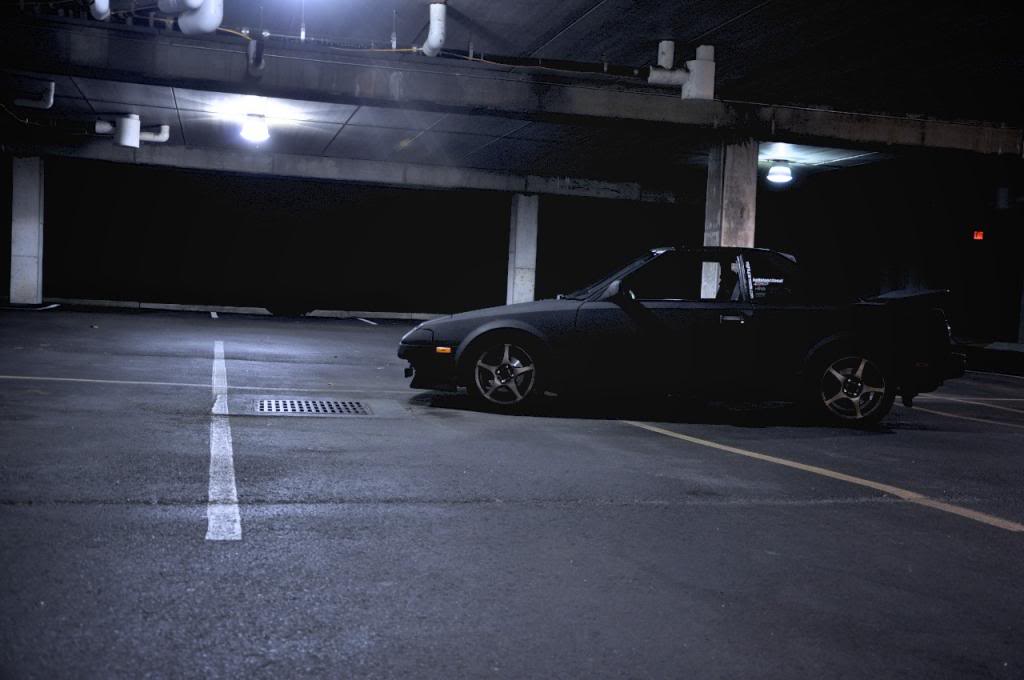
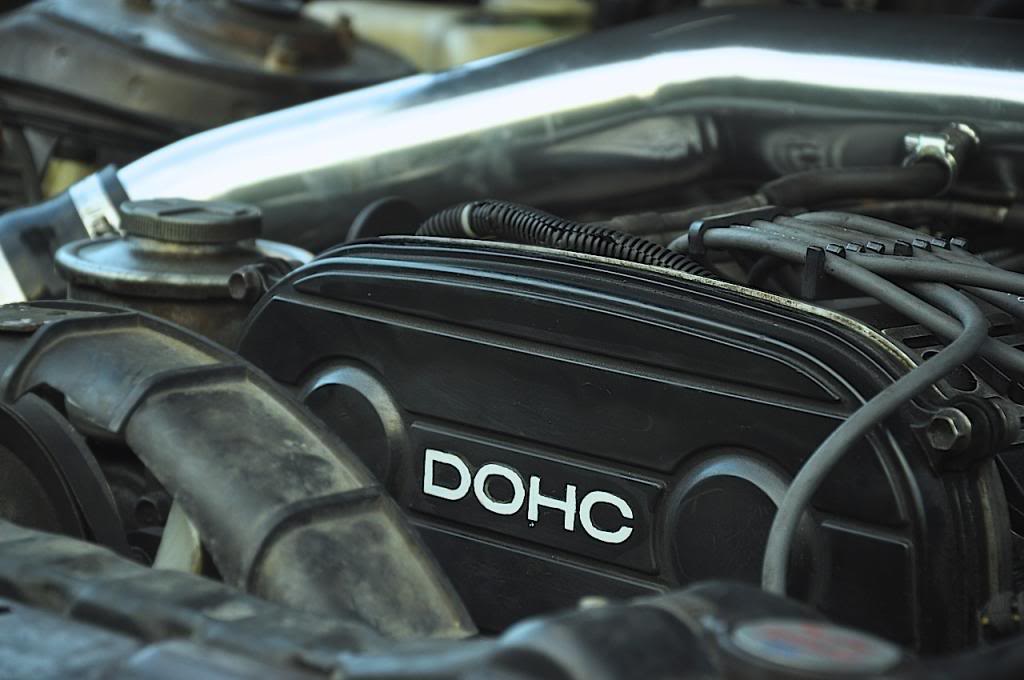
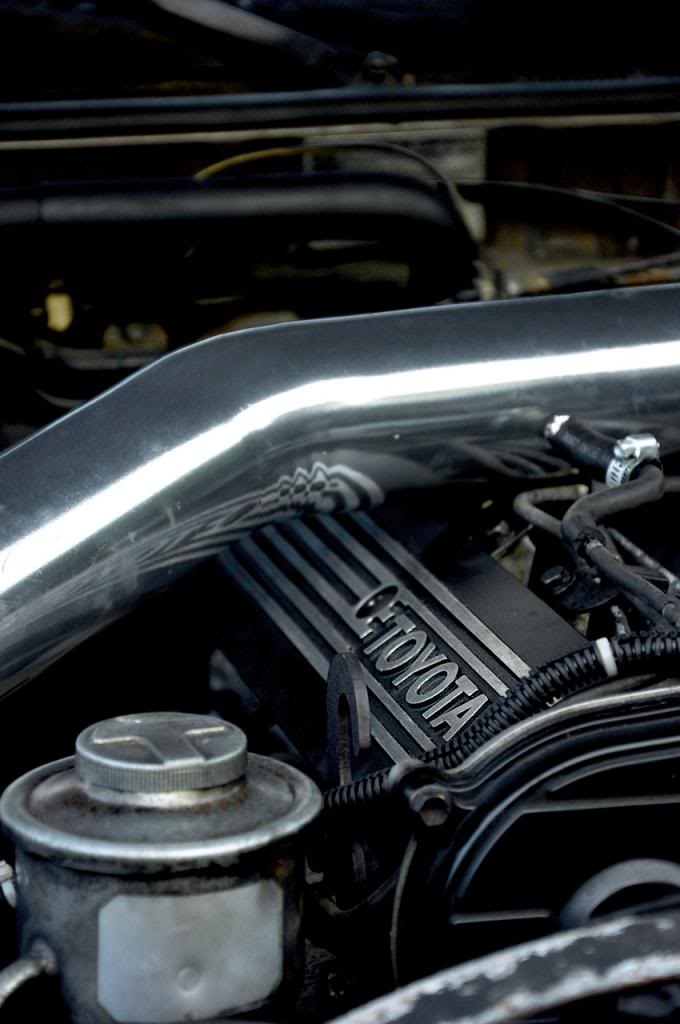
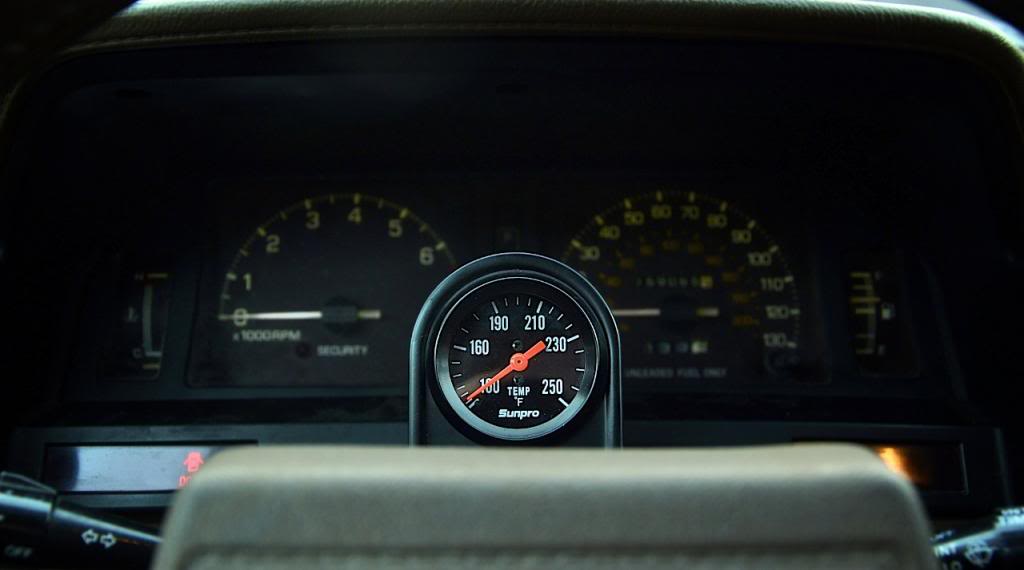
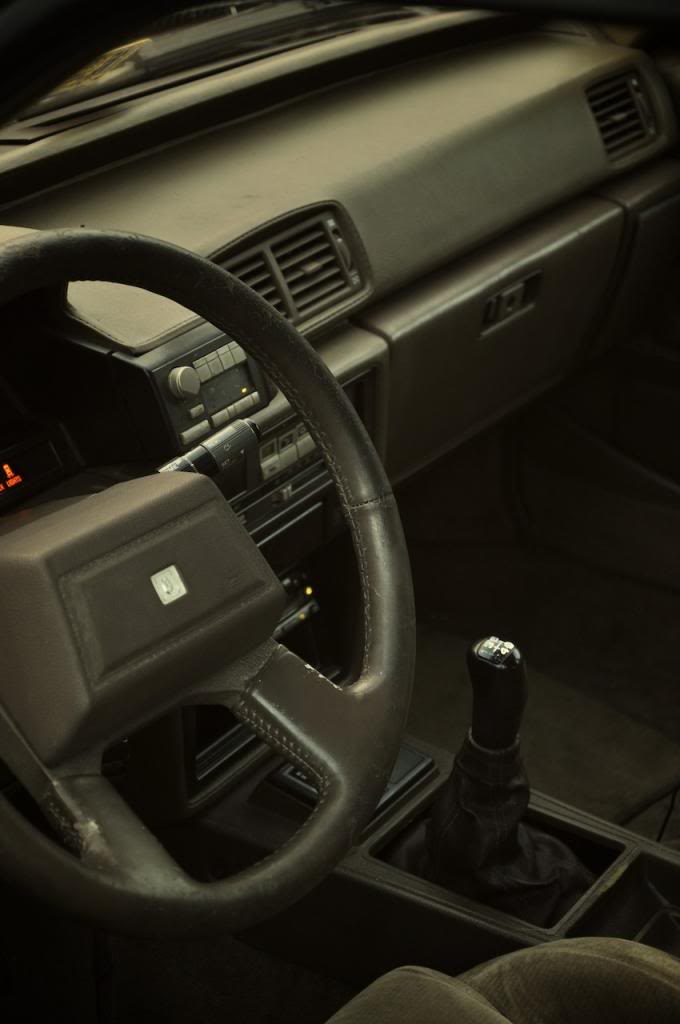
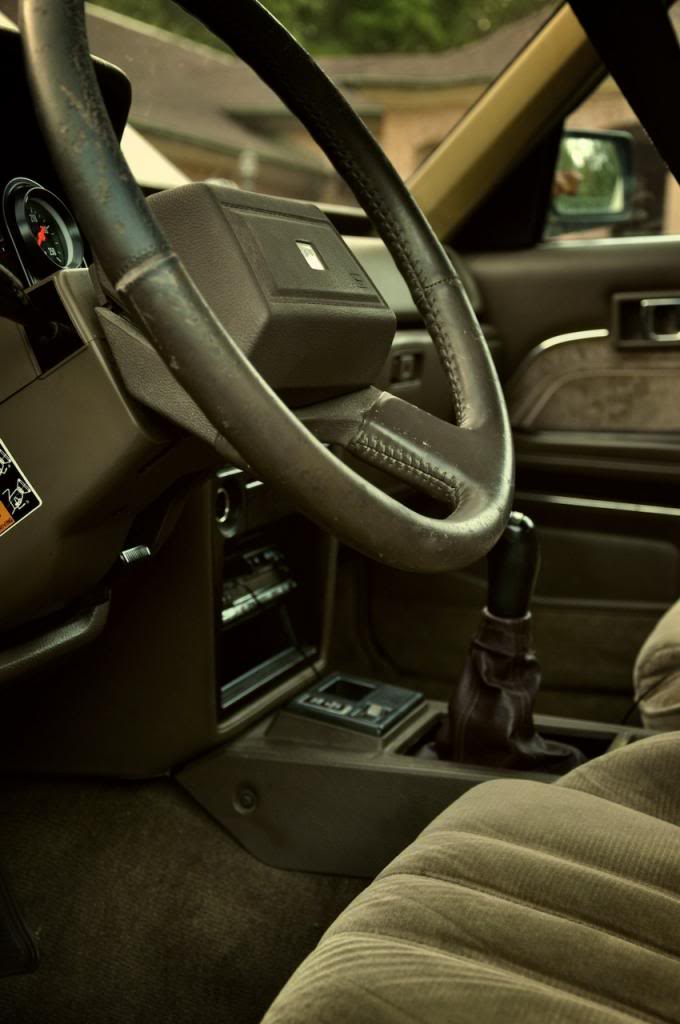
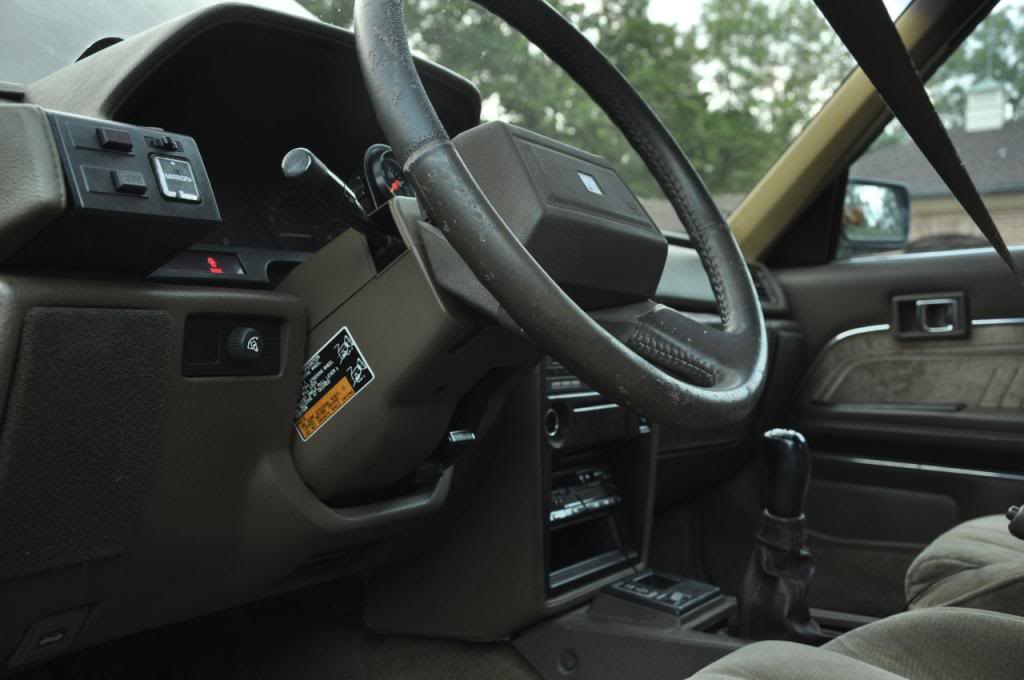
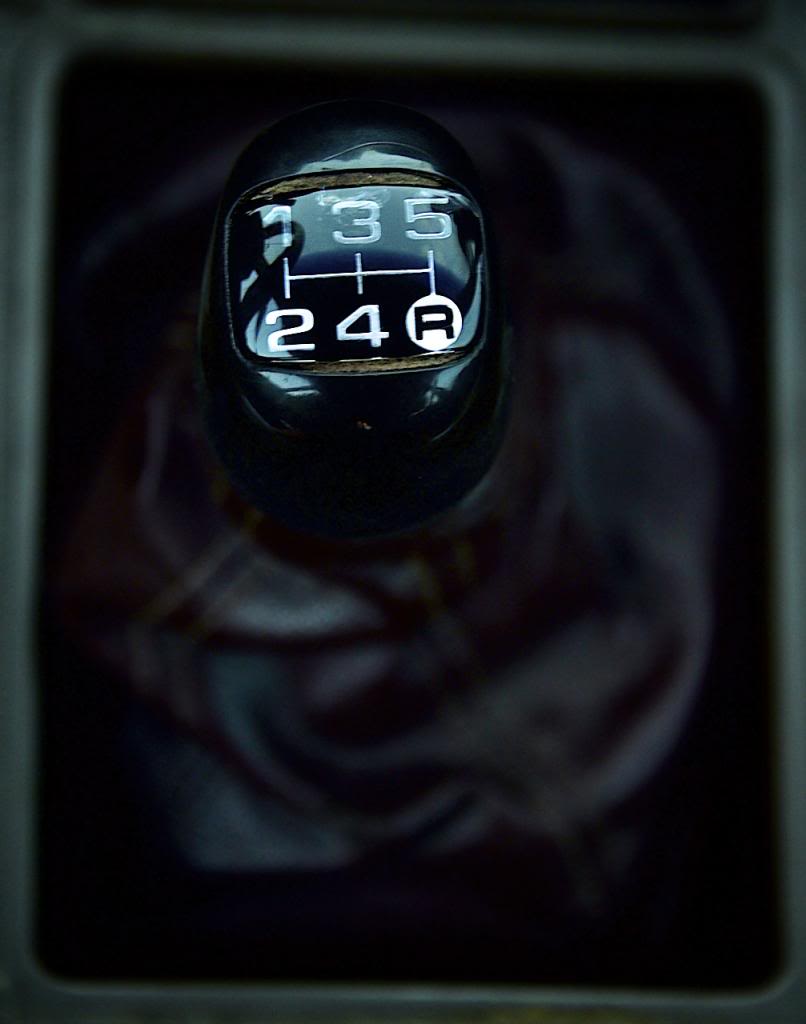
1986 MX72 Cressida Wagon Build: "Joby"
+7
Yotarip
davev1955
STANGWxRLD
RayRay
OkieRA29
Push
MR2_FTW
11 posters
Page 2 of 6
Page 2 of 6 •  1, 2, 3, 4, 5, 6
 Re: 1986 MX72 Cressida Wagon Build: "Joby"
super good work sir
OkieRA29- Posts : 66
Join date : 2013-07-01
 Re: 1986 MX72 Cressida Wagon Build: "Joby"
Got a bunch of little things done today after work.
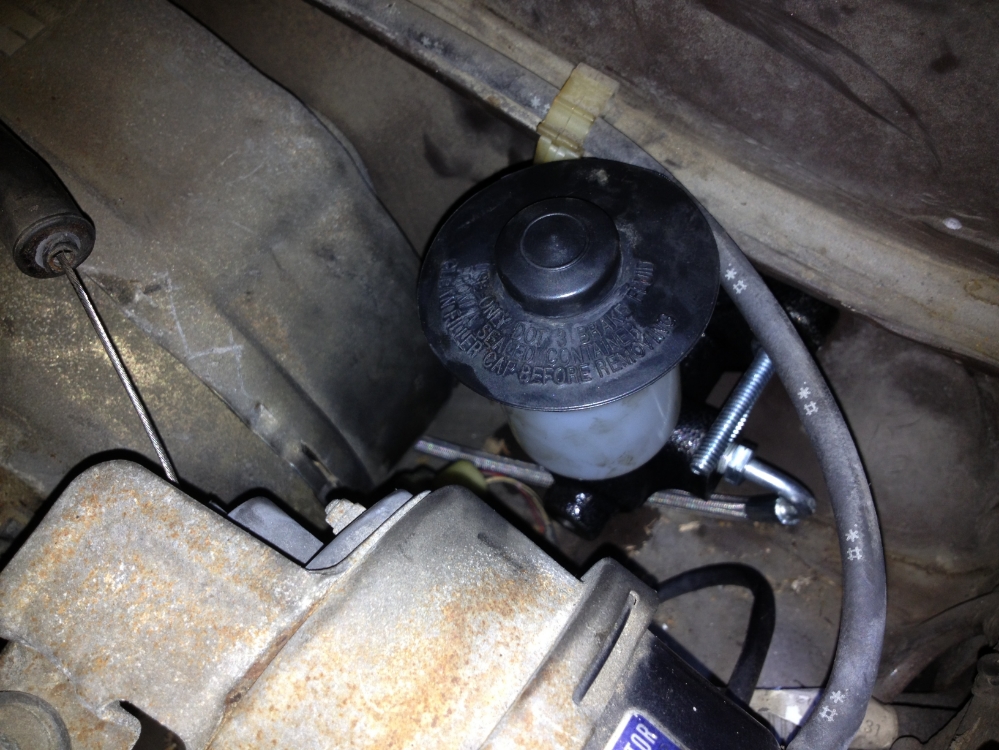
Clutch master cylinder has been bench bled and installed (yeah one of the bolts is wicked long. It's all I had at the time. Sue me)
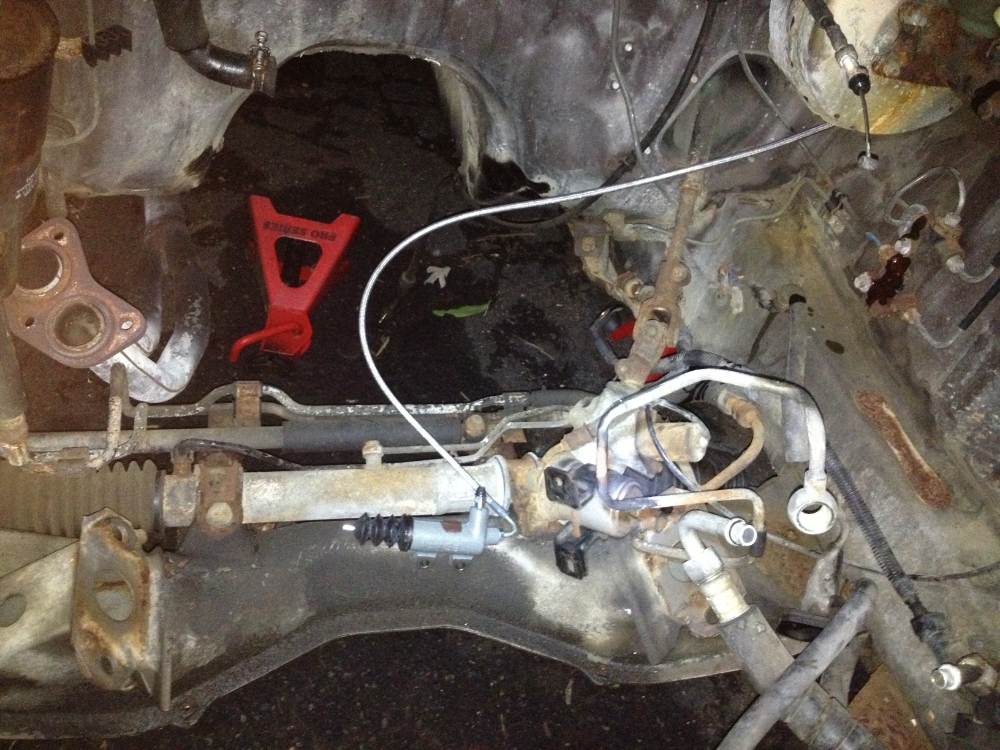
I also connected up the clutch line and slave cylinder and bled the whole thing on the bench, so the hydraulics are ready to go.
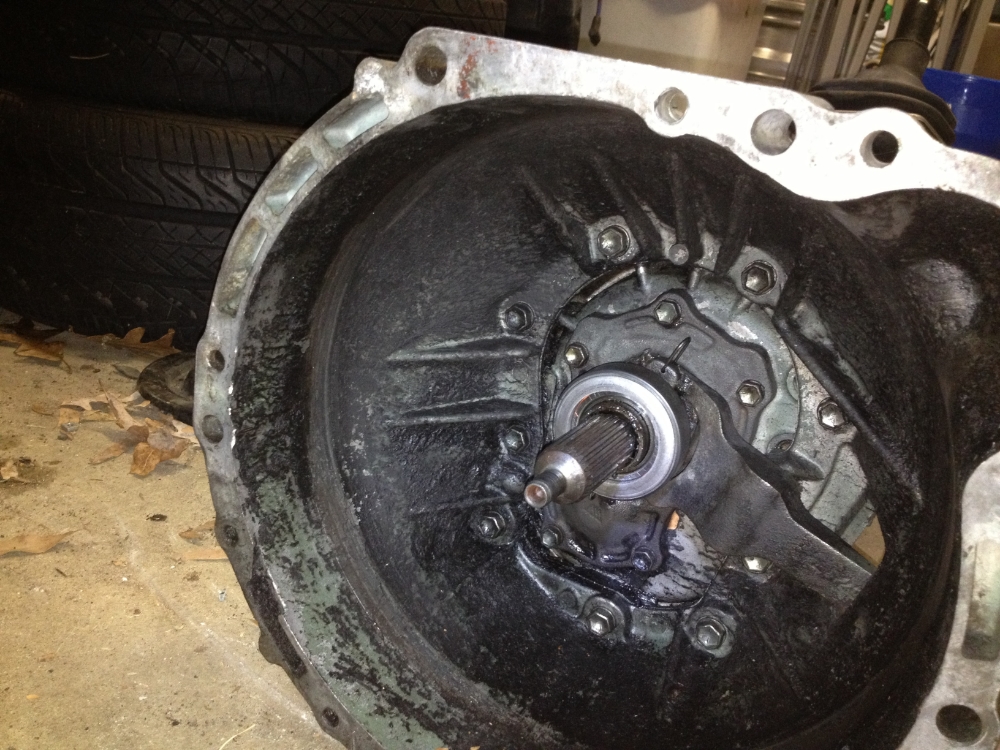
The old throwout bearing has been pressed off the hub and the new bearing has been pressed on and everything is greased and ready to go.
I also took a peek inside the brake reservoir, just to check the fluid since the pedal went straight to the floor on the test drive. This is what I found:
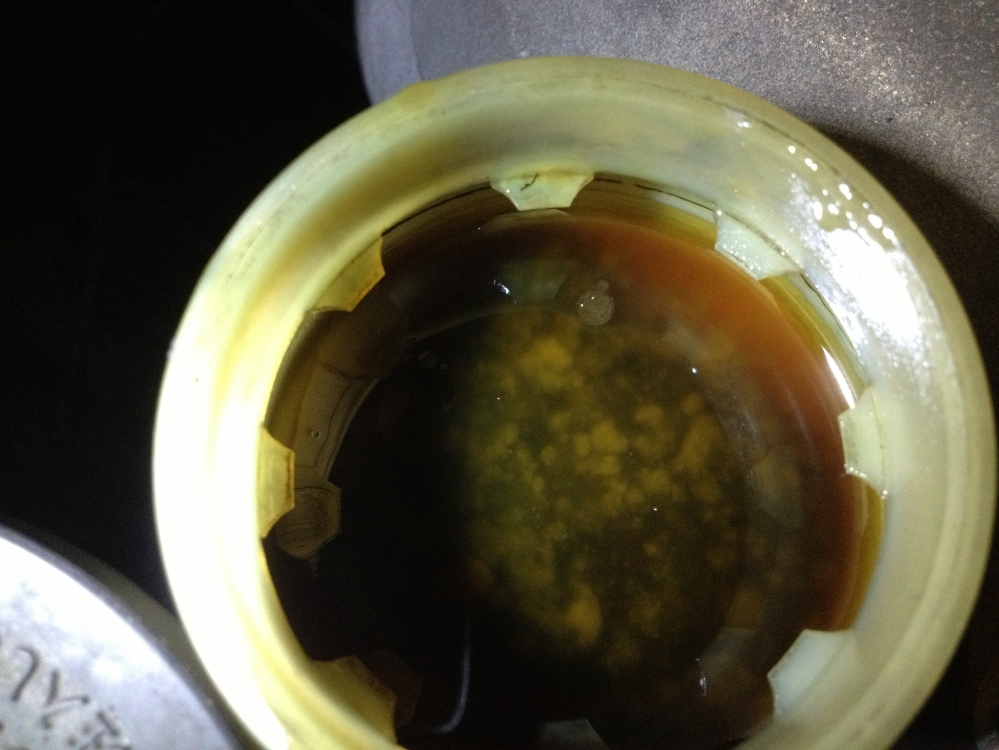
It is growing algae. My brake hydraulics have become a freaking ecosystem. I sucked out all the fluid in the reservoir and it was SO nasty and completely opaque:
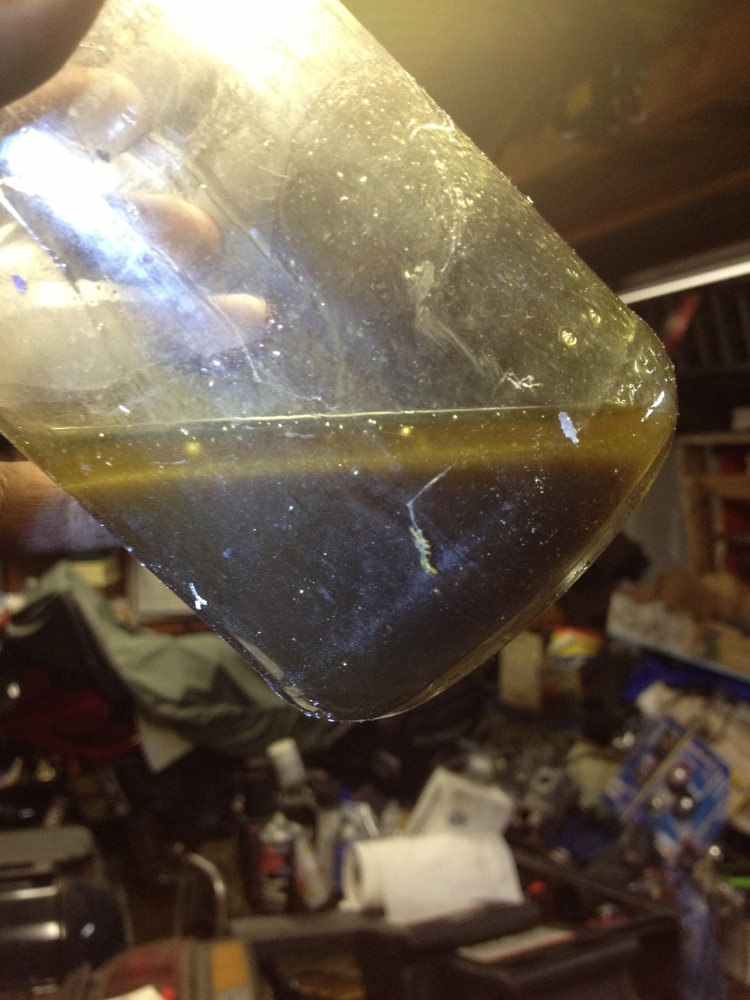
The system is going to need to be flushed for a good long while before the car moves anywhere.
I don't have a pic, but I also got some wires soldered to the terminals on the clutch safety switch. That will go in tomorrow, and will be wired up after the engine is in the car.
Parts I still need to order:
clutch fork boot
thermostat
fuel filter
Clutch master cylinder has been bench bled and installed (yeah one of the bolts is wicked long. It's all I had at the time. Sue me)

I also connected up the clutch line and slave cylinder and bled the whole thing on the bench, so the hydraulics are ready to go.

The old throwout bearing has been pressed off the hub and the new bearing has been pressed on and everything is greased and ready to go.

I also took a peek inside the brake reservoir, just to check the fluid since the pedal went straight to the floor on the test drive. This is what I found:

It is growing algae. My brake hydraulics have become a freaking ecosystem. I sucked out all the fluid in the reservoir and it was SO nasty and completely opaque:

The system is going to need to be flushed for a good long while before the car moves anywhere.
I don't have a pic, but I also got some wires soldered to the terminals on the clutch safety switch. That will go in tomorrow, and will be wired up after the engine is in the car.
Parts I still need to order:
clutch fork boot
thermostat
fuel filter
 Re: 1986 MX72 Cressida Wagon Build: "Joby"
I got my MA70 speedo cable, clutch safety switch, and driver's side interior installed/put back together
right now my problem is this:

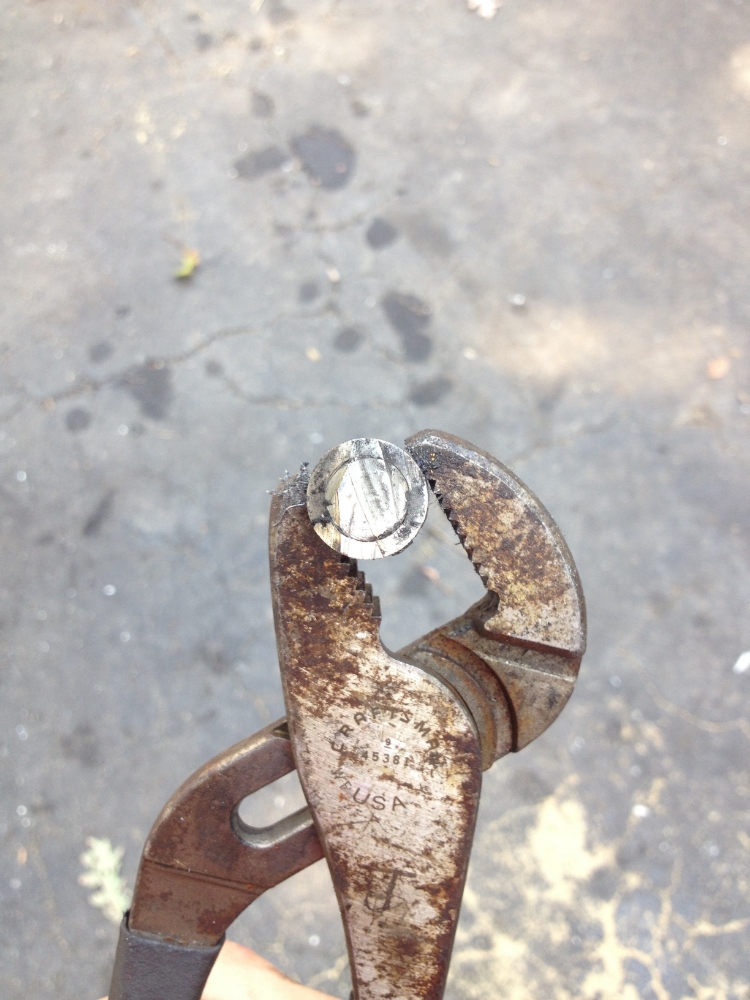
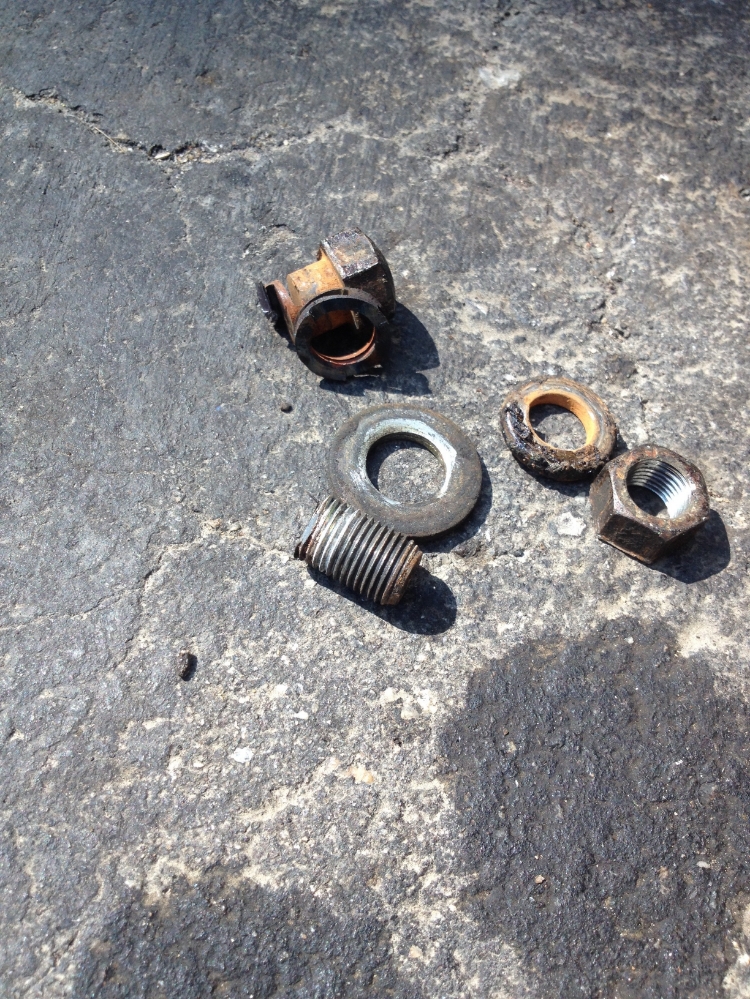
Snapped a bolt in the thermostat housing. I tried soaking it in PB blaster, vicegrips, slotting it and using a screwdriver, and a bolt extractor. The extractor bit snapped off inside the pilot hole in the bolt. Whatever metal the extractor bit was made of is too hard for my designed-for-drilling-metal drill bits to even scratch, so I can't even drill it/tap it. I think getting another housing from either CelicaSupra forums or junkyards is the only way forward.
right now my problem is this:

Snapped a bolt in the thermostat housing. I tried soaking it in PB blaster, vicegrips, slotting it and using a screwdriver, and a bolt extractor. The extractor bit snapped off inside the pilot hole in the bolt. Whatever metal the extractor bit was made of is too hard for my designed-for-drilling-metal drill bits to even scratch, so I can't even drill it/tap it. I think getting another housing from either CelicaSupra forums or junkyards is the only way forward.
 Re: 1986 MX72 Cressida Wagon Build: "Joby"
8/1/13
Went to the junkyard and pulled the windshield trim (for a friend), both seats, and thermostat housing off of the MA60.
8/3/13
Supra seats don't fit, rails are wrong.
I finished my EGR removal today. Fabbed block-off plates and gaskets, blocked off vacuum lines, etc
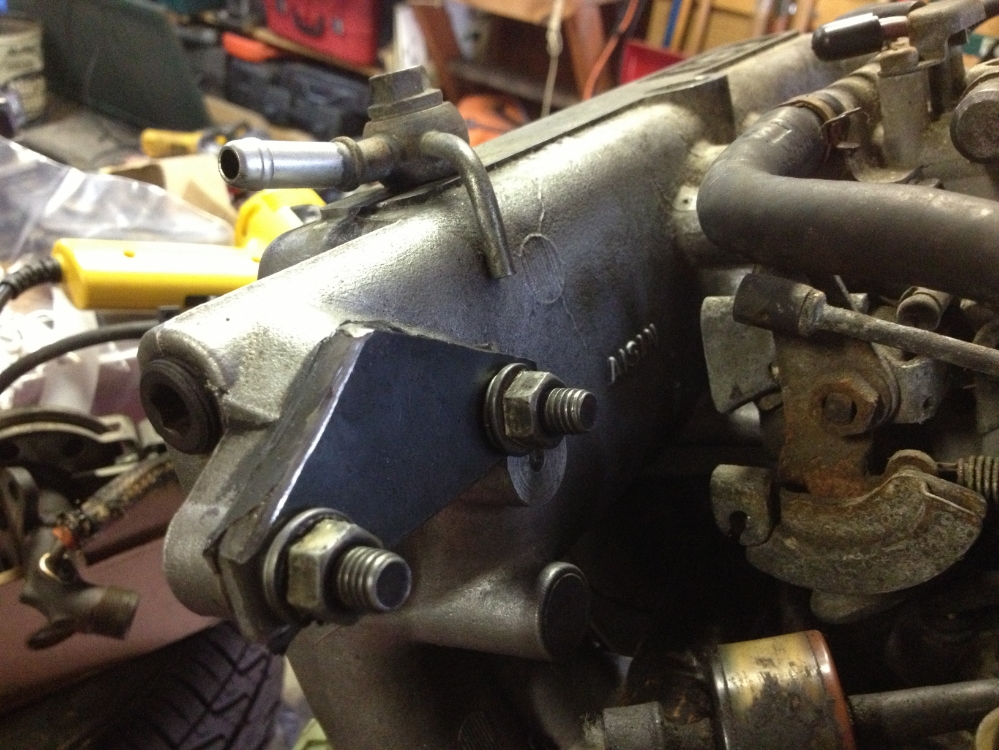
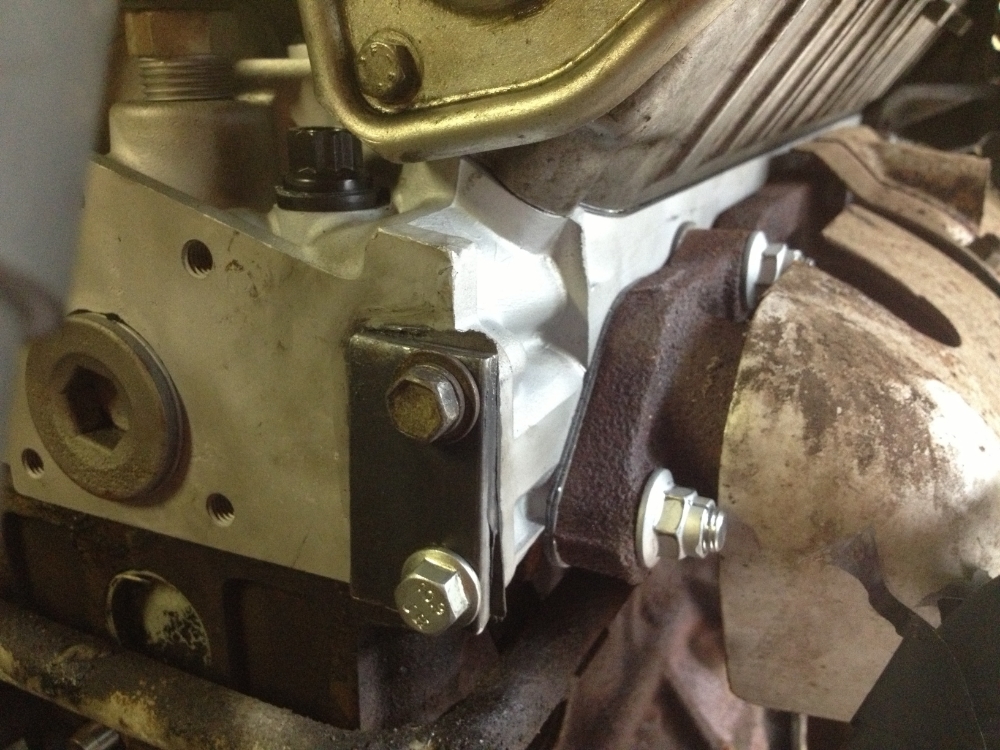
I also made wiring for the clutch-activated neutral safety switch and the reverse light switch. As soon as my new silicone couplers for the intake piping come in (the stock ones were super split), the engine will be ready to come off the stand, have the rear main seal replaced, clutch/flywheel bolted up, trans bolted on, and put back in the car. I'll be putting Redline MT-90 gear oil in the trans, and I'm going to run wal-mart brand oil in the motor for a day or two, then change it out for some Amsoil. The cooling system will also be getting Amsoil coolant boost that I had left over. I still have to drop the rear axle and change all the seals, but I'm not sure when that will happen.
8/4/13
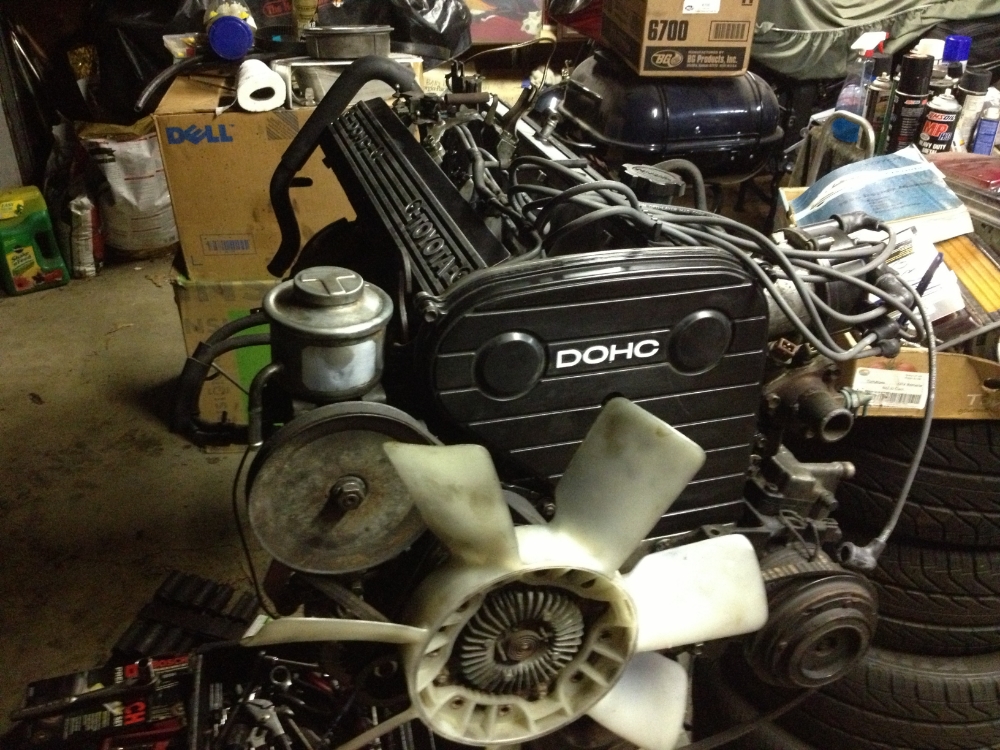
Picked up the hoist from Pierce's and removed the motor from the stand.
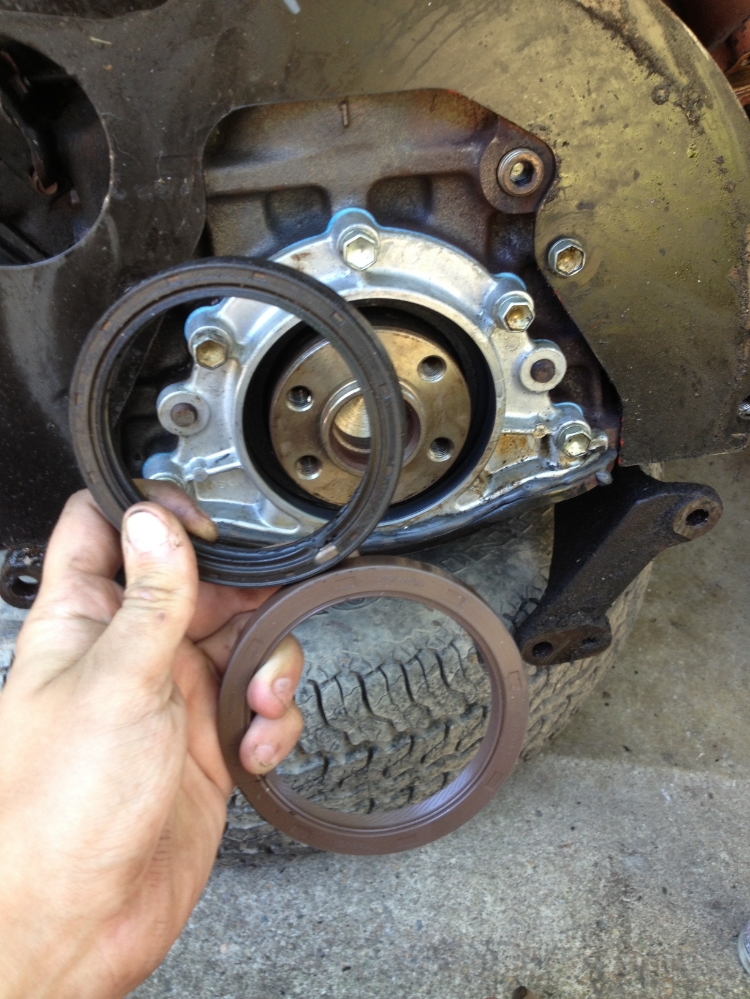
New rear main seal
Installed pilot bearing and got the clutch disc ready to go
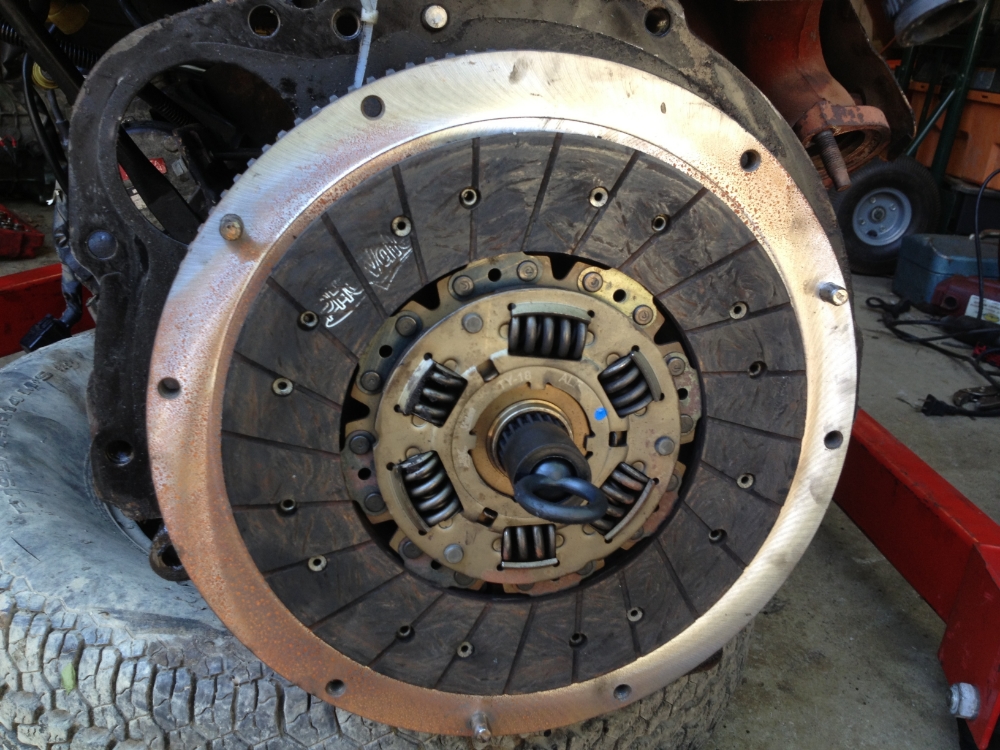
This is when I noticed that the flywheel's friction surface was a little bigger than the clutch disc. No biggie, just weird. But when I went to put on the pressure plate, the bolt holes/dowel pins on the flywheel don't line up with the holes in the pressure plate. I googled 7MGE and 7MGTE flywheels and concluded that I have two 7MGE clutches (which is what I need, so good) and a 7MGTE flywheel.
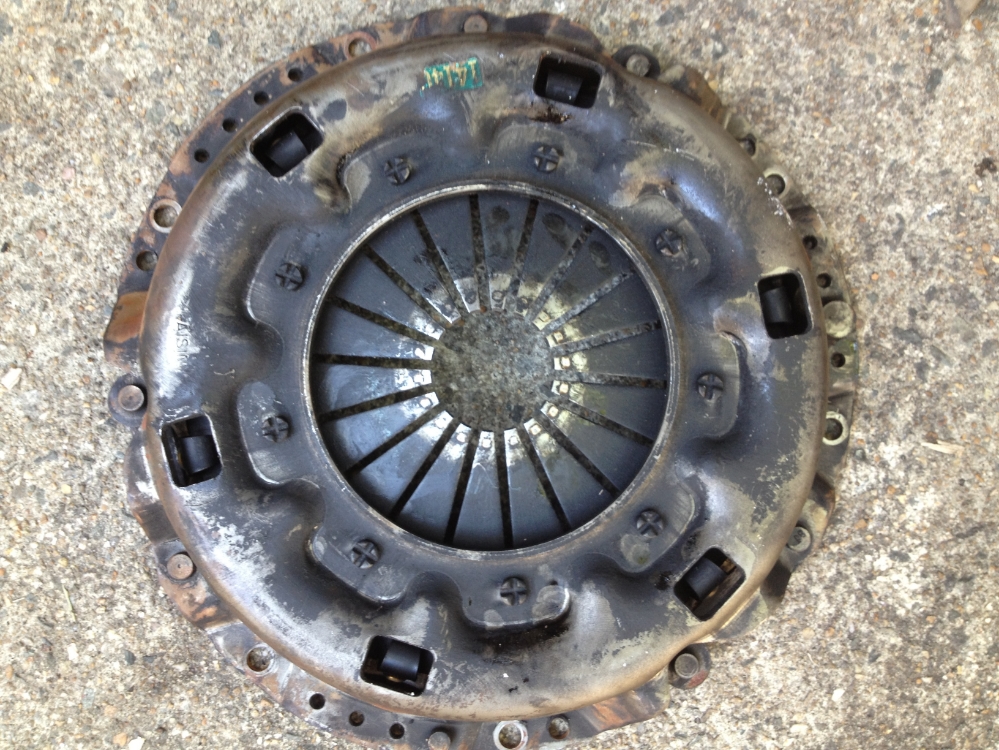
Awesome. Well I called the guy I bought the stuff from and he said he knows he has for sure some more NA flywheels buried in his garage but it will be some night this week before he can get to them. So I can't put my motor in till I have this crap taken care of, and I'll still be out the gas money to go get the parts from Fredericksburg AND the $55 I spent resurfacing the one I have. I could seriously punch a baby right now.
Went to the junkyard and pulled the windshield trim (for a friend), both seats, and thermostat housing off of the MA60.
8/3/13
Supra seats don't fit, rails are wrong.
I finished my EGR removal today. Fabbed block-off plates and gaskets, blocked off vacuum lines, etc


I also made wiring for the clutch-activated neutral safety switch and the reverse light switch. As soon as my new silicone couplers for the intake piping come in (the stock ones were super split), the engine will be ready to come off the stand, have the rear main seal replaced, clutch/flywheel bolted up, trans bolted on, and put back in the car. I'll be putting Redline MT-90 gear oil in the trans, and I'm going to run wal-mart brand oil in the motor for a day or two, then change it out for some Amsoil. The cooling system will also be getting Amsoil coolant boost that I had left over. I still have to drop the rear axle and change all the seals, but I'm not sure when that will happen.
8/4/13
Picked up the hoist from Pierce's and removed the motor from the stand.
New rear main seal

Installed pilot bearing and got the clutch disc ready to go

This is when I noticed that the flywheel's friction surface was a little bigger than the clutch disc. No biggie, just weird. But when I went to put on the pressure plate, the bolt holes/dowel pins on the flywheel don't line up with the holes in the pressure plate. I googled 7MGE and 7MGTE flywheels and concluded that I have two 7MGE clutches (which is what I need, so good) and a 7MGTE flywheel.

Awesome. Well I called the guy I bought the stuff from and he said he knows he has for sure some more NA flywheels buried in his garage but it will be some night this week before he can get to them. So I can't put my motor in till I have this crap taken care of, and I'll still be out the gas money to go get the parts from Fredericksburg AND the $55 I spent resurfacing the one I have. I could seriously punch a baby right now.
 Re: 1986 MX72 Cressida Wagon Build: "Joby"
Thats bitter, the same thing happened to me with a driveshaft, took a gamble buying one from some guy a few hours away... ended up to be for an auto.
RayRay- Posts : 114
Join date : 2013-04-29
 Re: 1986 MX72 Cressida Wagon Build: "Joby"
Starting to get parts in the pipeline for a brake system refresh. It has hubbed front brakes and rear drums, so none of it will be easy or simple to do. Here's a pic of how old school Toyota front hubs work

So it's rotor, seal, bearing, hub, bearing, claw washer, nut, castle cap, cotter pin, axle cap. I ordered new seals, bearings, claw washers, and cotter pins from Toyota. Pads, rotors, drums, shoes, and wheel cylinders are being ordered from RockAuto. I don't think it needs calipers or lines, but if it does I'll either rebuild or replace the calipers and probably come up with some custom stainless lines.

So it's rotor, seal, bearing, hub, bearing, claw washer, nut, castle cap, cotter pin, axle cap. I ordered new seals, bearings, claw washers, and cotter pins from Toyota. Pads, rotors, drums, shoes, and wheel cylinders are being ordered from RockAuto. I don't think it needs calipers or lines, but if it does I'll either rebuild or replace the calipers and probably come up with some custom stainless lines.
 Re: 1986 MX72 Cressida Wagon Build: "Joby"
8/9/13
I got reimbursed for my flywheel by the Fredericksburg dude, and have a proper flywheel from a manual MX73 Cressida coming from from a yard in King George on Tuesday. I also got all my front hub bearings/seals/washers, as well as the rear drums.
8/13/13
Flywheel came in today, and it's in the machine shop. They said it would be done in a day or two.
I also got the rest of my brake stuff. Bearings, seals, pins, washers, pads, rotors, shoes, drums, cylinders, axle seals, diff seals.....everything is here and ready. I'm just waiting to have the engine in before I do that stuff for some reason.
8/14/13
Made this while I've been waiting for the flywheel. I used parts from a MX73 Cressida, Mitsubishi Sigma Wagon, and Volvo 240 wagon to make it. LOTS of custom hand-clicked pixel by pixel.
 Re: 1986 MX72 Cressida Wagon Build: "Joby"
Flywheel fits, clutch bolted on easy, transmission mated no problem
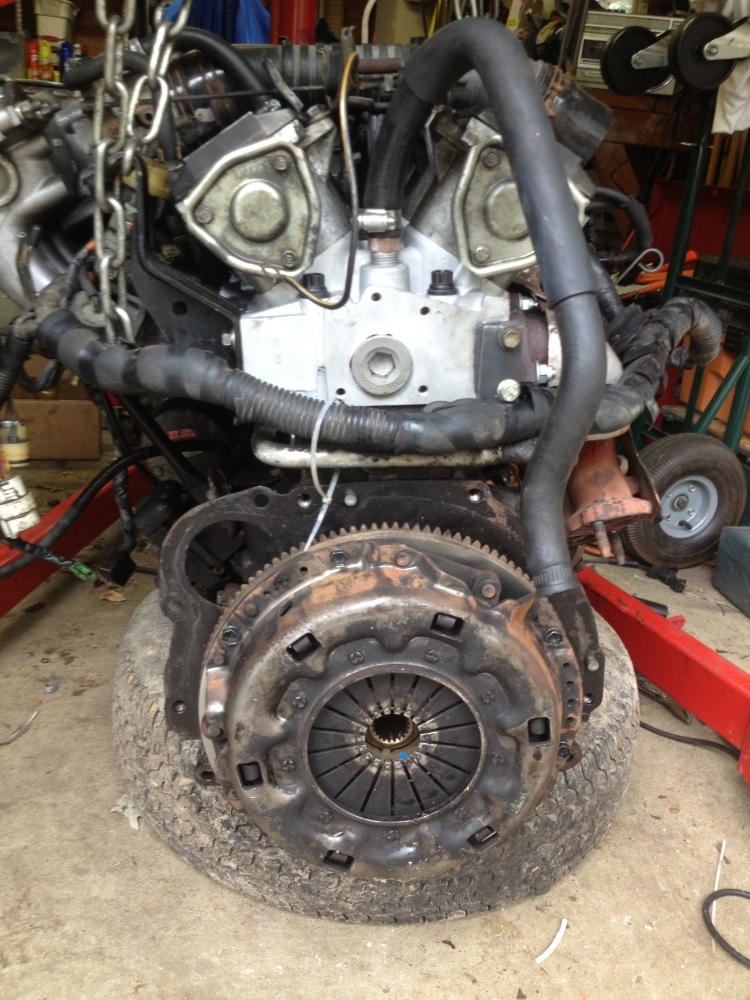
Drivetrain went in mostly painlessly
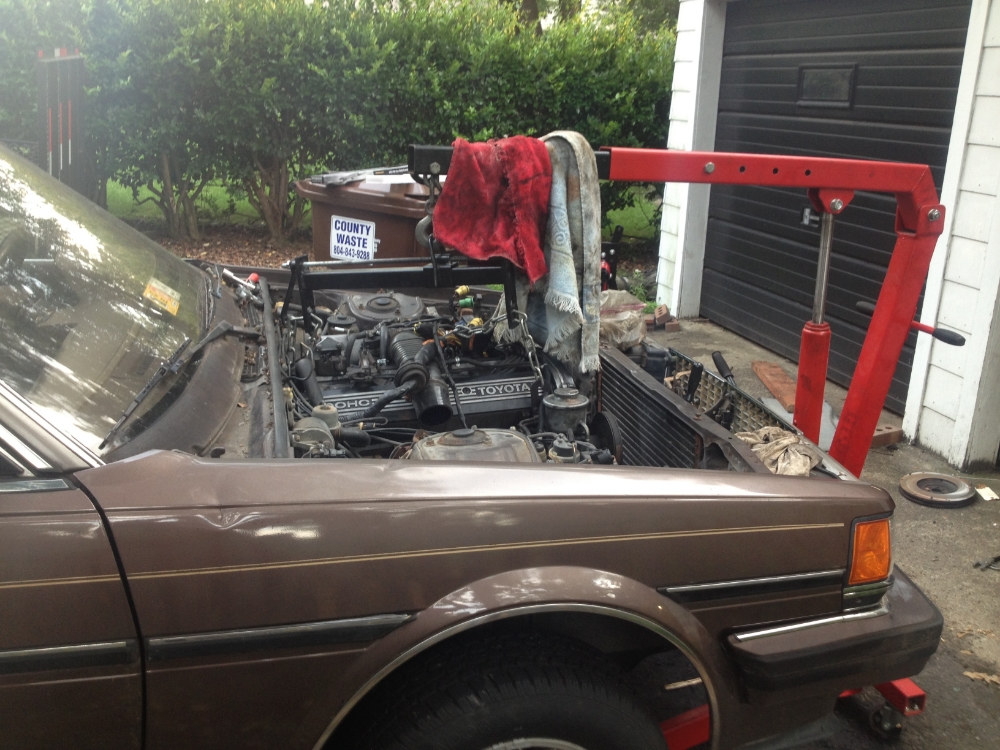
Now the issue is getting the transmission cross member to fit. The one that came with the manual trans (from 1986.5 Supra NA) is not wide enough so I have to use the Cressida auto one. I've tried every combination of every orientation with the crossmember and both transmission mounts from both gearboxes and I can't get the bolt holes to line up with any of the bajillion threaded holes in the chassis, so I have to go buy more roto-zip-style bits for my dremel so I can slot the holes in the trans member. However, most electronics are connected, power steering and alternator are hooked up, AC is connected but needs to be tightened, there are a few fuel hoses that still need to be routed, but it's going OK in the engine bay so far.
Also, the speedo cable drive is on the opposite side with this trans, so the speedo cable will be RIGHT next to the exhaust. I may have to get some heat wrap for the cable and/or wrap the exhaust there.

Drivetrain went in mostly painlessly

Now the issue is getting the transmission cross member to fit. The one that came with the manual trans (from 1986.5 Supra NA) is not wide enough so I have to use the Cressida auto one. I've tried every combination of every orientation with the crossmember and both transmission mounts from both gearboxes and I can't get the bolt holes to line up with any of the bajillion threaded holes in the chassis, so I have to go buy more roto-zip-style bits for my dremel so I can slot the holes in the trans member. However, most electronics are connected, power steering and alternator are hooked up, AC is connected but needs to be tightened, there are a few fuel hoses that still need to be routed, but it's going OK in the engine bay so far.
Also, the speedo cable drive is on the opposite side with this trans, so the speedo cable will be RIGHT next to the exhaust. I may have to get some heat wrap for the cable and/or wrap the exhaust there.
 Re: 1986 MX72 Cressida Wagon Build: "Joby"
Last night I got the transmission bolted in (3 out of 4 bolts ain't bad) and the interior is all back together except for the shifter, which is waiting on the rear end rebuild before I can put the driveshaft in to keep trans oil from coming out the back.
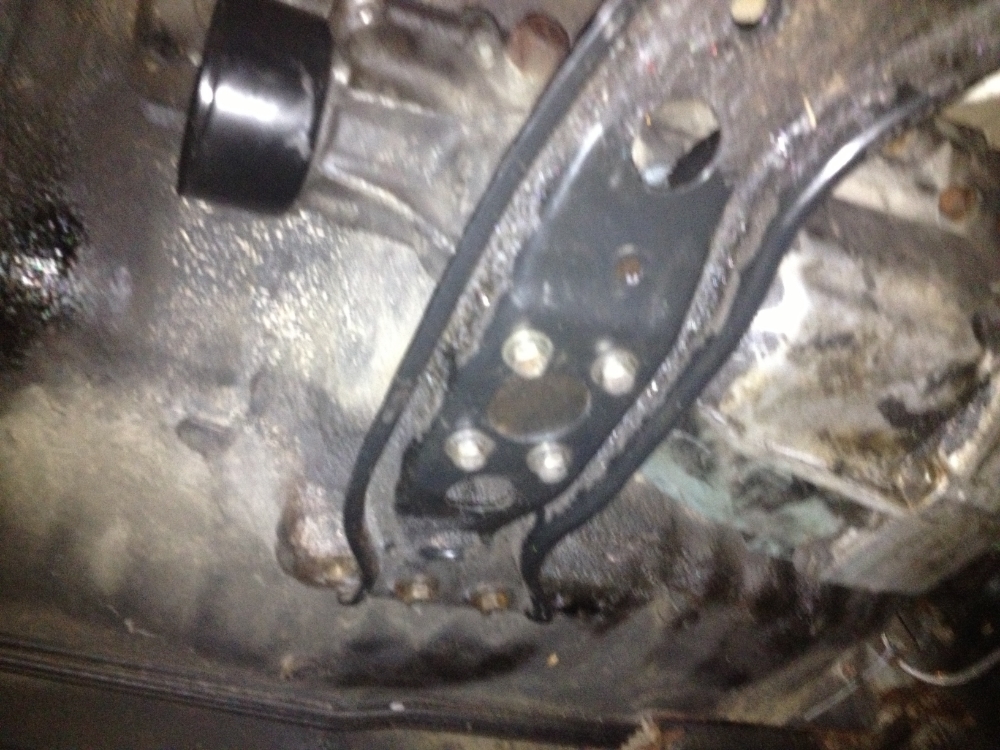
All the engine electrics are plugged in, radiator and fan are in, now I just have to connect up one of the fuel lines, get a battery, connect the exhaust, fill it up with fluids, and it should be good to start here soon.
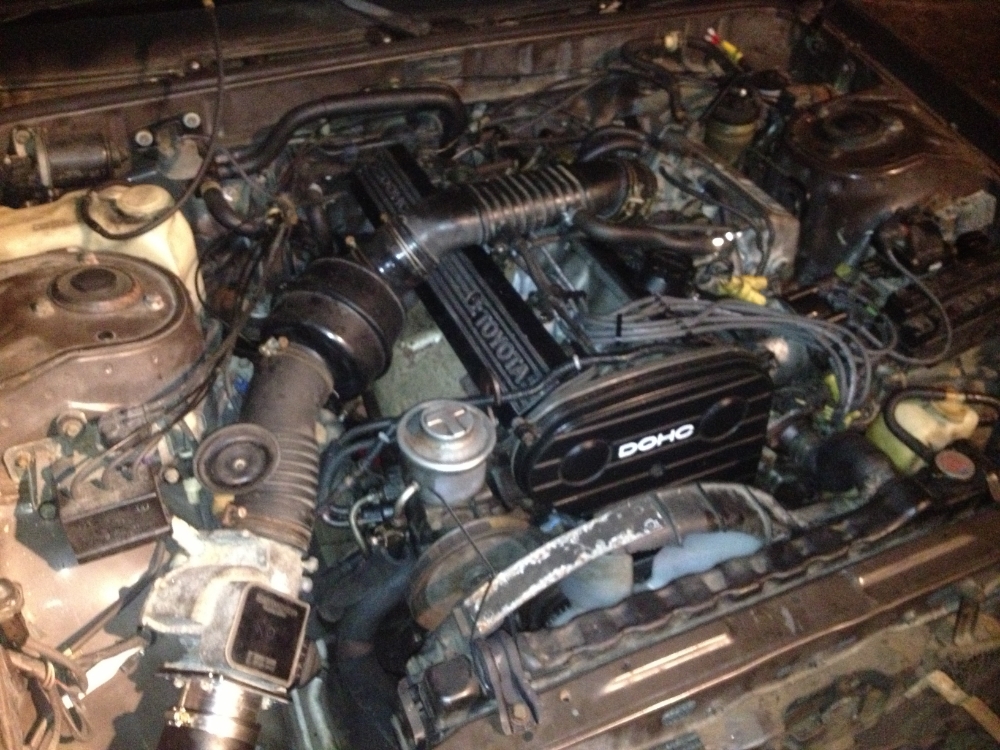
I really don't like how my intake is situated. I'll be buying a Rabid Chimp intake pipe in a week or two. I think I may just go ahead and replace the brake master cylinder, lines, and front calipers first. I don't trust any brake system that has been neglected to the point of housing an algae colony.

All the engine electrics are plugged in, radiator and fan are in, now I just have to connect up one of the fuel lines, get a battery, connect the exhaust, fill it up with fluids, and it should be good to start here soon.

I really don't like how my intake is situated. I'll be buying a Rabid Chimp intake pipe in a week or two. I think I may just go ahead and replace the brake master cylinder, lines, and front calipers first. I don't trust any brake system that has been neglected to the point of housing an algae colony.
 Re: 1986 MX72 Cressida Wagon Build: "Joby"
Went to the DMV today and got it all registered and titled and whatnot. I then came home and fell asleep so I only worked on the car for like an hour and a half today, but I did get one front hub all disassembled.
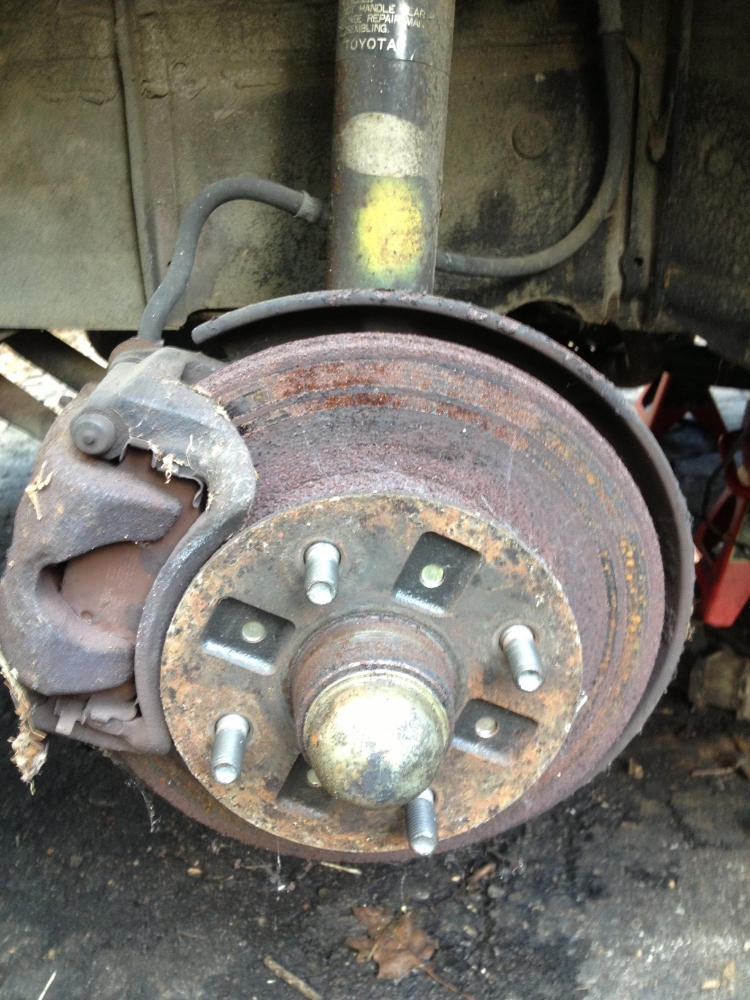
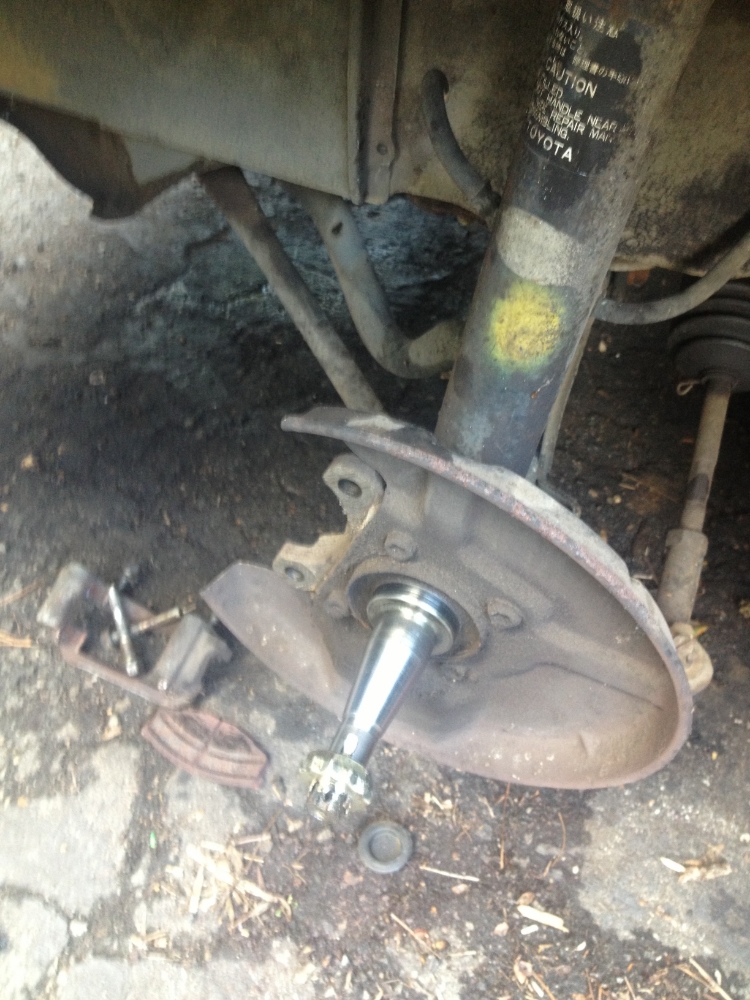
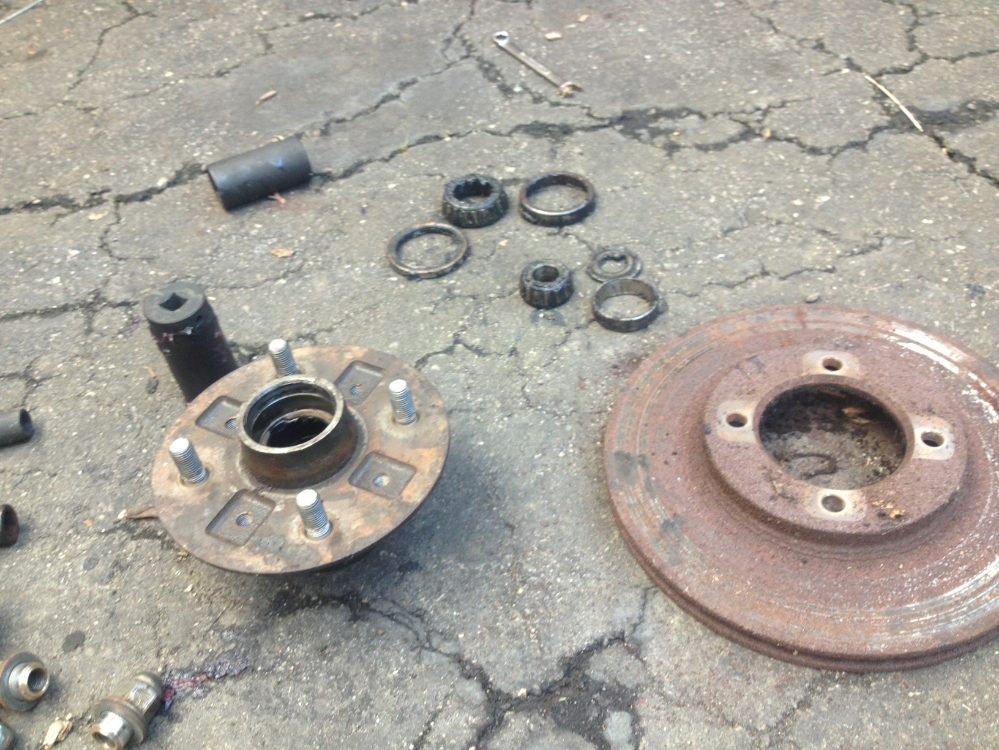
While I was in there, I noticed that the hardline-to-softline brake fitting is pretty much fused and will likely need to be cut off, which mean I'll need to either re-flair the existing hardline with a new fitting or replace the hardline altogether. I also noticed that the left steering rack boot is torn, and I have one coming in on Monday from Bap Geon. Monday at work I will need to order caliper pin boot things as well since these are toast. Tomorrow I'm going to go by Wal-Mart and get their cheap-o oil for the first start up, as well as stopping by Advance Auto and grabbing a battery and some axle/bearing grease so I can reassemble what I took apart today. Hopefully I can get both front hubs rebuilt/rotors replaced tomorrow as well as make some progress on re-sealing the rear axle/diff and replacing the rear brakes.


While I was in there, I noticed that the hardline-to-softline brake fitting is pretty much fused and will likely need to be cut off, which mean I'll need to either re-flair the existing hardline with a new fitting or replace the hardline altogether. I also noticed that the left steering rack boot is torn, and I have one coming in on Monday from Bap Geon. Monday at work I will need to order caliper pin boot things as well since these are toast. Tomorrow I'm going to go by Wal-Mart and get their cheap-o oil for the first start up, as well as stopping by Advance Auto and grabbing a battery and some axle/bearing grease so I can reassemble what I took apart today. Hopefully I can get both front hubs rebuilt/rotors replaced tomorrow as well as make some progress on re-sealing the rear axle/diff and replacing the rear brakes.
 Re: 1986 MX72 Cressida Wagon Build: "Joby"
I got everything buttoned up on the motor and it runs sooooooo smooth (my clutch-activated neutral safety bypass works perfectly). I just gotta sort out a medium-sized coolant leak from where the heater hose connects to the top/back of the head and it will be awesome. Both front rotors have been replaced, along with all the hub bearings and such. I'm still waiting on calipers and brake lines, should be here tomorrow. Tomorrow I need to order new caliper slide pin boots at work.

Power steering will need to be bled as well. I also noticed that the passenger front window will go down but not up. I tested the motor by itself and it works, so it must be something in a switch. I ALSO need to get a trim-removal tool so I can get into my rear hatch handle and get the key lock to work. Right now I can only unlock it electronically. So basically once I get my brakes done up front I can move on to the rear axle, then the driveshaft can go in and I can take it for a spin! WOO HOO!

Power steering will need to be bled as well. I also noticed that the passenger front window will go down but not up. I tested the motor by itself and it works, so it must be something in a switch. I ALSO need to get a trim-removal tool so I can get into my rear hatch handle and get the key lock to work. Right now I can only unlock it electronically. So basically once I get my brakes done up front I can move on to the rear axle, then the driveshaft can go in and I can take it for a spin! WOO HOO!
 Re: 1986 MX72 Cressida Wagon Build: "Joby"
I made very little progress tonight. The torn steering rack boot has been replaced, but in the process the threads on my outer tie rod end were completely mangled so I have one of those coming from Advance tomorrow. I THINK my coolant leak is fixed but I'm not 100% on that, time will tell. Tomorrow my calipers/lines/master cylinder should come in. After that, the front will be back on the ground and I'll move on to the rear end seals.
As for the future of the rear end, I have been doing research into axle/diff codes and whatnot and I THINK if I took out the internal gear-bits out of a MA60 Celica-Supra it SHOULD bolt into my axle and give me an LSD. I know the ring and pinion are the same, but I'm not sure about the axle splines and such. So I'll be hopping over to CAP early Saturday morning and pulling the diff out of the P-type they have over there just for shiggles.
As for the future of the rear end, I have been doing research into axle/diff codes and whatnot and I THINK if I took out the internal gear-bits out of a MA60 Celica-Supra it SHOULD bolt into my axle and give me an LSD. I know the ring and pinion are the same, but I'm not sure about the axle splines and such. So I'll be hopping over to CAP early Saturday morning and pulling the diff out of the P-type they have over there just for shiggles.
 Re: 1986 MX72 Cressida Wagon Build: "Joby"
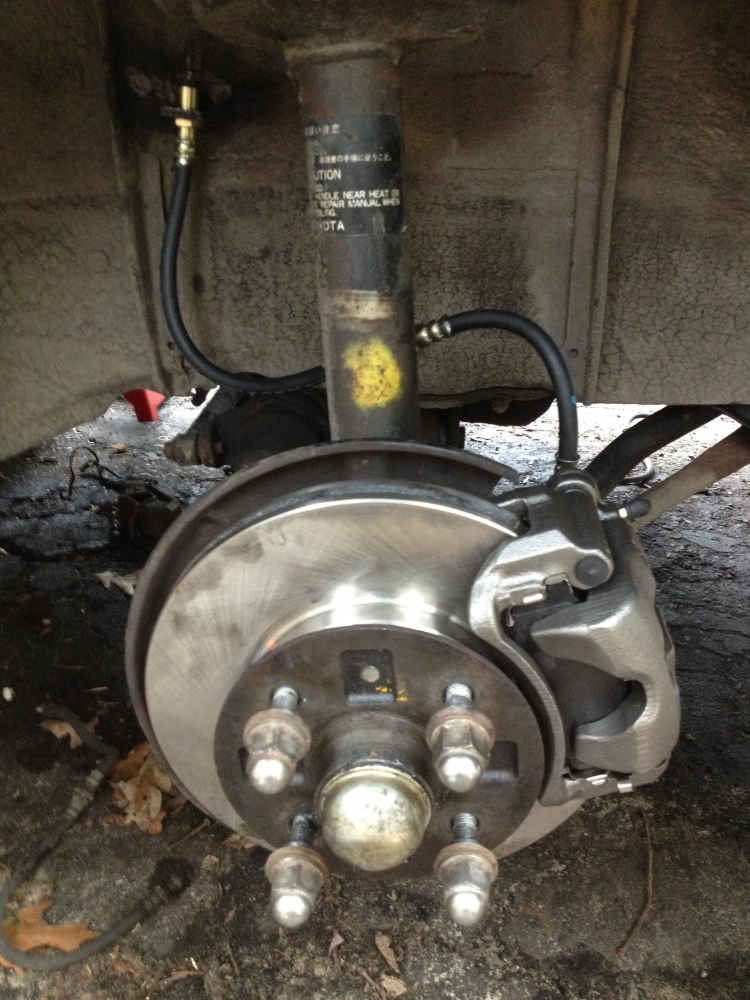
New calipers and brake lines fit up to the new rotors and pads to complete the front brakes......
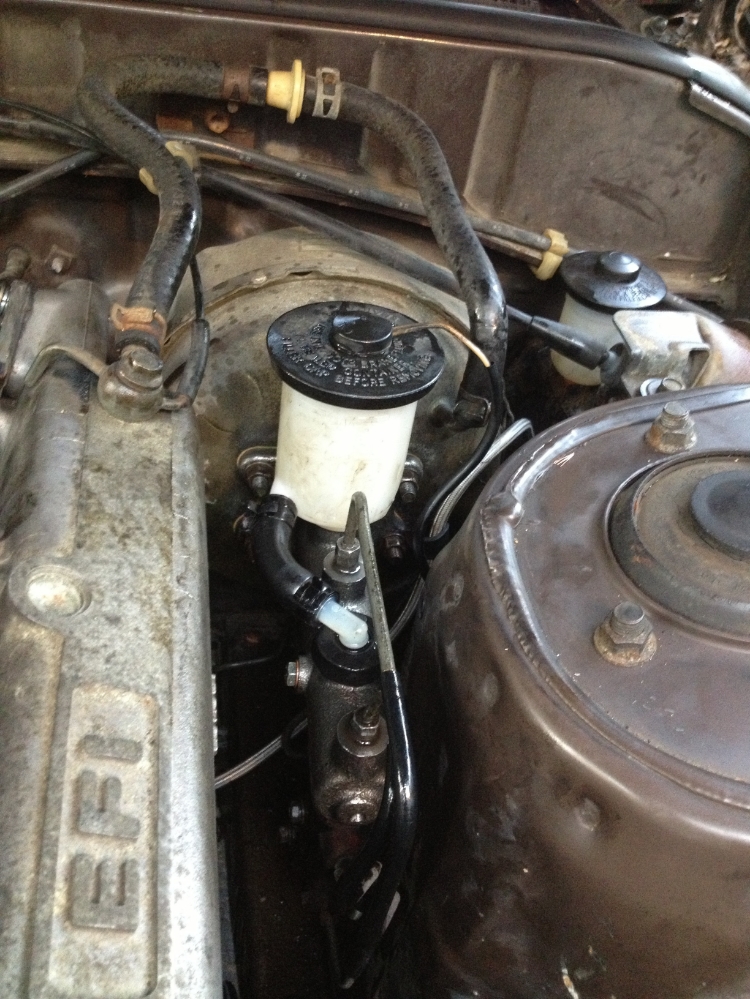
.....along with a new master cylinder.
Now we move on to the rear brakes. Drums. Yuck.
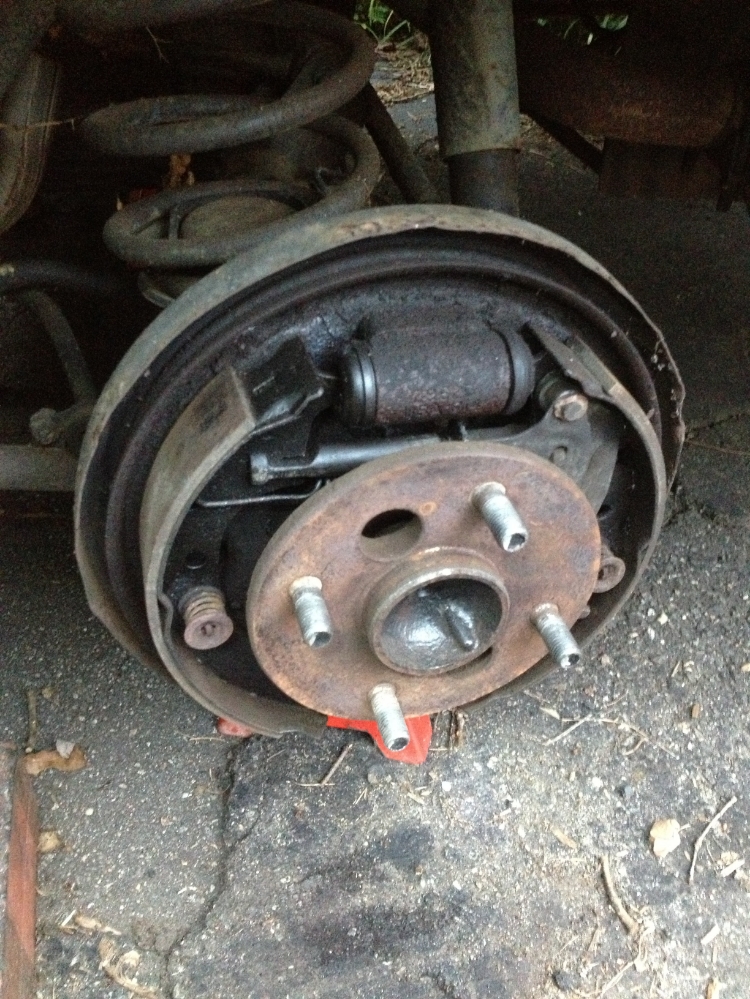
My workspace this evening, complete with mosquito lamp to keep the biters at bay.
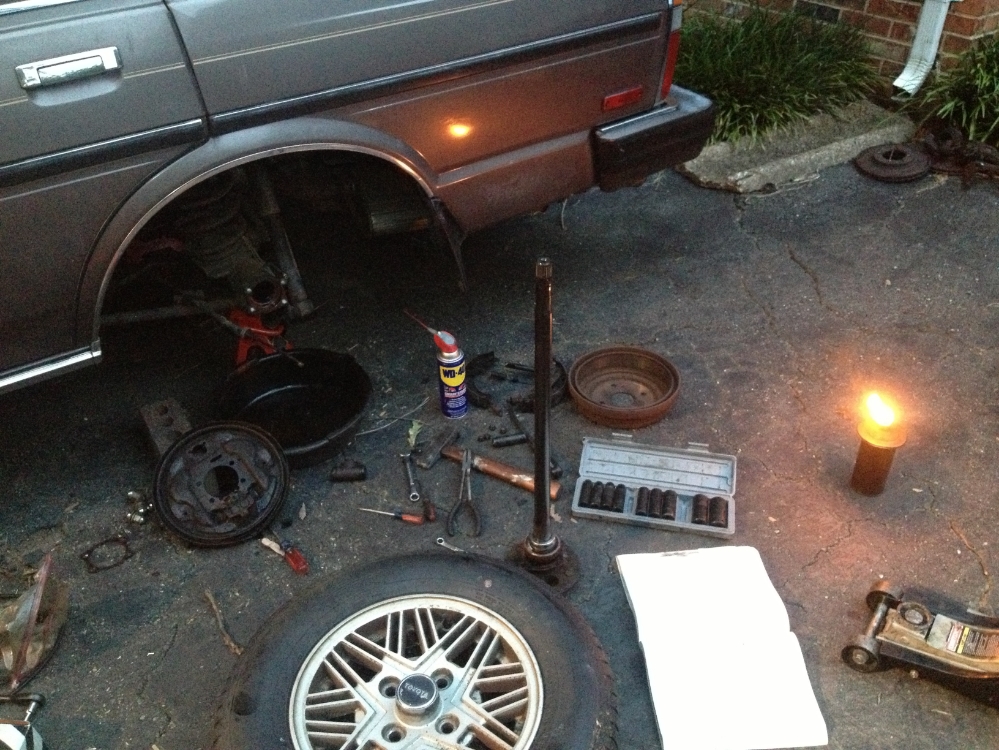
I got the axle out, the rear brakes completely disassembled, the back plate off, the axle oil seal out, only to find that I forgot to order new seals. *facepalm* Looks like I'll be ordering those tomorrow. I was able to get the backing plate put on with new shoes and a new wheel cylinder. Not a big deal about the seals, as the axles have to be out of the diff for me to pull the "third member" (as the 4Runner guys call it) to replace the big diff housing gasket. While it's out I may take it somewhere to have the backlash checked and what not since I have NO idea how to do that mess.
I also checked my VIN Plate. Looks like the EPC at work was wrong, I have an E-series diff (7.1"), not an F-series (7.5") so the MA60 diff will NOT swap

.....along with a new master cylinder.

Now we move on to the rear brakes. Drums. Yuck.

My workspace this evening, complete with mosquito lamp to keep the biters at bay.

I got the axle out, the rear brakes completely disassembled, the back plate off, the axle oil seal out, only to find that I forgot to order new seals. *facepalm* Looks like I'll be ordering those tomorrow. I was able to get the backing plate put on with new shoes and a new wheel cylinder. Not a big deal about the seals, as the axles have to be out of the diff for me to pull the "third member" (as the 4Runner guys call it) to replace the big diff housing gasket. While it's out I may take it somewhere to have the backlash checked and what not since I have NO idea how to do that mess.
I also checked my VIN Plate. Looks like the EPC at work was wrong, I have an E-series diff (7.1"), not an F-series (7.5") so the MA60 diff will NOT swap
 Re: 1986 MX72 Cressida Wagon Build: "Joby"
Got me all inspired and shit. Got a five day weekend coming up. After some honey does on saturday, gonna reseal the engine in the backyard(75K or so), pull the engine out of the wagon and start the swap so I can drive it. I have the HG and Cam tower seals coming in by saturday. I have already got the rest gaskets needed. I will start a WIP thread when I start the destruction!
OkieRA29- Posts : 66
Join date : 2013-07-01
 Re: 1986 MX72 Cressida Wagon Build: "Joby"
I was in a big hurry today so I only took one pic. Basically today between 3 and 9 I did the following:
-remove right axle shaft
-replace right drum brakes
-replace both axle oil seals
-re-install both axle shafts with fresh end plate gaskets
-drain diff oil, replace drain bolt/gasket
-remove diff, replace oil seal, replace diff
-refill diff, replace fill bolt/gasket (Amsoil gear oil)
-drain transmission, replace drain bolt/gasket
-refill transmission (Redline MT90)
-install shifter
-replace rear brake softline
-install new custom driveshaft
-re-bench bleed brake master cylinder
-bleed all brakes
-reinstall wheels
As you can see, I was busy. Here's a pic of my super awesome open diff while it was out
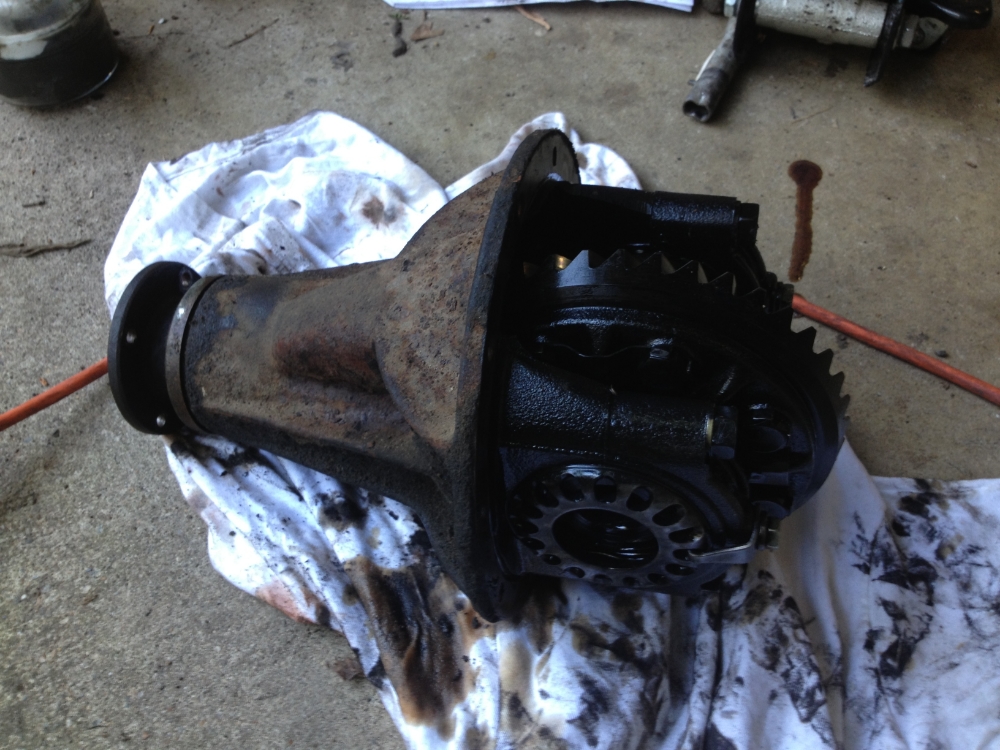
It now runs and drives very well, but there are a few issues I need to address soon.
-replace radiator hose(s) since they are a tad drippy
-replace or rebuild starter since it's kinda spotty when it actually wants to work properly
-it hesitates when you give it lots of throttle. Not sure what that could be, maybe TPS? It has all new ignition, so I'm not sure what's up.
-front right window needs to be diag'd, goes down but not up, but the motor works fine when you apply power directly to it.
-needs rear wiper blades
-needs proper coolant temp gauge. The stock one reads in the middle all the time.
But the important thing is that it runs and drives! WOO HOO!
-remove right axle shaft
-replace right drum brakes
-replace both axle oil seals
-re-install both axle shafts with fresh end plate gaskets
-drain diff oil, replace drain bolt/gasket
-remove diff, replace oil seal, replace diff
-refill diff, replace fill bolt/gasket (Amsoil gear oil)
-drain transmission, replace drain bolt/gasket
-refill transmission (Redline MT90)
-install shifter
-replace rear brake softline
-install new custom driveshaft
-re-bench bleed brake master cylinder
-bleed all brakes
-reinstall wheels
As you can see, I was busy. Here's a pic of my super awesome open diff while it was out

It now runs and drives very well, but there are a few issues I need to address soon.
-replace radiator hose(s) since they are a tad drippy
-replace or rebuild starter since it's kinda spotty when it actually wants to work properly
-it hesitates when you give it lots of throttle. Not sure what that could be, maybe TPS? It has all new ignition, so I'm not sure what's up.
-front right window needs to be diag'd, goes down but not up, but the motor works fine when you apply power directly to it.
-needs rear wiper blades
-needs proper coolant temp gauge. The stock one reads in the middle all the time.
But the important thing is that it runs and drives! WOO HOO!
 Re: 1986 MX72 Cressida Wagon Build: "Joby"
I've put about 150 miles on the car so far and it's been pretty solid. I put in a cheap-o autozone mechanical water temp gauge just to make sure I'm not overheating and I'm not. There are still a few issues that need to be addressed:
-window still doesn't work
-shift boot/center console needs to be properly put together
-pedals need adjusting
-whenever the rear suspension is compressed a bit (bump or lots of people in the car), the now-oversized front u-joint on the driveshaft lightly contacts the dust shield on the transmission, looks like the black thing in this picture I found on google:

So I think I may trim that skirt thing a little bit.
Other than that the car doesn't have any real issues. I do have a list of things I'd like to do to it in the future, here they are in rough order of expense/effort:
-buy cassette tape to headphone jack adapter so I can listen to my iPod through the awesome 1993-spec aftermarket Pioneer stereo
-plumb in a power steering cooler using either a PS cooler I have yet to acquire from a car in the junkyard OR using the stock AE86 oil cooler I have as a PS cooler
-plumb in an engine oil cooler using either the aforementioned AE86 cooler or using another cooler from probably the junkyard in conjunction with an Earl's Performance oil filter sandwich w/build in thermostat
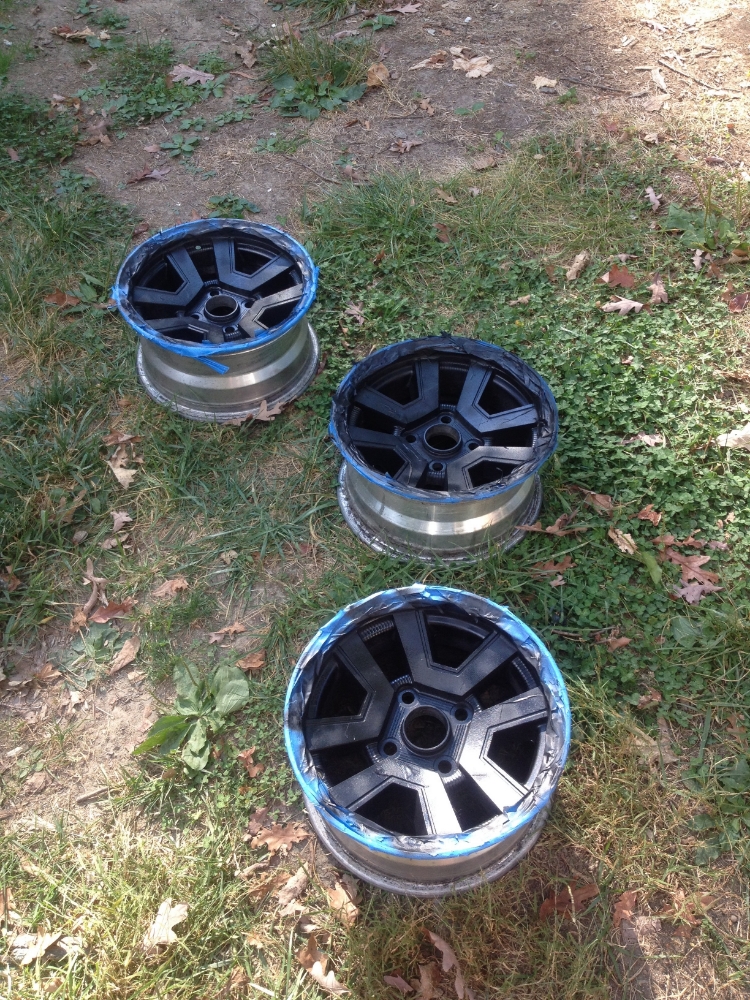
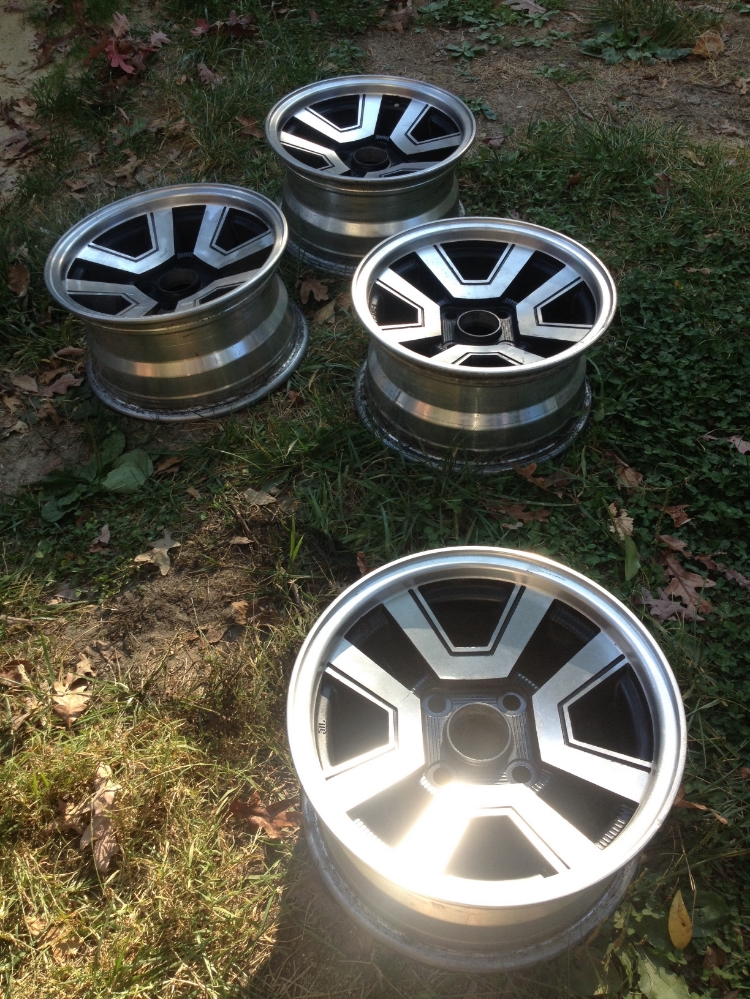
-finish restoring/polishing the P-Type wheels, get tires, put them on the car
-cut springs a bit until I can afford coilovers
-electric radiator fan conversion
-modify my Celi-Supra seat rails to fit/dye seats to match/fix lumbar ball pump thing/install
-complete suspension overhaul with T3 shortened front coilover housings, BC racing rear AE86 coilovers (really adjustable shock perches and adjustable length shocks, not actually "coil-over"), custom T3 panhard bar, custom length T3 axle links, probably T3 steering arms as well for quicker steering
-window still doesn't work
-shift boot/center console needs to be properly put together
-pedals need adjusting
-whenever the rear suspension is compressed a bit (bump or lots of people in the car), the now-oversized front u-joint on the driveshaft lightly contacts the dust shield on the transmission, looks like the black thing in this picture I found on google:

So I think I may trim that skirt thing a little bit.
Other than that the car doesn't have any real issues. I do have a list of things I'd like to do to it in the future, here they are in rough order of expense/effort:
-buy cassette tape to headphone jack adapter so I can listen to my iPod through the awesome 1993-spec aftermarket Pioneer stereo
-plumb in a power steering cooler using either a PS cooler I have yet to acquire from a car in the junkyard OR using the stock AE86 oil cooler I have as a PS cooler
-plumb in an engine oil cooler using either the aforementioned AE86 cooler or using another cooler from probably the junkyard in conjunction with an Earl's Performance oil filter sandwich w/build in thermostat
-finish restoring/polishing the P-Type wheels, get tires, put them on the car
-cut springs a bit until I can afford coilovers
-electric radiator fan conversion
-modify my Celi-Supra seat rails to fit/dye seats to match/fix lumbar ball pump thing/install
-complete suspension overhaul with T3 shortened front coilover housings, BC racing rear AE86 coilovers (really adjustable shock perches and adjustable length shocks, not actually "coil-over"), custom T3 panhard bar, custom length T3 axle links, probably T3 steering arms as well for quicker steering
 Re: 1986 MX72 Cressida Wagon Build: "Joby"
9/14/13
Compiling a list of options for future low...
Front:
A) Cut springs, stock shocks - free, but hate my life
B) Remove spring perches, cut/shorten/weld housings with SW20 MR2 rear KYB AGX shock inserts and T3 weld-on kit and camber plates - $610 + welding costs, $420 without camber plates
Rear:
A) Cut springs, Camaro KYB AGX rear shocks, custom T3 panhard bar - $350, but hate my life
B) Custom springs, Camaro KYB AGX rear shocks, custom T3 panhard bar - $???
C) Megan Racing/BC Racing AE86 rear "coilover" (adjustable spring seats, 8k springs, adjustable length shocks), custom T3 panhard bar - around $650
D) everything from option C, plus all T3 adjustable heim joint links and traction brackets - $1100 ish
I'm thinking B for the front without camber plates for now, and either B or C for the rear
9/17/13
Got word from T3 that a panhard rod would run me $145 and I just have to send them measurements and they will make me a nice heim joint adjustable one.
Megan Racing rear AE86 bits would run around $500 (not sure if shipped or not)
BC Racing rear AE86 bits would run around $660 shipped
I think I may just do cut springs with KYB AGX Camaro shocks on the rear. I'll still probably be doing T3 coilovers/shortened housings/MR2 shocks on the front, but it's all going to have to wait since it's pretty expensive to do everything.
9/19/13
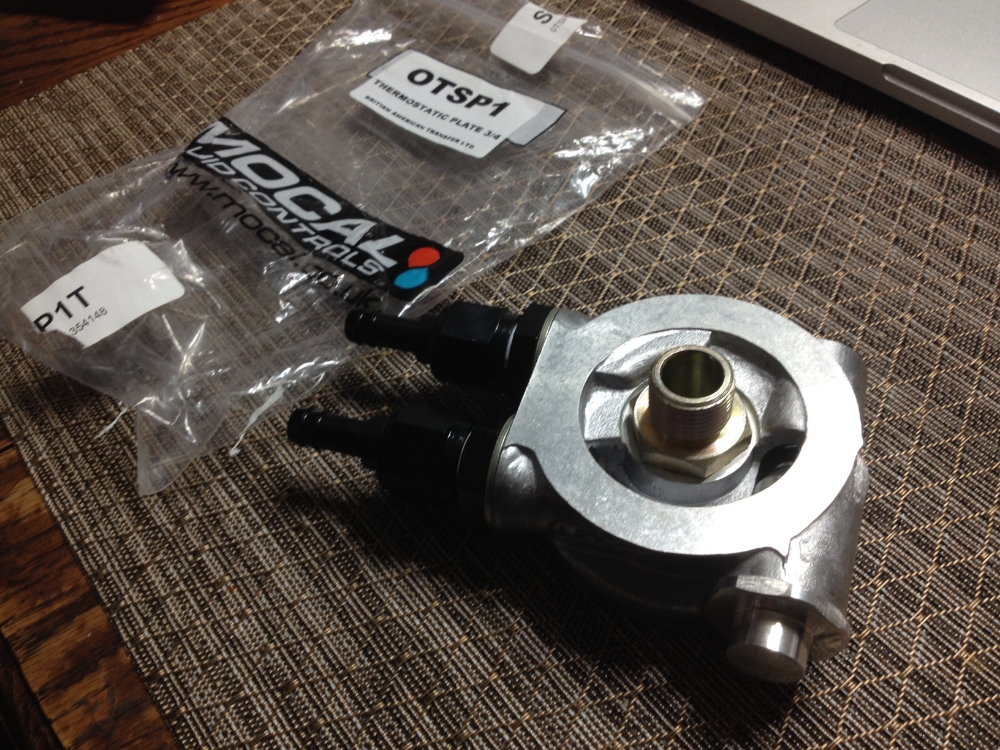
Ordered a Mocal oil filter sandwich plate with built-in thermostat.

It has two 1/2" BSP fittings, so I got 1/2" BSP to -8AN adapters, and two -8AN to 3/8" hose barb fittings that match the 3/8" barbs on the AE86 oil cooler. ALSO, the bracketry on the cooler almost perfectly lines up with the bolts for the hood latch vertical support piece, so mounting it should be a breeze. Still working on how a power steering cooler will fit, but we will see.
I also have new radiator hoses waiting to go in, and I'll probably be getting new belts tomorrow. Every time I start the car from cold, it squeals really loud for about 20 seconds or so.
9/22/13
RabidChimp intake pipe installed! It's purdey
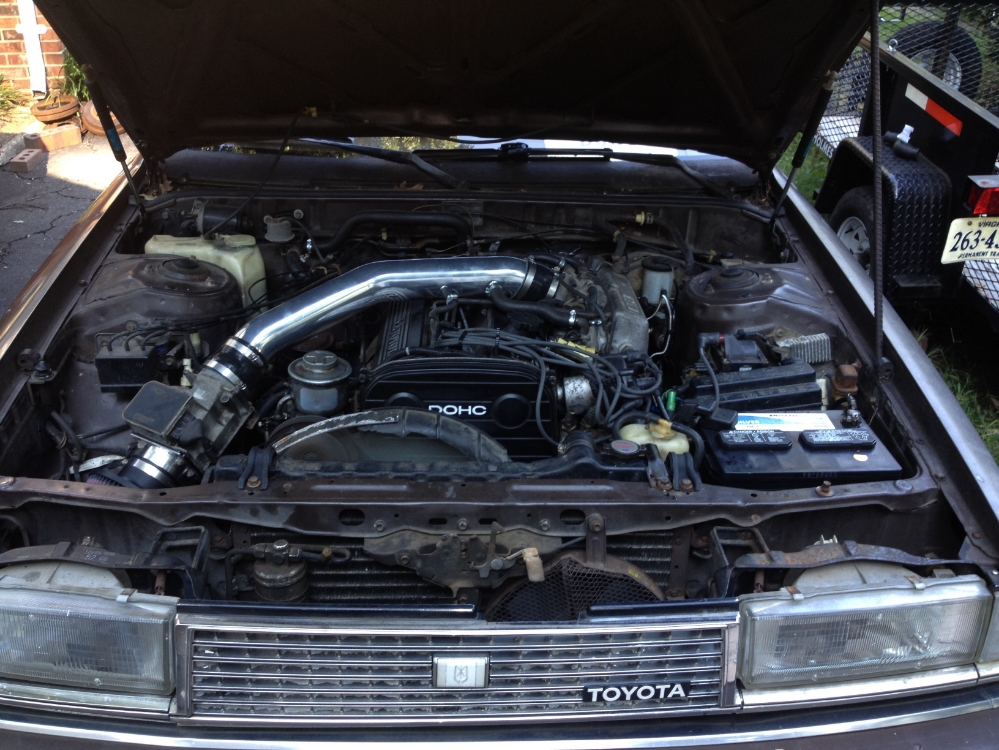
I also started measuring the panhard rod, but the chassis side bolt is stuck and won't slide out, So I can't measure it's diameter. I think what I'll end up doing is ordering a new bolt from work, measuring that, then cutting out the old one. Here are the measurements:
Bolt center to bolt center (rod length): 29 1/4"
Axle-side end width: 1 3/8"
Axle-side hole size: 13/16"
Chassis-side end width: 1 3/8"
Chassis-side hole size: ????
Oh, and new radiator hoses are in, and new belts are on the way.
Compiling a list of options for future low...
Front:
A) Cut springs, stock shocks - free, but hate my life
B) Remove spring perches, cut/shorten/weld housings with SW20 MR2 rear KYB AGX shock inserts and T3 weld-on kit and camber plates - $610 + welding costs, $420 without camber plates
Rear:
A) Cut springs, Camaro KYB AGX rear shocks, custom T3 panhard bar - $350, but hate my life
B) Custom springs, Camaro KYB AGX rear shocks, custom T3 panhard bar - $???
C) Megan Racing/BC Racing AE86 rear "coilover" (adjustable spring seats, 8k springs, adjustable length shocks), custom T3 panhard bar - around $650
D) everything from option C, plus all T3 adjustable heim joint links and traction brackets - $1100 ish
I'm thinking B for the front without camber plates for now, and either B or C for the rear
9/17/13
Got word from T3 that a panhard rod would run me $145 and I just have to send them measurements and they will make me a nice heim joint adjustable one.
Megan Racing rear AE86 bits would run around $500 (not sure if shipped or not)
BC Racing rear AE86 bits would run around $660 shipped
I think I may just do cut springs with KYB AGX Camaro shocks on the rear. I'll still probably be doing T3 coilovers/shortened housings/MR2 shocks on the front, but it's all going to have to wait since it's pretty expensive to do everything.
9/19/13
Ordered a Mocal oil filter sandwich plate with built-in thermostat.

It has two 1/2" BSP fittings, so I got 1/2" BSP to -8AN adapters, and two -8AN to 3/8" hose barb fittings that match the 3/8" barbs on the AE86 oil cooler. ALSO, the bracketry on the cooler almost perfectly lines up with the bolts for the hood latch vertical support piece, so mounting it should be a breeze. Still working on how a power steering cooler will fit, but we will see.
I also have new radiator hoses waiting to go in, and I'll probably be getting new belts tomorrow. Every time I start the car from cold, it squeals really loud for about 20 seconds or so.
9/22/13
RabidChimp intake pipe installed! It's purdey

I also started measuring the panhard rod, but the chassis side bolt is stuck and won't slide out, So I can't measure it's diameter. I think what I'll end up doing is ordering a new bolt from work, measuring that, then cutting out the old one. Here are the measurements:
Bolt center to bolt center (rod length): 29 1/4"
Axle-side end width: 1 3/8"
Axle-side hole size: 13/16"
Chassis-side end width: 1 3/8"
Chassis-side hole size: ????
Oh, and new radiator hoses are in, and new belts are on the way.
 Re: 1986 MX72 Cressida Wagon Build: "Joby"
Oil cooler is installed!
The AE86 cooler is ALMOST a direct bolt-in to the vertical hood latch support bracket. All you have to do in terms of modification is trim the upper oil cooler bracket like so:
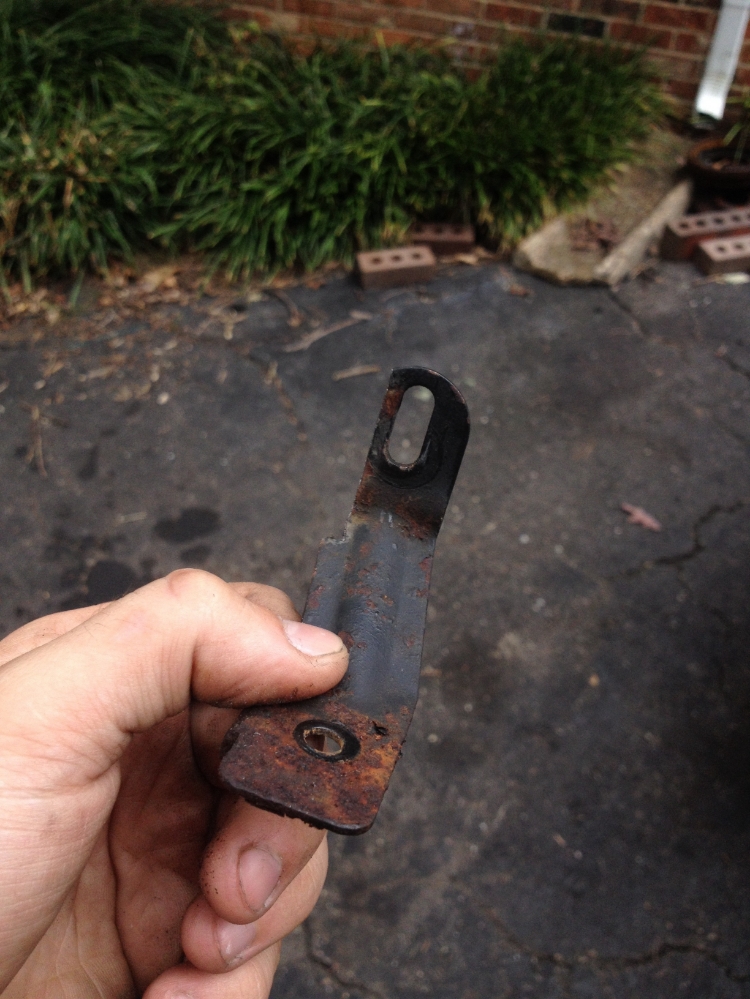
Then it bolts right in!
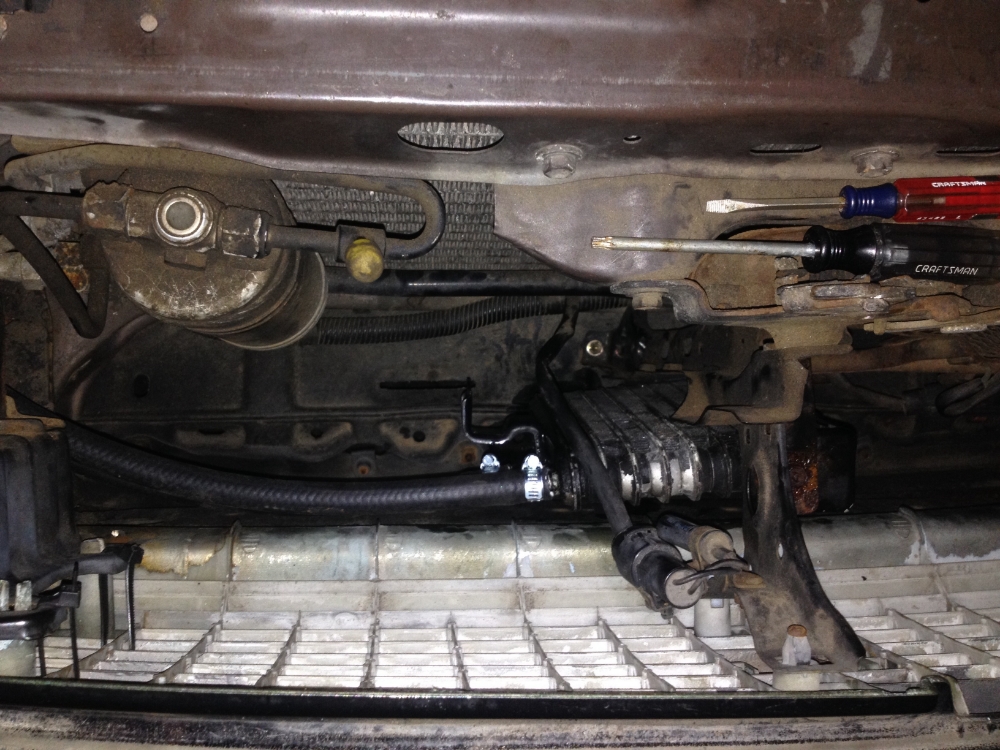
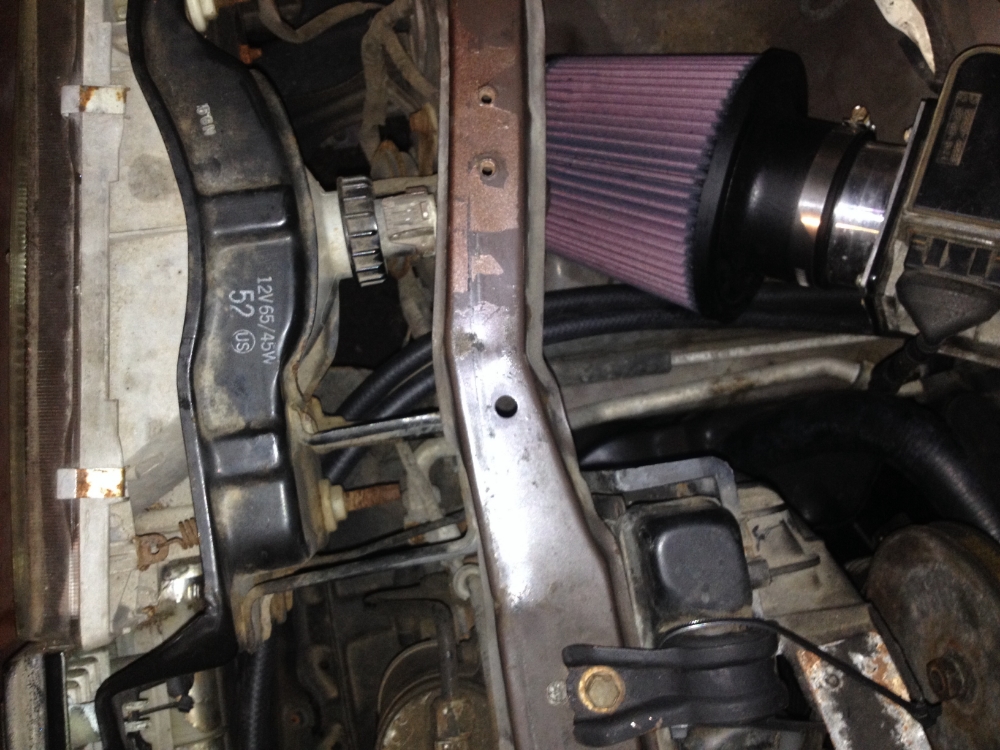
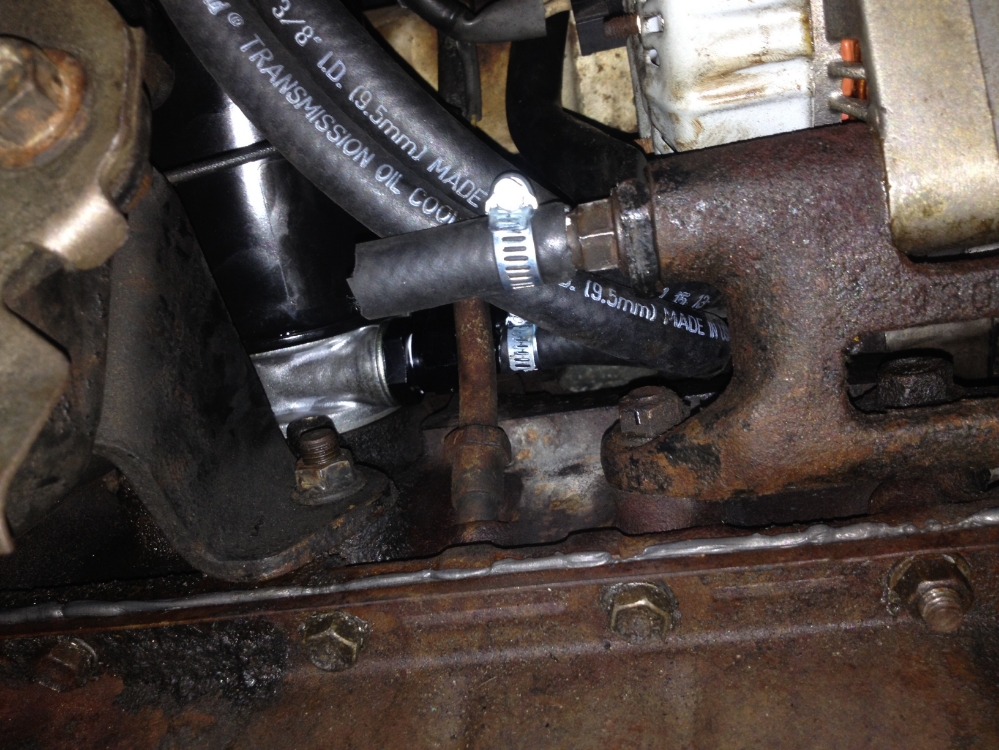
It's a pretty tight fit around the filter, but it works. That little stub of hose on the bottom there is covering the end of the long alternator mounting bolt so the hoses don't rub on it.
The AE86 cooler is ALMOST a direct bolt-in to the vertical hood latch support bracket. All you have to do in terms of modification is trim the upper oil cooler bracket like so:

Then it bolts right in!


It's a pretty tight fit around the filter, but it works. That little stub of hose on the bottom there is covering the end of the long alternator mounting bolt so the hoses don't rub on it.
 Re: 1986 MX72 Cressida Wagon Build: "Joby"
Great job on the P-types, they look great! Hoping to get a bit more done on my MX72 tomorrow, got a dentist appointment and I think some engine work will offset the annoyance of the dentist!
OkieRA29- Posts : 66
Join date : 2013-07-01
 Re: 1986 MX72 Cressida Wagon Build: "Joby"
10/7/13
Supra wheels are on the car with tires mounted. Pics will come once I get the T3 panhard rod in and have the car back on the ground.
10/8/13
Ordered the panhard rod today. No idea when it will be here, but it can't be soon enough. Also, I found this picture on the interwebs (NOT MY CAR):

That's pretty much EXACTLY the stance I want on mine! So seckseh.
She's still up on jackstands, but here's what the wheels look like on the car
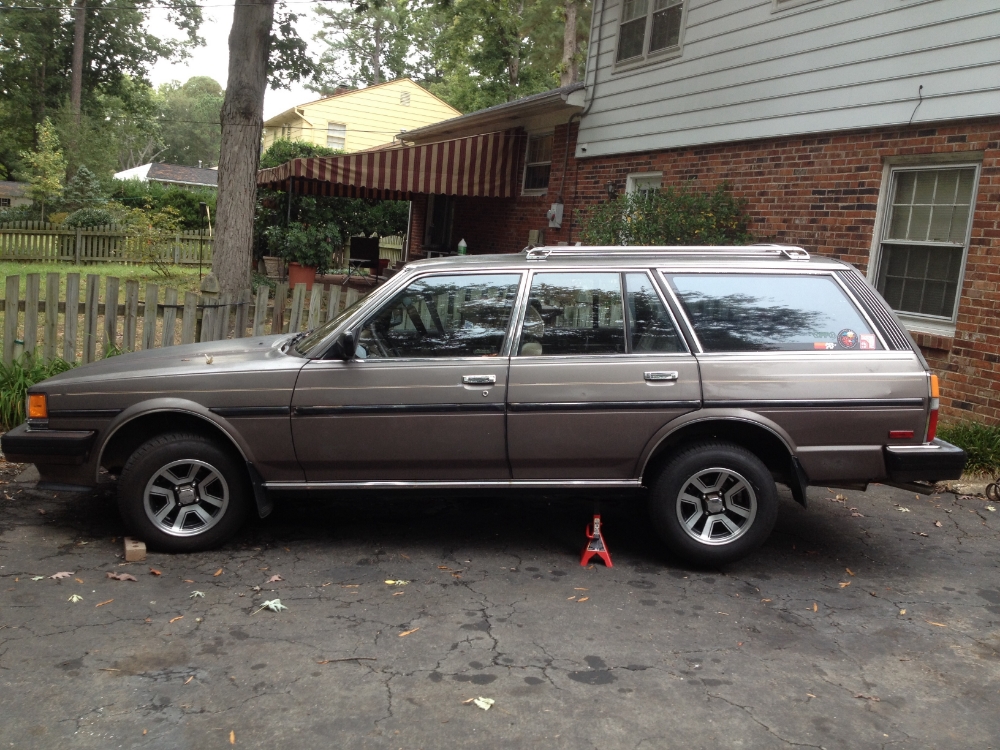
Supra wheels are on the car with tires mounted. Pics will come once I get the T3 panhard rod in and have the car back on the ground.
10/8/13
Ordered the panhard rod today. No idea when it will be here, but it can't be soon enough. Also, I found this picture on the interwebs (NOT MY CAR):

That's pretty much EXACTLY the stance I want on mine! So seckseh.
She's still up on jackstands, but here's what the wheels look like on the car

Page 2 of 6 •  1, 2, 3, 4, 5, 6
 Similar topics
» 1986 Cressida MX72 Wagon "project"
» 1986 Toyota Cressida Wagon MX72 FOR SALE
» FS: 1986 Cressida Wagon 5 speed LSD
» Rear Tail Light Assembly Passenger Side MX72 Cressida Wagon HELP!!!!!!!!!!!!
» custom 1-pice driveshaft for W58 MX72 wagon. Pittsboro, NC. pick up only.
» 1986 Toyota Cressida Wagon MX72 FOR SALE
» FS: 1986 Cressida Wagon 5 speed LSD
» Rear Tail Light Assembly Passenger Side MX72 Cressida Wagon HELP!!!!!!!!!!!!
» custom 1-pice driveshaft for W58 MX72 wagon. Pittsboro, NC. pick up only.
Page 2 of 6
Permissions in this forum:
You cannot reply to topics in this forum

