1986 MX72 Cressida Wagon Build: "Joby"
+7
Yotarip
davev1955
STANGWxRLD
RayRay
OkieRA29
Push
MR2_FTW
11 posters
Page 4 of 6
Page 4 of 6 •  1, 2, 3, 4, 5, 6
 Re: 1986 MX72 Cressida Wagon Build: "Joby"
Got a call back from Coilsprings.com over the weekend. They are starting to design my springs. Apparently they tested the stock one I sent in and the rate was like 140lbs/in or something stupid like that. They asked if I was REALLY sure I wanted 400lb/in and I explained how the car currently handles like overcooked pasta and that I was used to driving an autocross-prepped MR2 on a daily basis, he laughed and said "OK that makes sense". There are only two issues at this point. One is that it will probably be around 4 weeks before I see the springs. The other is that the new springs will only be 8" long, which means they will come unseated if the axle is at full droop. So, I've been looking into limit straps and I think I'm gonna go with these:
http://www.ruffstuffspecialties.com/catalog/LIMIT-KIT.html


Basically you weld those mounts to the chassis and the axle, then pick what length you want, and it will keep the axle from drooping too far. Normally this job is accomplished with getting shorter shocks, but even the Camaro AGX's I have are too long to keep an 8" spring in place at full droop.
Also the starting problems haven't been sorted yet, but the weather has been so bad I haven't had time to look into it much.
http://www.ruffstuffspecialties.com/catalog/LIMIT-KIT.html


Basically you weld those mounts to the chassis and the axle, then pick what length you want, and it will keep the axle from drooping too far. Normally this job is accomplished with getting shorter shocks, but even the Camaro AGX's I have are too long to keep an 8" spring in place at full droop.
Also the starting problems haven't been sorted yet, but the weather has been so bad I haven't had time to look into it much.
 Re: 1986 MX72 Cressida Wagon Build: "Joby"
Hey Jordan,
My take on the starter issue;
These old toys do not have a relay that serves the starter solenoid with the 12 volts. The solenoid is served 12 volts from the ignition switch. After decades of use, the contacts get worn and a voltage drop develops. The solenoid no longer gets 12 volts. Quick fix may be to install a relay between the starter signal and the solenoid. The weak signal may still activate the relay. The relay will serve the solenoid with 12 volts directly from the battery. More involved fix would be to source a new ignition switch.
Yotarip- Posts : 5
Join date : 2013-11-07
 Re: 1986 MX72 Cressida Wagon Build: "Joby"
Got a new ignition switch from RockAuto for super cheap thinking that could be the source from my voltage drop. The part I got in won't fit. Close, but no.
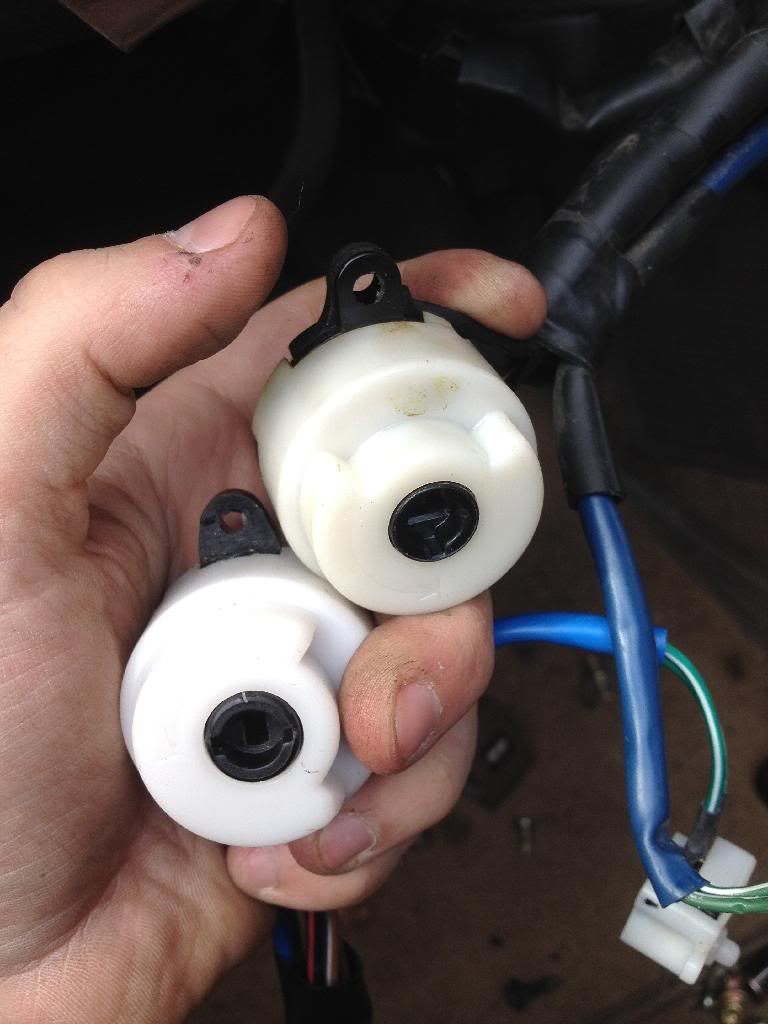
Top is stock, bottom is the Airtex part from Rock Auto. the mounting tab is in the wrong place and it won't mount up. I have messaged RockAuto to make an exchange.

Top is stock, bottom is the Airtex part from Rock Auto. the mounting tab is in the wrong place and it won't mount up. I have messaged RockAuto to make an exchange.
 Re: 1986 MX72 Cressida Wagon Build: "Joby"
I have been going through the car while it's been down to try and figure out my starting problem and I think I've figured it out. Keep in mind electrical systems are super hard for me to wrap my brain around, so don't hate on my slowness. I aced everything in physics until the chapter on electricity which I failed. Just saying.
OK so here's how I see it. The relay that the PO bypassed is in fact the starter relay. It has four wires:
white- steady voltage from the battery when the key is in ACC
black- goes to the starter
black/orange - power from the ignition switch (only actually sees like 11.5volts for some reason)
red - grounds through the alarm system
The issues:
1. the alarm system on this car is really messed up. Sometimes it works, sometimes it doesn't, sometimes it goes off for NO reason.
2. the black/orange wire only sees 11.5 volts. This is even with a brand new ignition switch so I am going to presume this is normal and is usually enough for the relay to click
I think the reason the PO bypassed the relay and jumped the black/orange wire straight to the black wire was because the alarm was dying. Every now and then the starter would kick from the 11.5 volts, but not reliably. I think the reason the relays I've tried to put in haven't worked was because of the wonky alarm acting up. I jumped the black and white wires to each other, turned the key to ACC, and the starter would spin if I hit the clutch pedal so I think my logic works.
Right now what I am thinking I'm going to do is unplug the alarm computer box (lots of people ditch it anyway). I'll take the red wire that grounds the starter relay, and ground it, bypassing the immobilizer. Then I should be able to have a functioning relay, allowing for the proper function of the starting system. Here's the wiring diagram in case you were curious
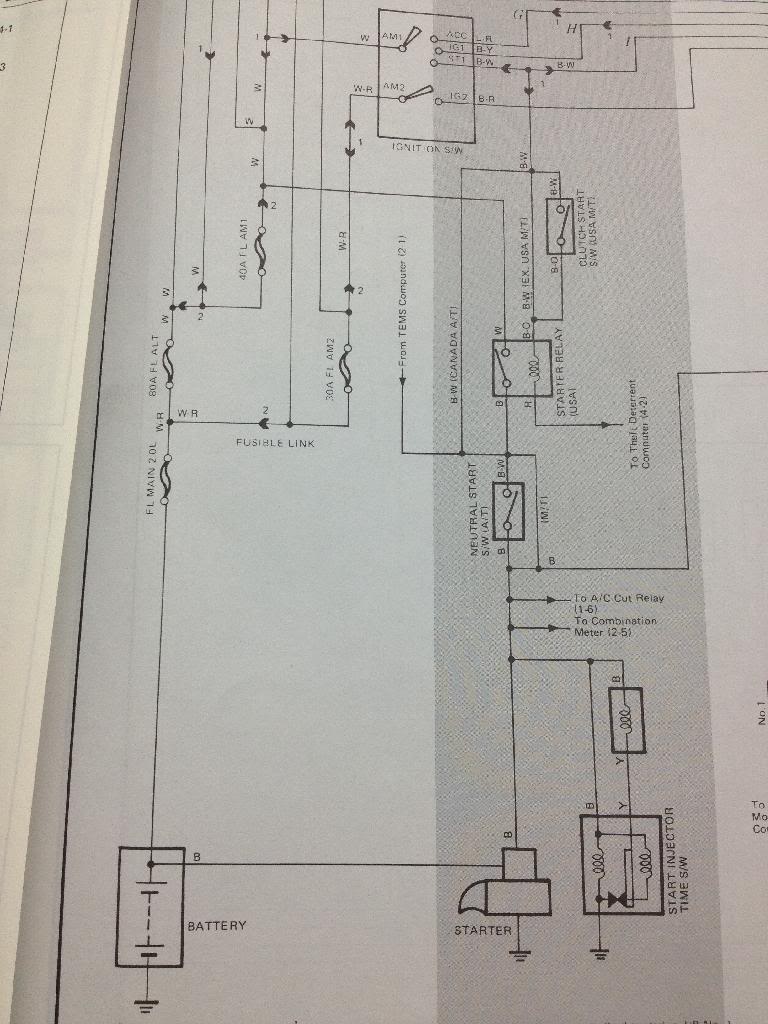
Also just to make it even more confusing, the pinout on the actual relay in the fuse box is not in the same orientation as what it looks like in this diagram.
OK so here's how I see it. The relay that the PO bypassed is in fact the starter relay. It has four wires:
white- steady voltage from the battery when the key is in ACC
black- goes to the starter
black/orange - power from the ignition switch (only actually sees like 11.5volts for some reason)
red - grounds through the alarm system
The issues:
1. the alarm system on this car is really messed up. Sometimes it works, sometimes it doesn't, sometimes it goes off for NO reason.
2. the black/orange wire only sees 11.5 volts. This is even with a brand new ignition switch so I am going to presume this is normal and is usually enough for the relay to click
I think the reason the PO bypassed the relay and jumped the black/orange wire straight to the black wire was because the alarm was dying. Every now and then the starter would kick from the 11.5 volts, but not reliably. I think the reason the relays I've tried to put in haven't worked was because of the wonky alarm acting up. I jumped the black and white wires to each other, turned the key to ACC, and the starter would spin if I hit the clutch pedal so I think my logic works.
Right now what I am thinking I'm going to do is unplug the alarm computer box (lots of people ditch it anyway). I'll take the red wire that grounds the starter relay, and ground it, bypassing the immobilizer. Then I should be able to have a functioning relay, allowing for the proper function of the starting system. Here's the wiring diagram in case you were curious

Also just to make it even more confusing, the pinout on the actual relay in the fuse box is not in the same orientation as what it looks like in this diagram.
 Re: 1986 MX72 Cressida Wagon Build: "Joby"
The fix worked and the car starts up perfectly every time using the relay as intended.
I also got billed for the springs so I'm guessing the end is near and I hope can expect them in the next week or so.
I also got billed for the springs so I'm guessing the end is near and I hope can expect them in the next week or so.
 Re: 1986 MX72 Cressida Wagon Build: "Joby"
Springs were at my door when I got home from work today!
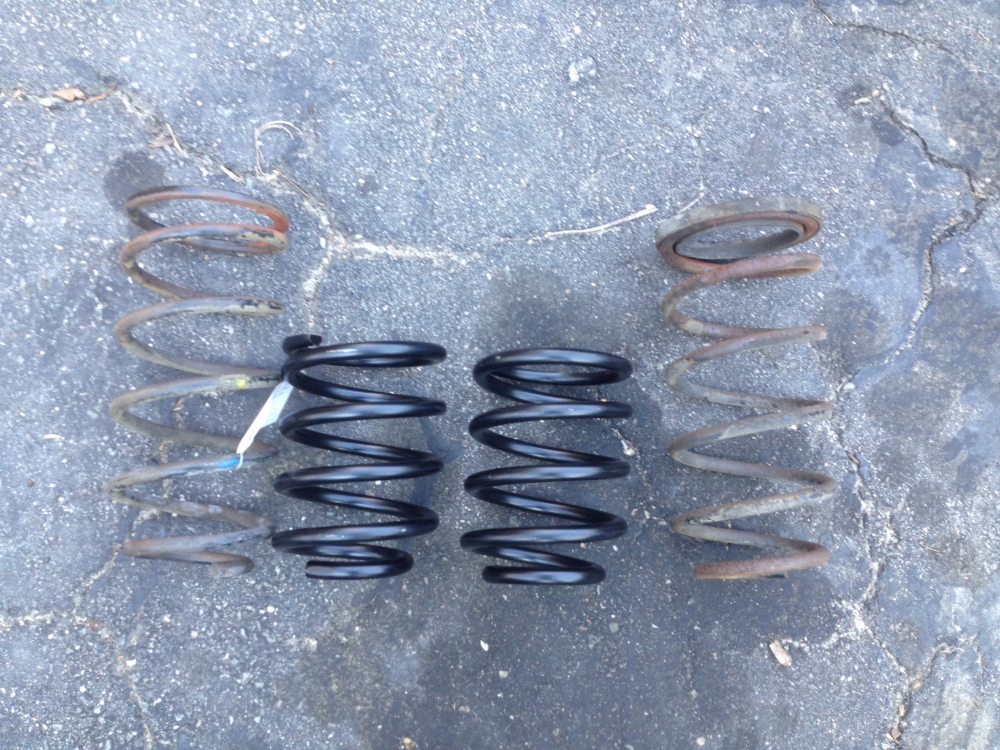
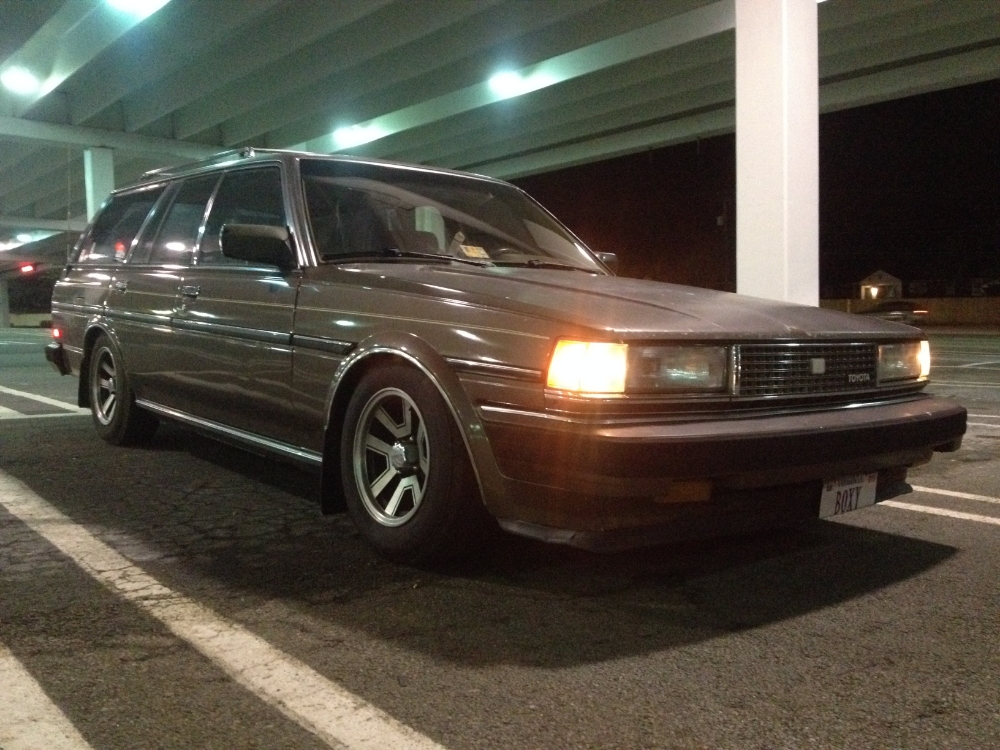
So naturally I got them on as quick as I could. Here it is!

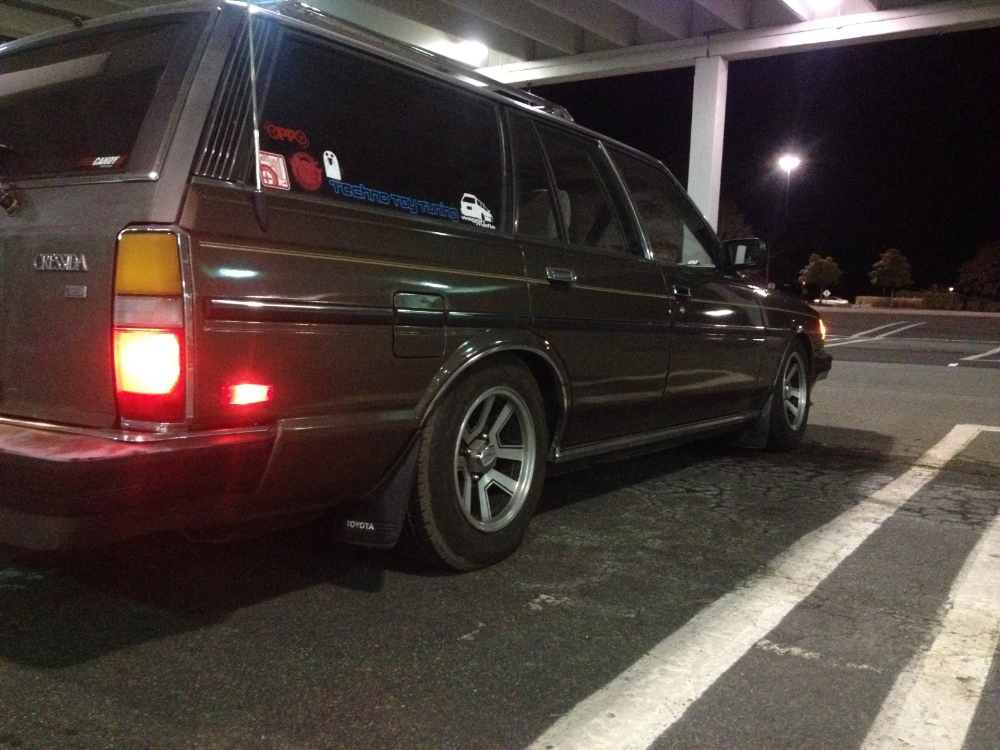
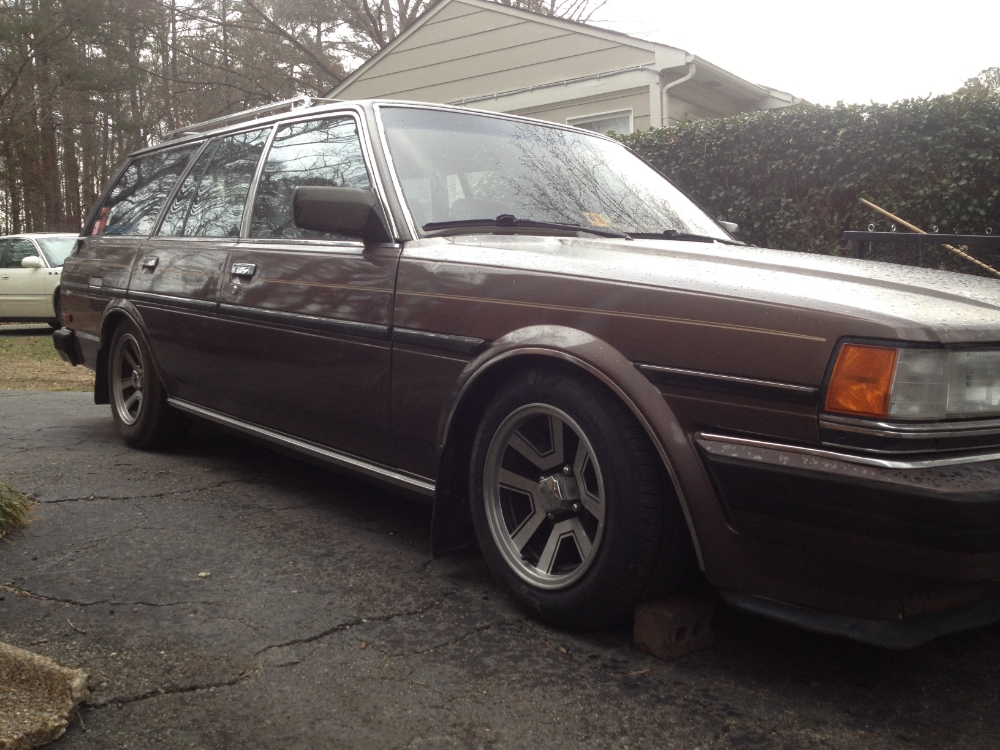
Here's the "before" height just for comparison

Naturally, the giganto-sidewall 195/70's rub in the front, so I may well be ordering some 185/60's off TireRack here soon. It also desperately needs an alignment, the panhard rod may need to be adjusted of the axle is off center (if it is, it's not by much), and some limit straps for the rear axle as well. Also one of these:
http://www.xcessivemanufacturing.com/ONLINESTORE.html?cid=60&step=4&pid=349

But yeah I'm pretty happy with how everything looks (and drives, holy crap). Once I get the smaller tires and skid plate, the front will go a touch lower I think.

So naturally I got them on as quick as I could. Here it is!


Here's the "before" height just for comparison

Naturally, the giganto-sidewall 195/70's rub in the front, so I may well be ordering some 185/60's off TireRack here soon. It also desperately needs an alignment, the panhard rod may need to be adjusted of the axle is off center (if it is, it's not by much), and some limit straps for the rear axle as well. Also one of these:
http://www.xcessivemanufacturing.com/ONLINESTORE.html?cid=60&step=4&pid=349
But yeah I'm pretty happy with how everything looks (and drives, holy crap). Once I get the smaller tires and skid plate, the front will go a touch lower I think.
 Re: 1986 MX72 Cressida Wagon Build: "Joby"
Swapped out the 195/70's on the front for some 185/60's. They don't rub anywhere near as bad anymore but at the same time they don't look quite as nice, since they don't tuck up into the fenders. Oh well.
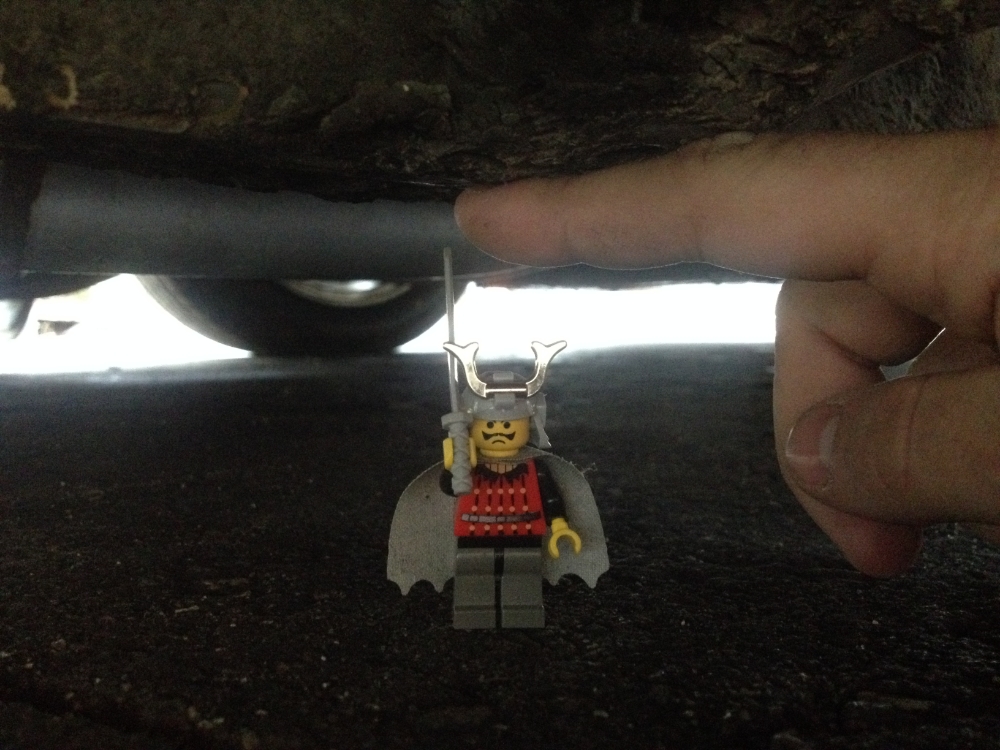
That did drop an inch of ride height just from the change in sidewall though. Here's a Lego samurai standing under my frame rail. There's about a finger's width between the sword and the frame.
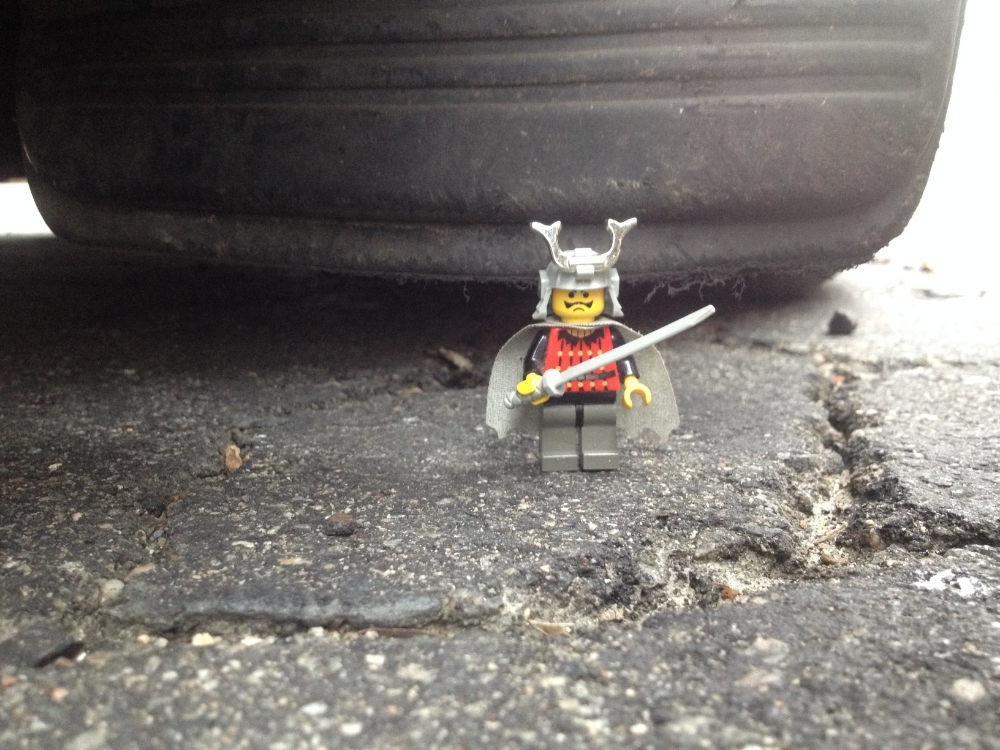
And the front mudflap. It scrapes if I take a turn too fast haha. It's about 1.5" off the ground
The oil pan is currently around 2.5-3" off the ground. I'll definitely be getting a skid plate with my next paycheck.

That did drop an inch of ride height just from the change in sidewall though. Here's a Lego samurai standing under my frame rail. There's about a finger's width between the sword and the frame.

And the front mudflap. It scrapes if I take a turn too fast haha. It's about 1.5" off the ground

The oil pan is currently around 2.5-3" off the ground. I'll definitely be getting a skid plate with my next paycheck.
 Re: 1986 MX72 Cressida Wagon Build: "Joby"
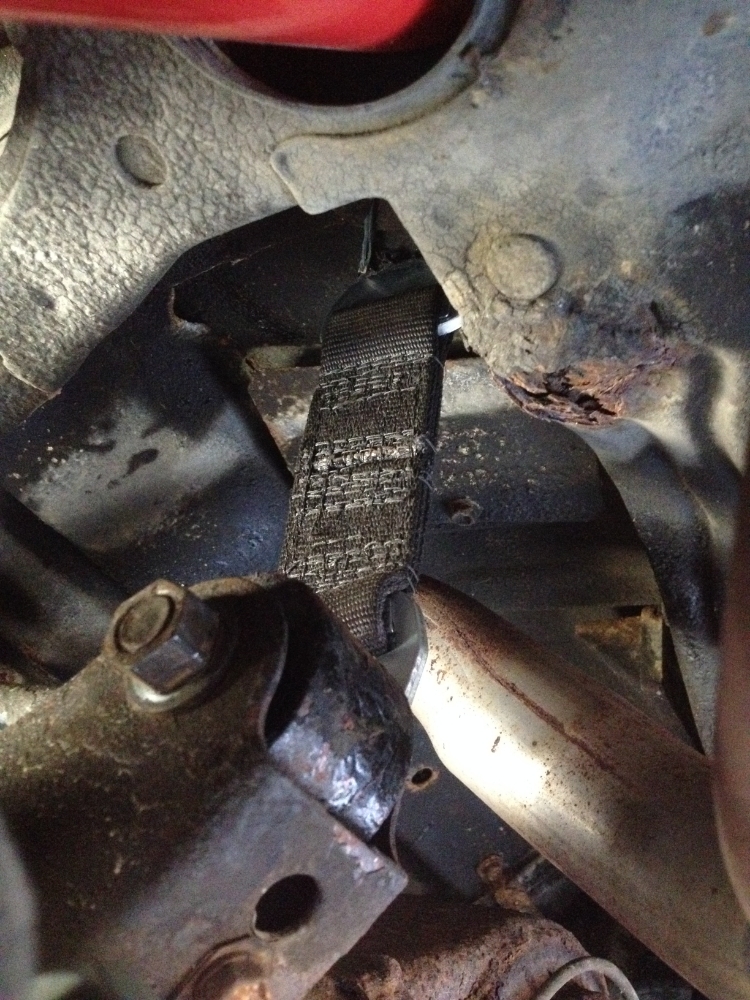
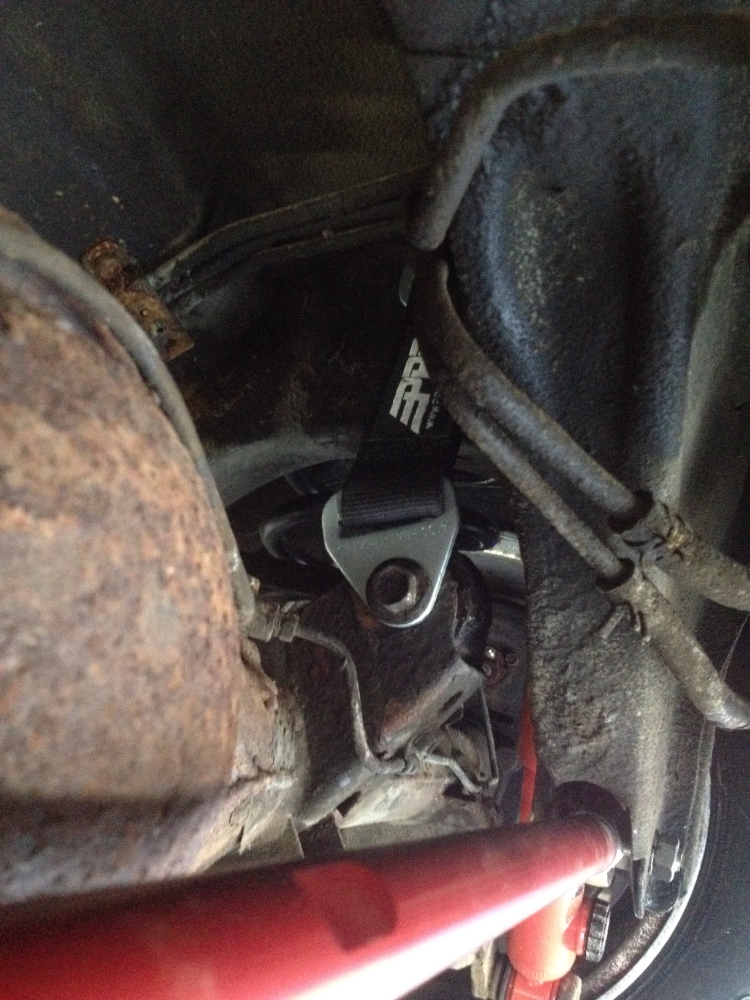
Limit straps installed. Bottom is bolted to the upper arm bolts and the top is fed through slots cut in the floor of the trunk and held in place with crossbolts. Not super ideal but hey it works.


 Re: 1986 MX72 Cressida Wagon Build: "Joby"
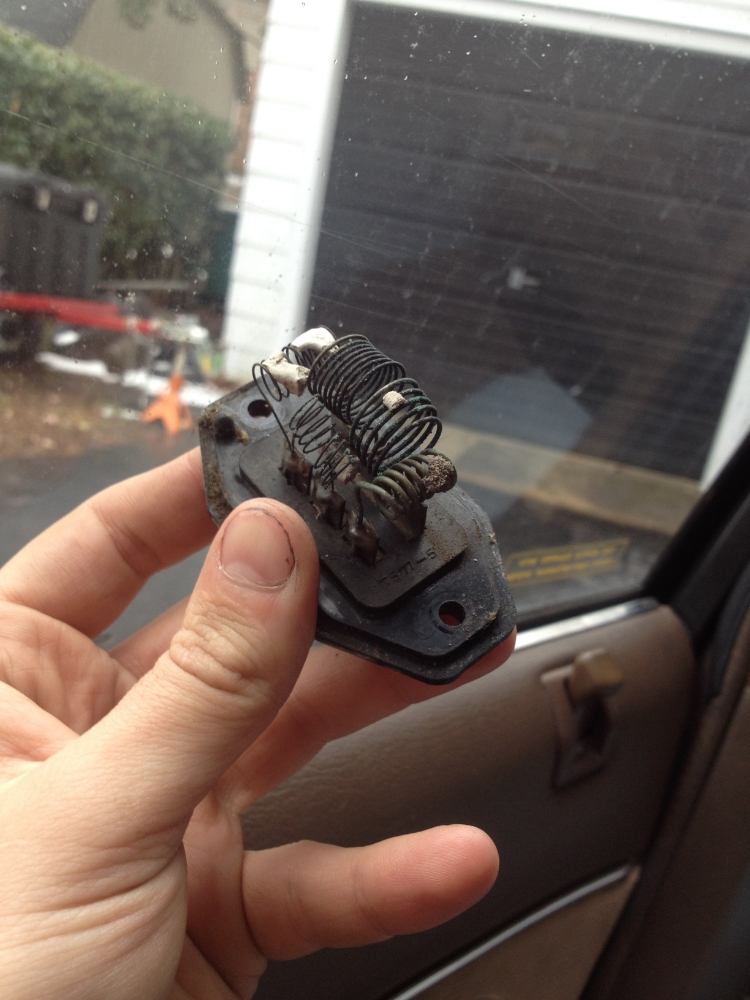
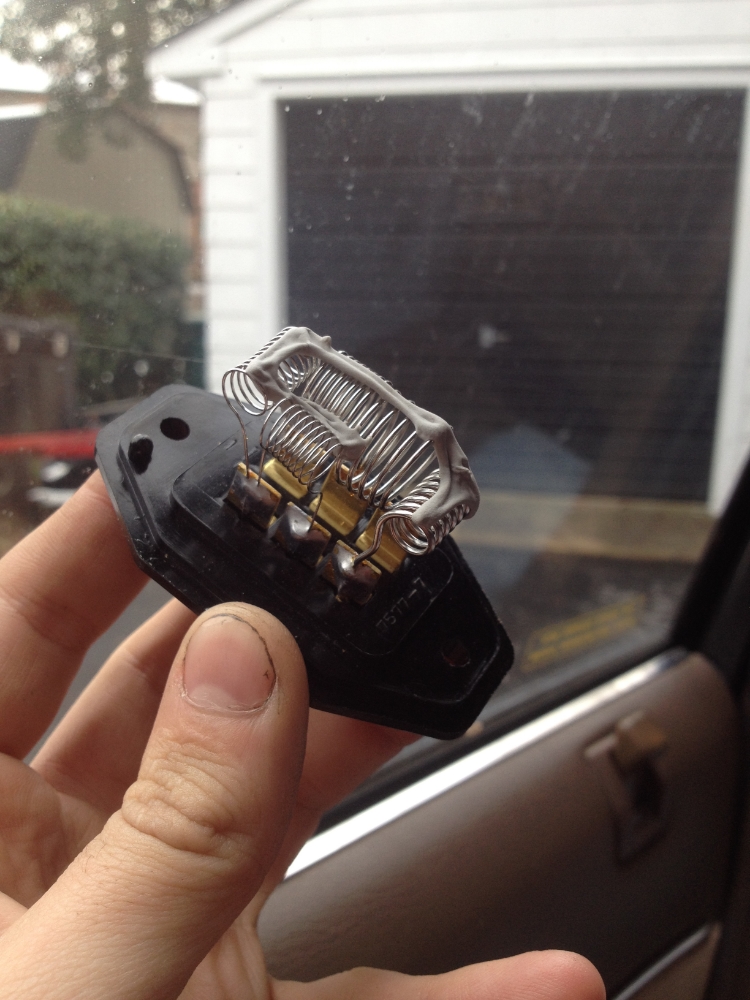
Ever since I bought the car the HVAC controls have been very hit or miss. There are four fan speeds: Auto, Off, Low, and High. Off obviously worked, but Low never did and High was intermittent. Basically to have any fan at all I'd have to use Auto which varies in speed depending on the temperature in the car. So I overheard somebody talking about a blower motor resistor pack. I'd never heard of it so I googled and low and behold it could be the issue. So I looked it up at work and it was a whopping $12. Discontinued. One left in the country. Bought. Installed. Fixed.
Here's the old one. Several broken connections, deteriorated metal, and generally garbage condition.
Here's the new one. So shiny and functional-looking.
SUCCESS!
Here's the old one. Several broken connections, deteriorated metal, and generally garbage condition.

Here's the new one. So shiny and functional-looking.

SUCCESS!
 Re: 1986 MX72 Cressida Wagon Build: "Joby"
Just ordered one of these pretty babies. This comes after freaking myself out by scraping my subframe while shuffling cars around my driveway. I figured my oil pan could use a little extra protection.

 Re: 1986 MX72 Cressida Wagon Build: "Joby"
I swapped out the front parking light peanut bulbs for some LED's and holy god are they bright. And awesome. I did the same on my MR2 (euro dual bulb housings ftw) and it just looks awesome.
Tomorrow my skid plate should be arriving, but more importantly weather permitting I will probably be putting the car in the air and pulling the diff out to investigate my clunk. I'm almost positive it's the spider gears. I'm going to bring the diff into work and have one of the mechanics look at it (the guy restores vintage Land Cruisers, so he knows a thing or two about diffs). The fix will consist of either new shim washers to get proper clearance of the spider gears (like $10), or a spider gear kit with new gears (like $165, with only two left in the country last I checked). So hopefully I'll be rid of this awful rear end clunk relatively soon.
Tomorrow my skid plate should be arriving, but more importantly weather permitting I will probably be putting the car in the air and pulling the diff out to investigate my clunk. I'm almost positive it's the spider gears. I'm going to bring the diff into work and have one of the mechanics look at it (the guy restores vintage Land Cruisers, so he knows a thing or two about diffs). The fix will consist of either new shim washers to get proper clearance of the spider gears (like $10), or a spider gear kit with new gears (like $165, with only two left in the country last I checked). So hopefully I'll be rid of this awful rear end clunk relatively soon.
 Re: 1986 MX72 Cressida Wagon Build: "Joby"
Anyhow, I got the diff out today. I think there are some clearance issues with both the spider gears AND the ring/pinion. Neither are terrible, but I think a combination of the two is leading to too much play. I'll be taking it in to work with me tomorrow. Hopefully one of the techs will be able to help me sort it out.
Also, this came in

Also, this came in

 Re: 1986 MX72 Cressida Wagon Build: "Joby"
Brought the diff in to work and measured the backlash on the ring gear to be around 12 thousandths. Spec is between 5 and 7 thousandths, so that's part of the issue. The big thing is the passenger side axle gear's shim is so small that the gear has lateral play. This means that when under load, the gear moves away from the spider gears and has way way too much backlash. Now I have a couple options. I can spend like $25 and get a bunch of different sized shims to try and make it work that will take like a week and a half to come in. This will require complete diff dis-assembly and subsequent reassembly, including resetting the backlash on the diff and adjusting the pinion preload; none of which I've ever done before and I lack several of the tools required to do so.
OR
I can drive up to MD and pick up a Celica-Supra complete rear end with disc brakes and LSD for....many hundreds of dollars...which should just bolt on.
Thoughts?
OR
I can drive up to MD and pick up a Celica-Supra complete rear end with disc brakes and LSD for....many hundreds of dollars...which should just bolt on.
Thoughts?
 Re: 1986 MX72 Cressida Wagon Build: "Joby"
Let us know how you like the xm Skid plate... I need to go grab one for my x7. 
 Re: 1986 MX72 Cressida Wagon Build: "Joby"
Long story short, talked to guy 3 hours away about buying his axle. Arrange time/place over facebook chat. I show up, he's nowhere to be found, not responding to messages. Time wasted, kinda pissed.
So, I ordered $25 worth of different sized shims and stuff to re-adjust the stock diff to eliminate the clunk. Looks like I get to learn how to clearance a diff. Hooray.
So, I ordered $25 worth of different sized shims and stuff to re-adjust the stock diff to eliminate the clunk. Looks like I get to learn how to clearance a diff. Hooray.
 Re: 1986 MX72 Cressida Wagon Build: "Joby"
This evening I started working on the diff. Keep in mind I've never done anything like this before so this is all new to me.
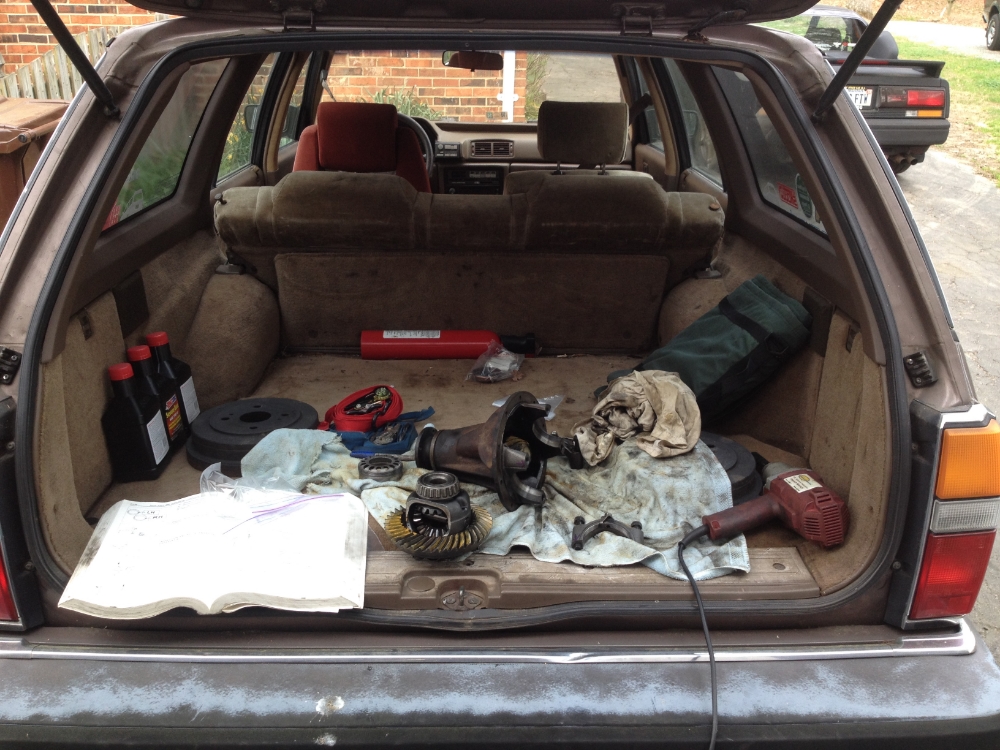
I started by removing the retaining lock things for the diff carrier adjuster bolt things (yeah there's going to be a lot of that sort of language in here. Sue me.) and then removing the two caps that hold the diff into the 3rd member. I was careful to mark everything so it all goes back exactly the way it came apart. Here's my workspace:
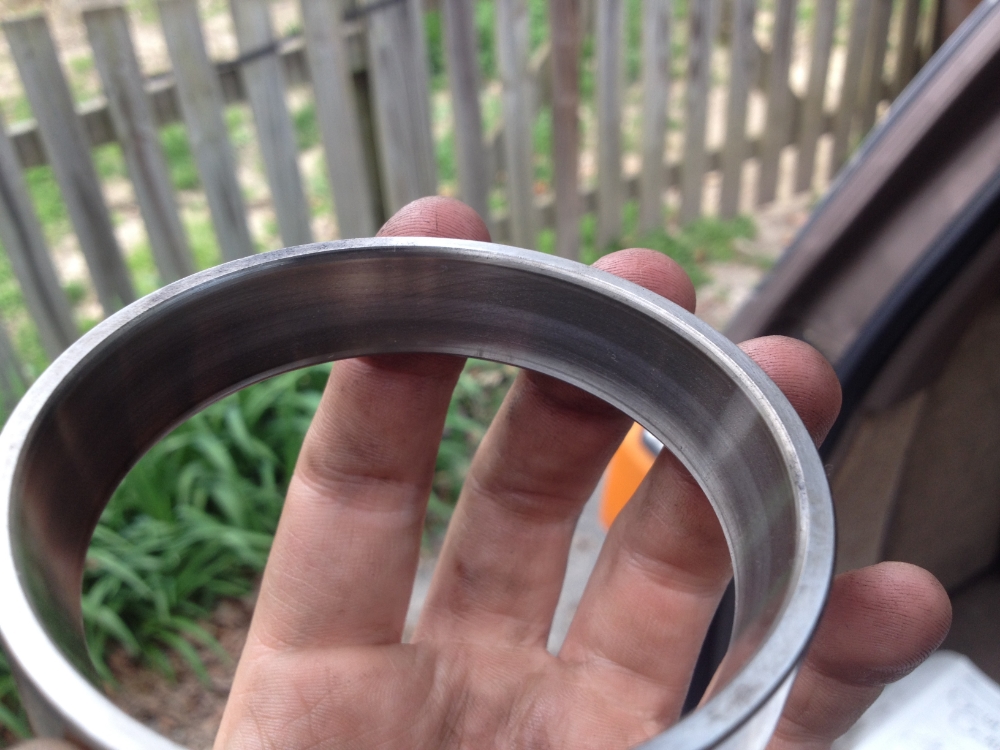
Here's one of the races for the big diff bearings. Both of them looked great.
The bar that the spider gears ride on is held in with a little pin that is staked in the housing. That took some persuading to remove, but once I figured out it only comes out one way, I got it.
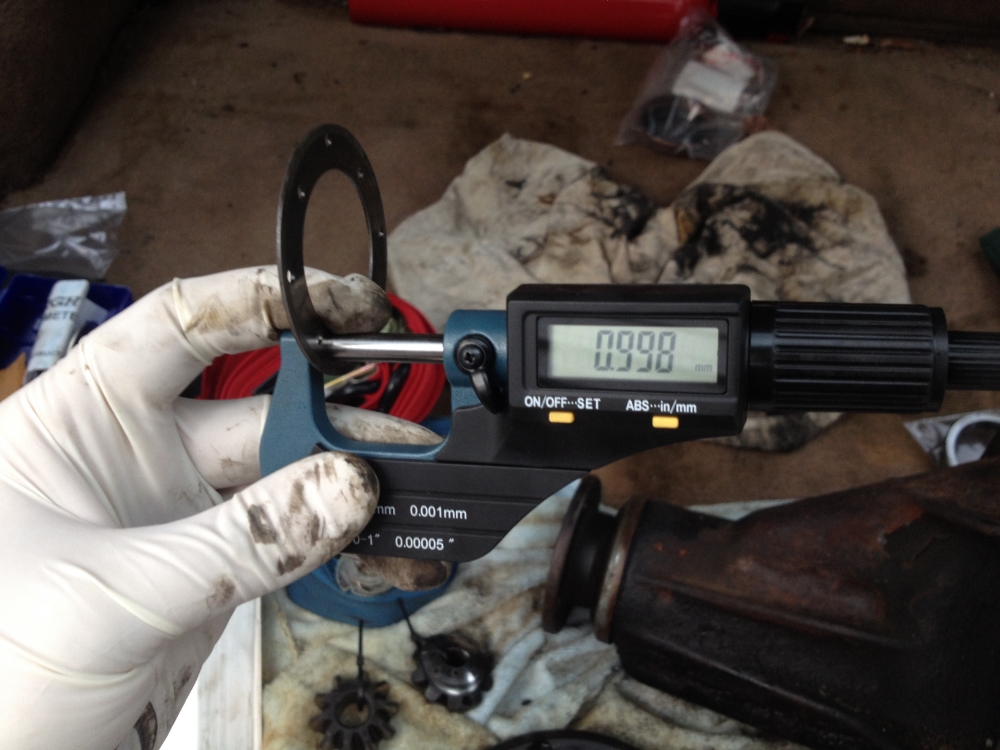
Here's one of the offending articles: the passenger side axle gear adjusting shim. This one is pretty much exactly 1mm thick. I don't recall the thickness of the ones I ordered, but it was over 1mm which is good.
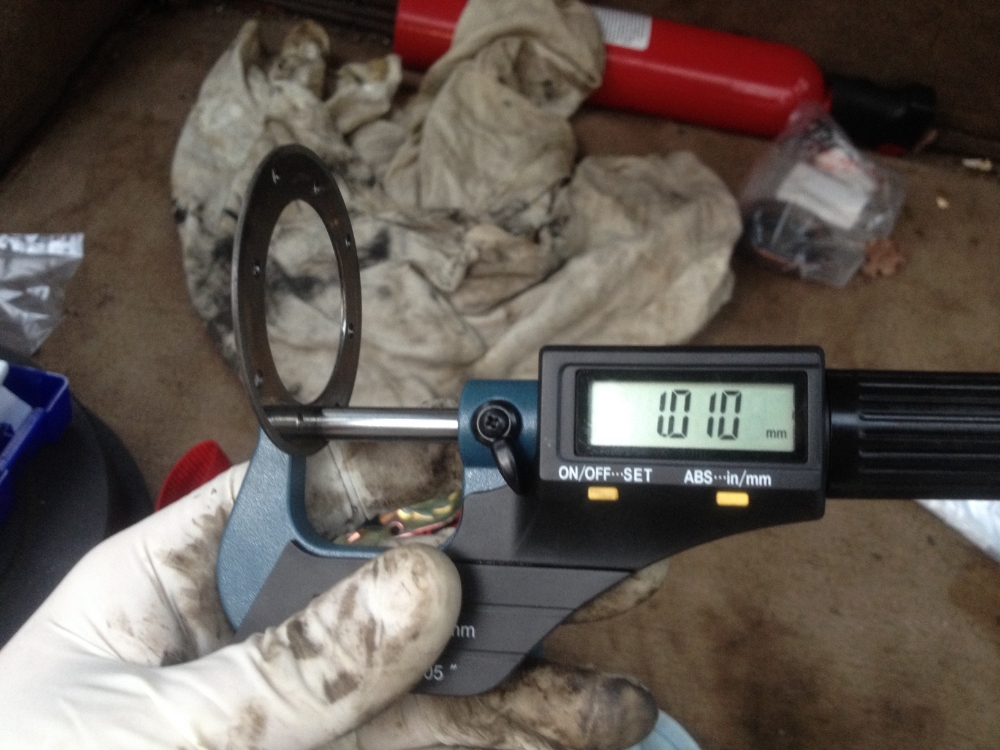
And the left (driver's) side shim washer: 1.01mm
So now as far as that goes, I'm waiting on parts from Toyota. They were all in a warehouse in California so it will probably be Friday or early next week before I see them.
I did however have a pinion oil seal (two, actually which as it turns out was a good thing) and nut already from when I rebuilt the axle last summer. I never used them but now I can! So basically I used a punch to un-stake the pinion nut and my steering wheel puller to pull the flange off. Unfortunately when I put the oil seal in I forgot to put in the bearing oil deflector so I had to destroy that new seal getting it back out. Luckily I had accidentally ordered two pinion seals last summer so I had a spare. So now the pinion is all back together and shouldn't need to be re-adjusted since I never messed with the bearing.
Here's the new seal:
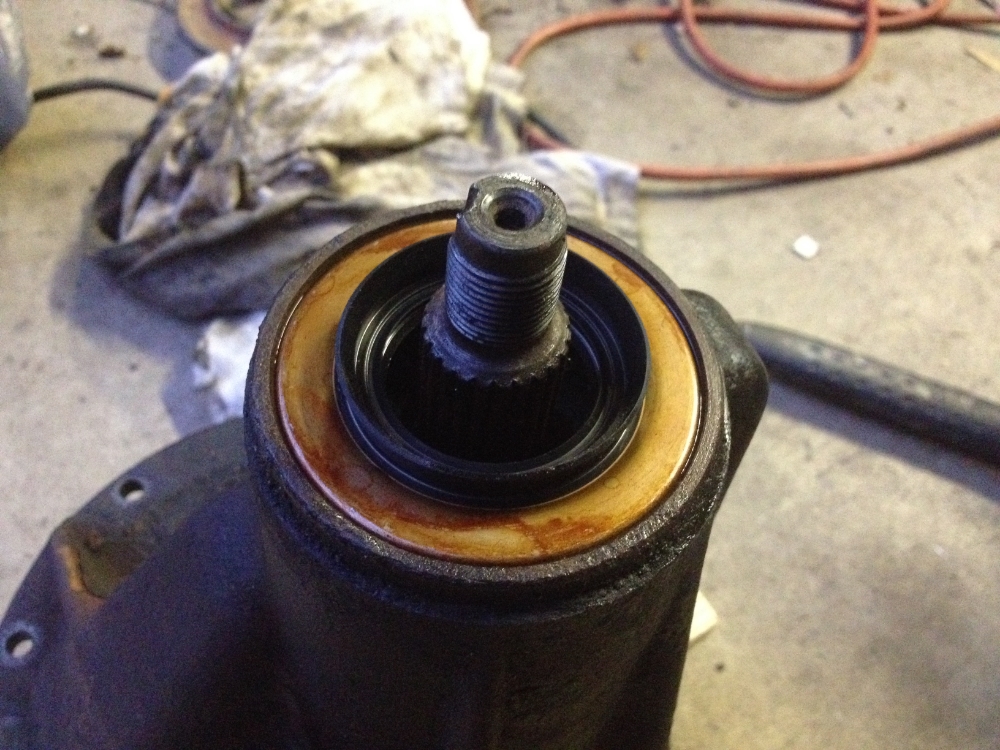
So now we wait on shim washers. I also ordered a dial indicator with magnetic base from Amazon so I can check my backlash and such. Also in that order is some awesome DEI gold heat reflector tape that I'm gonna go crazy with in the MR2 engine bay. Woo hoo!
I started by removing the retaining lock things for the diff carrier adjuster bolt things (yeah there's going to be a lot of that sort of language in here. Sue me.) and then removing the two caps that hold the diff into the 3rd member. I was careful to mark everything so it all goes back exactly the way it came apart. Here's my workspace:

Here's one of the races for the big diff bearings. Both of them looked great.

The bar that the spider gears ride on is held in with a little pin that is staked in the housing. That took some persuading to remove, but once I figured out it only comes out one way, I got it.
Here's one of the offending articles: the passenger side axle gear adjusting shim. This one is pretty much exactly 1mm thick. I don't recall the thickness of the ones I ordered, but it was over 1mm which is good.

And the left (driver's) side shim washer: 1.01mm

So now as far as that goes, I'm waiting on parts from Toyota. They were all in a warehouse in California so it will probably be Friday or early next week before I see them.
I did however have a pinion oil seal (two, actually which as it turns out was a good thing) and nut already from when I rebuilt the axle last summer. I never used them but now I can! So basically I used a punch to un-stake the pinion nut and my steering wheel puller to pull the flange off. Unfortunately when I put the oil seal in I forgot to put in the bearing oil deflector so I had to destroy that new seal getting it back out. Luckily I had accidentally ordered two pinion seals last summer so I had a spare. So now the pinion is all back together and shouldn't need to be re-adjusted since I never messed with the bearing.
Here's the new seal:

So now we wait on shim washers. I also ordered a dial indicator with magnetic base from Amazon so I can check my backlash and such. Also in that order is some awesome DEI gold heat reflector tape that I'm gonna go crazy with in the MR2 engine bay. Woo hoo!
 Re: 1986 MX72 Cressida Wagon Build: "Joby"
So I got the shims in today, looks like the thickest is 1.3mm, which may not be thick enough to eliminate the slack in the gears. If not, do you think stacking two 1mm thick shims would be bad? To get a better idea of what I'm talking about, see the picture below. Shims are circled in red.


 Re: 1986 MX72 Cressida Wagon Build: "Joby"
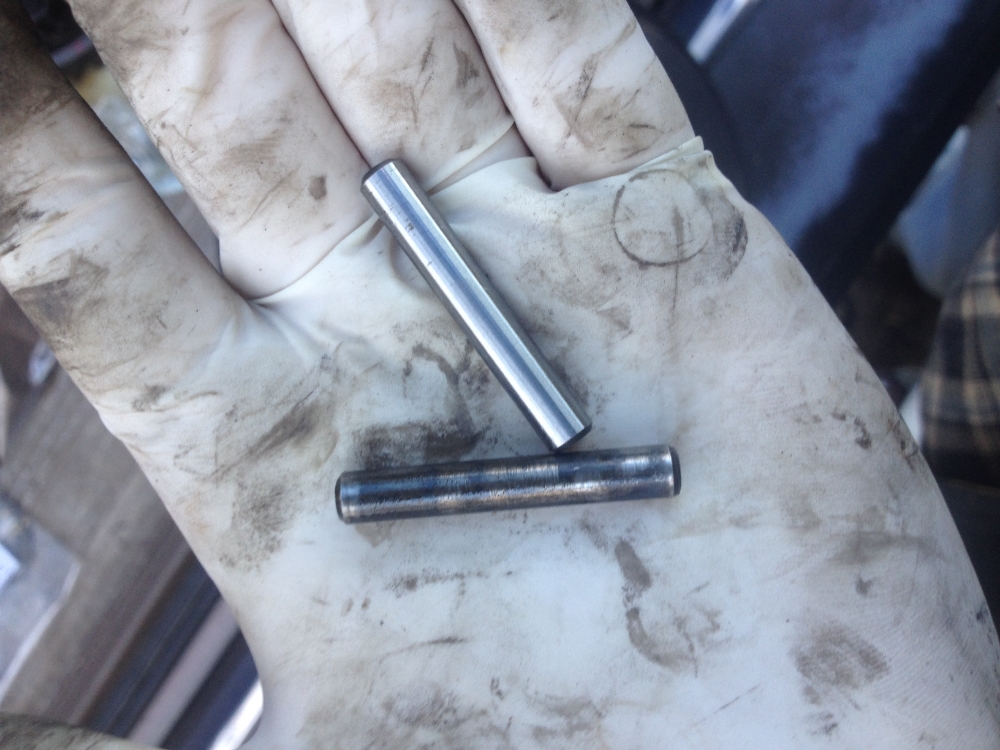
Alrighty then. Shims came in (along with a shiny new retaining pin for the middle bar thing)
And here's everything laid out all nice
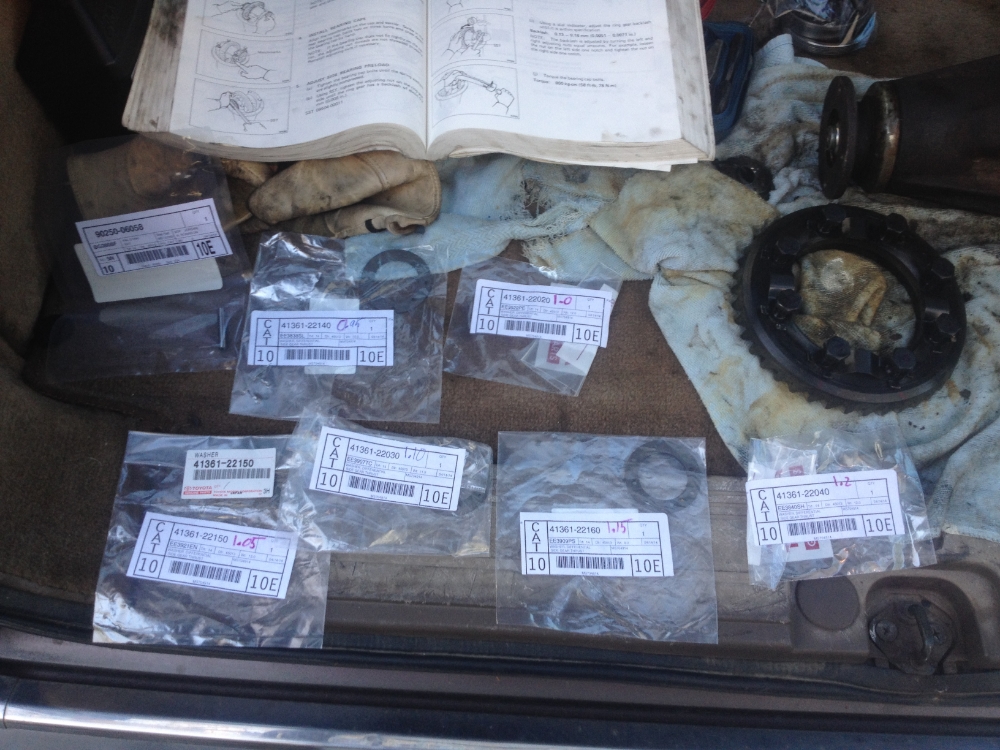
Basically I said "to hell with it" and put in the two thickest shims I had, one on either side. This put the backlash on the side gears as good as I could get it. My shiny new dial indicator is.....well, it was $35 so it's not great. I then spent an hour and a half heating up the ring gear with a torch and trying to get it installed on the diff with the bolt holes perfectly aligned. Everything went together pretty well after that, I set the backlash and side bearing preload as best I could for my first time. Today I put it in the car and filled it up with some new gear oil. After a ride around the neighborhood it would seem that the clunking is gone! So I'm going to call this a tentative success, as long as bearings don't start whining from improper preload.

And here's everything laid out all nice

Basically I said "to hell with it" and put in the two thickest shims I had, one on either side. This put the backlash on the side gears as good as I could get it. My shiny new dial indicator is.....well, it was $35 so it's not great. I then spent an hour and a half heating up the ring gear with a torch and trying to get it installed on the diff with the bolt holes perfectly aligned. Everything went together pretty well after that, I set the backlash and side bearing preload as best I could for my first time. Today I put it in the car and filled it up with some new gear oil. After a ride around the neighborhood it would seem that the clunking is gone! So I'm going to call this a tentative success, as long as bearings don't start whining from improper preload.
 Re: 1986 MX72 Cressida Wagon Build: "Joby"
Xcessive Manufacturing skid plate is in. I chased the threads in the chassis with a tap and it went in super easy. I also coated it with Duplicolor rubberized truck bed liner, just for a little extra protection.
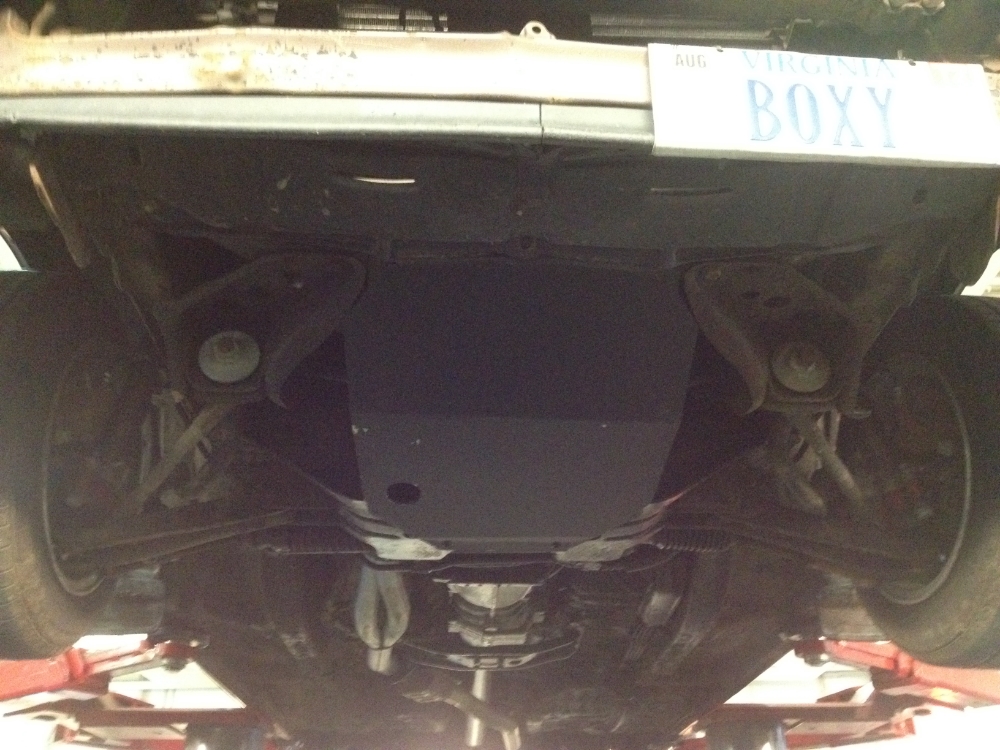
It fits great, though I think the oil drain hole is placed more for JZ or UZ swaps because it doesn't really line up with the 5M drain. Also, it sits probably 1-1.5" lower than the subframe so it's mad low. I'm gonna have to be super careful to not scrape it on anything.

It fits great, though I think the oil drain hole is placed more for JZ or UZ swaps because it doesn't really line up with the 5M drain. Also, it sits probably 1-1.5" lower than the subframe so it's mad low. I'm gonna have to be super careful to not scrape it on anything.
 Re: 1986 MX72 Cressida Wagon Build: "Joby"
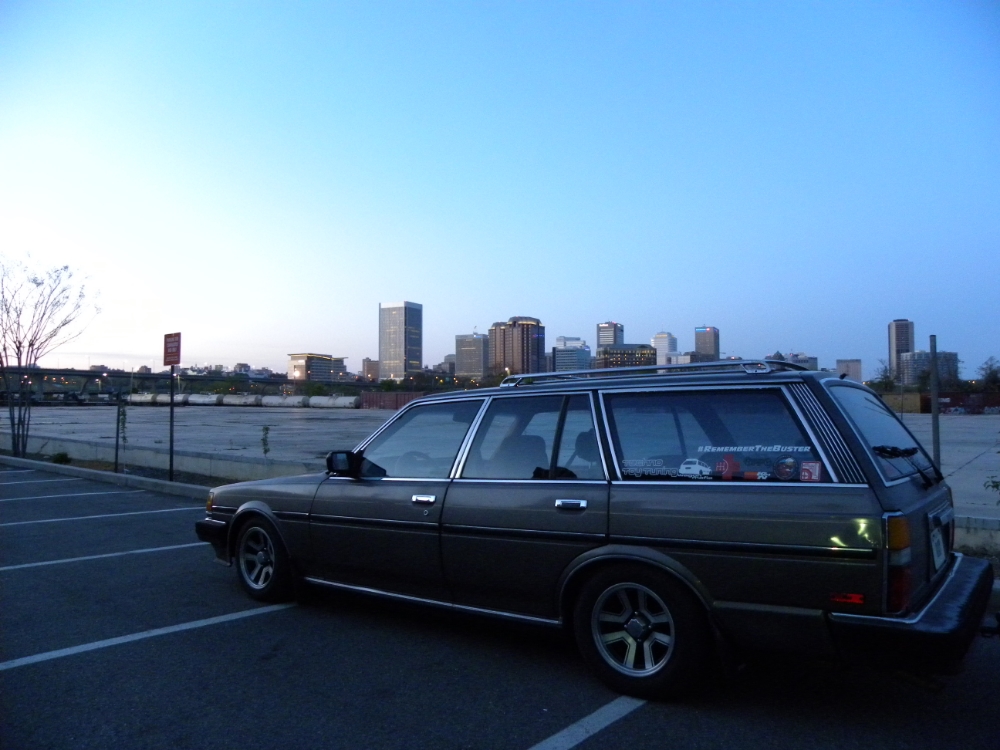
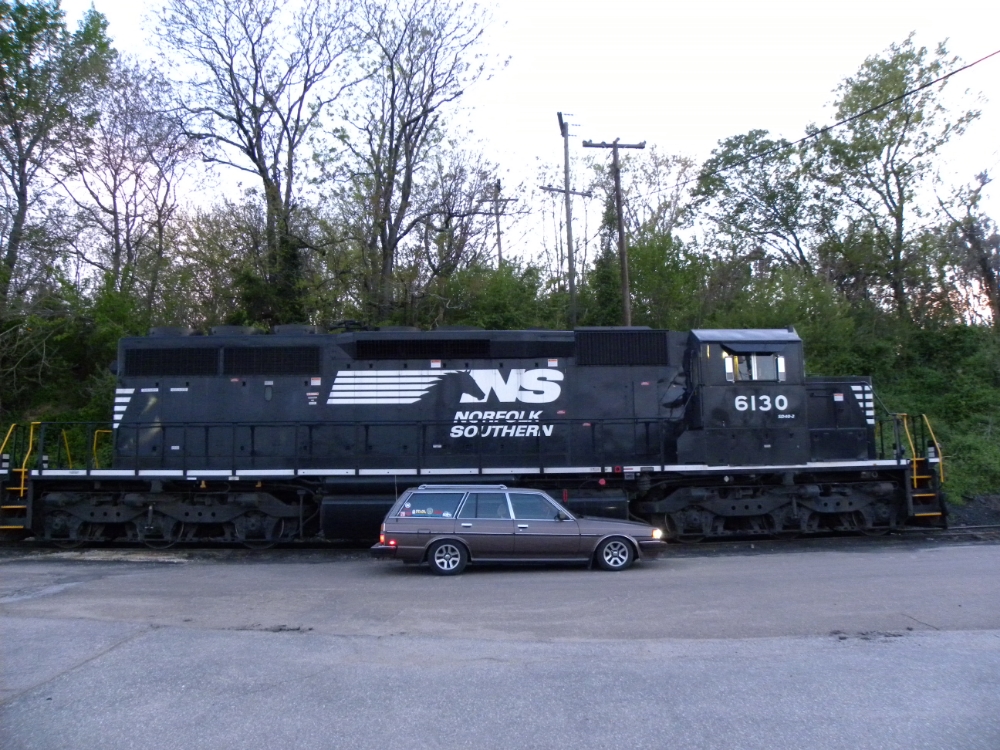
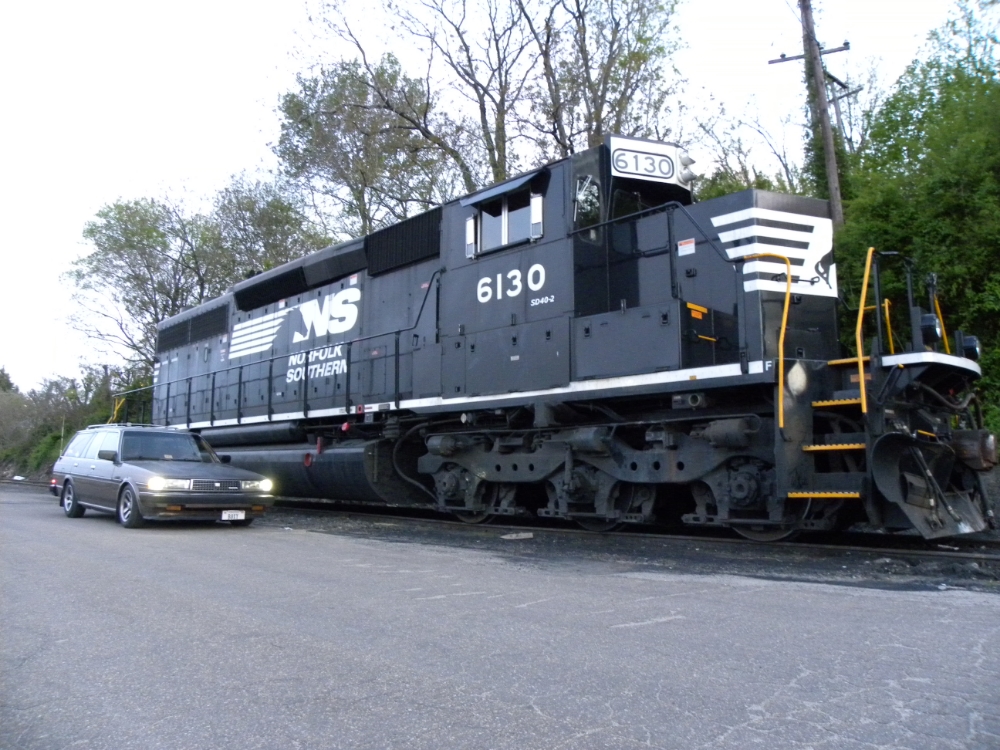
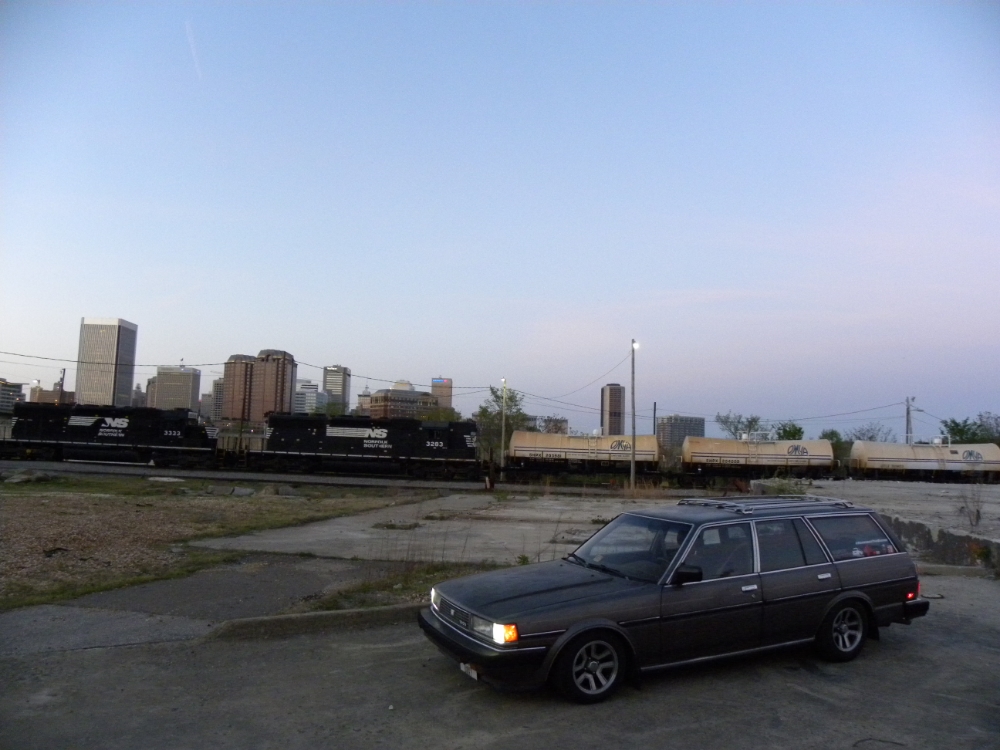
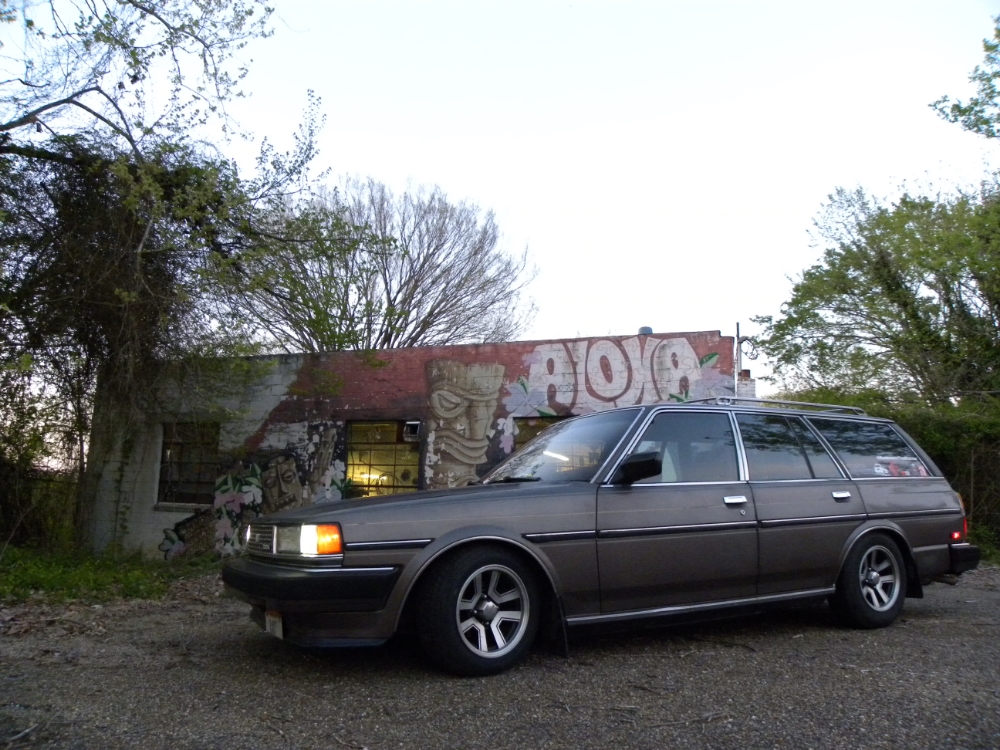
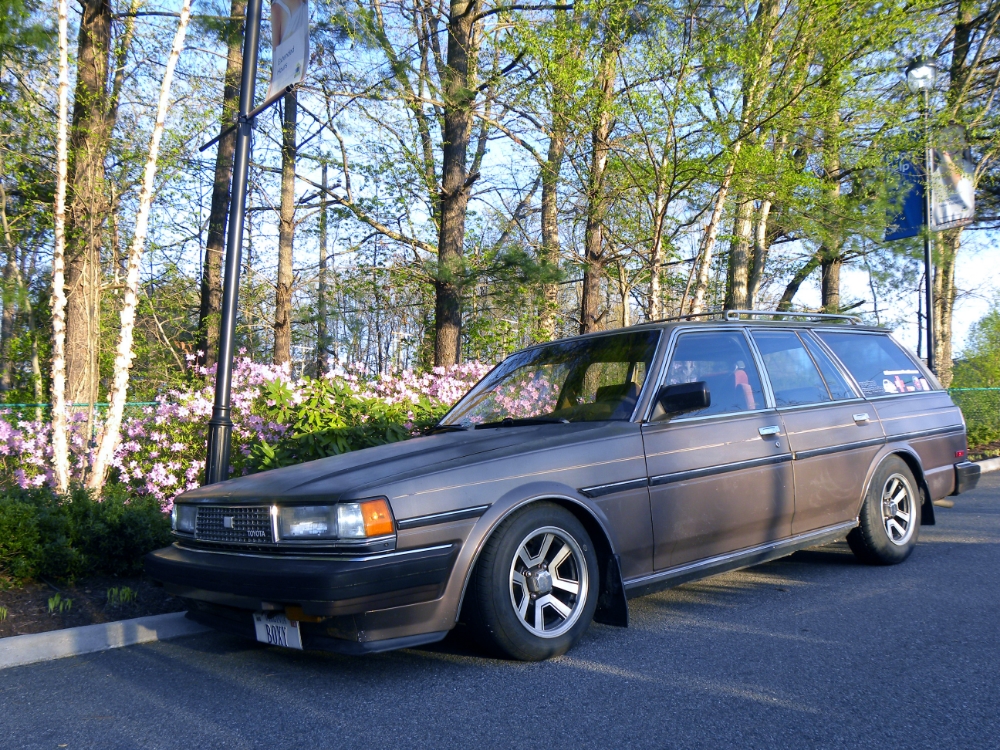
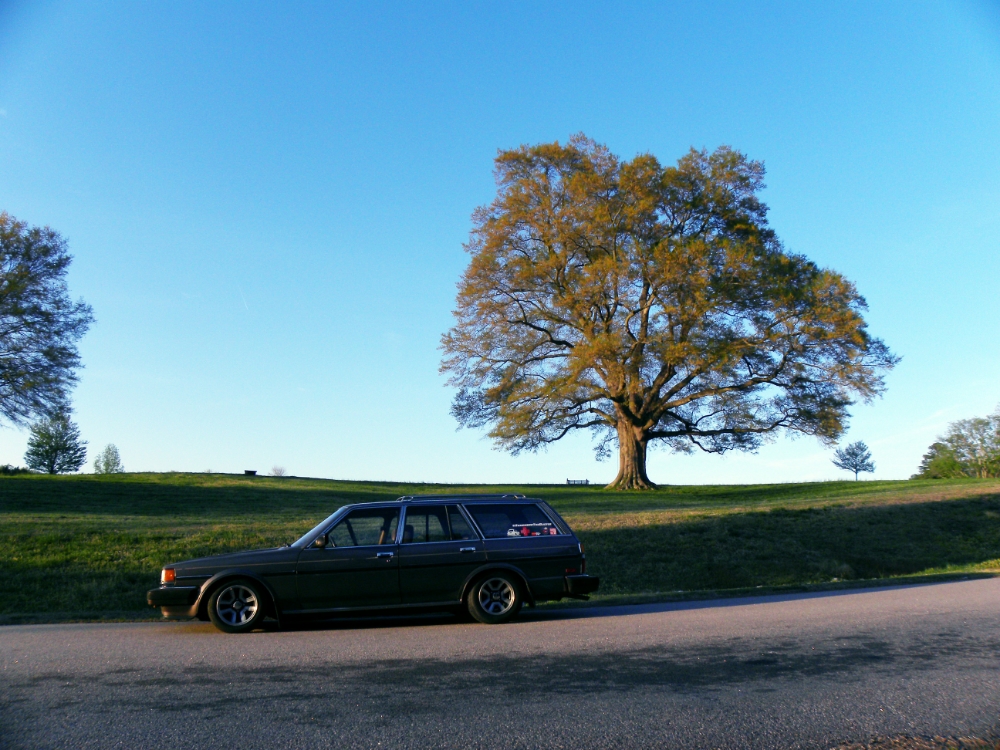
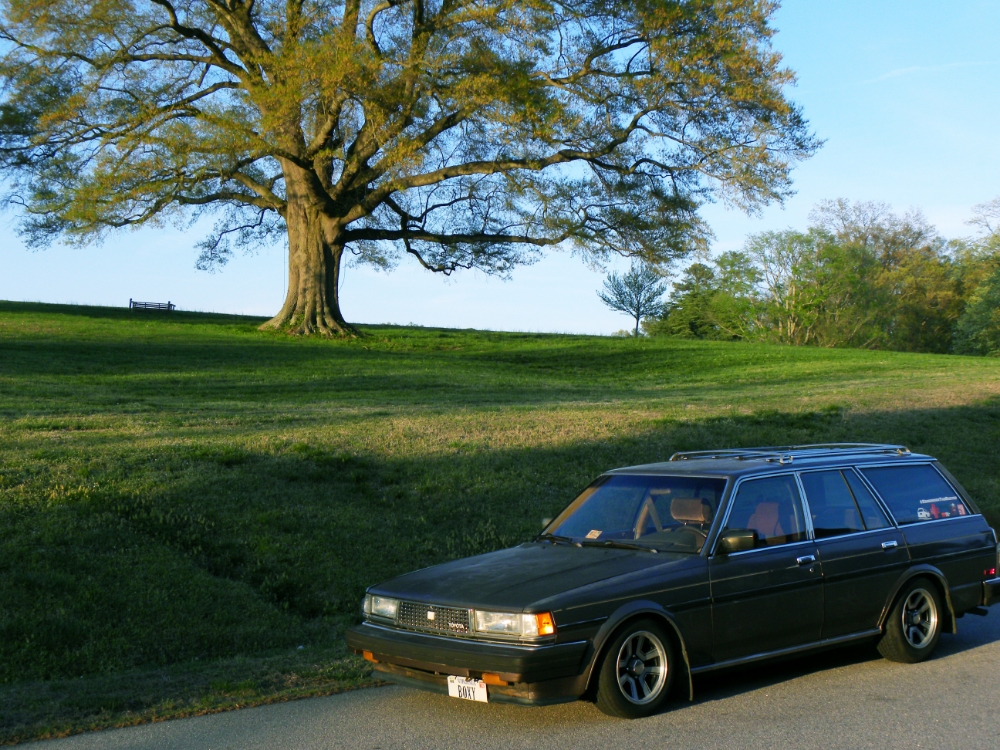
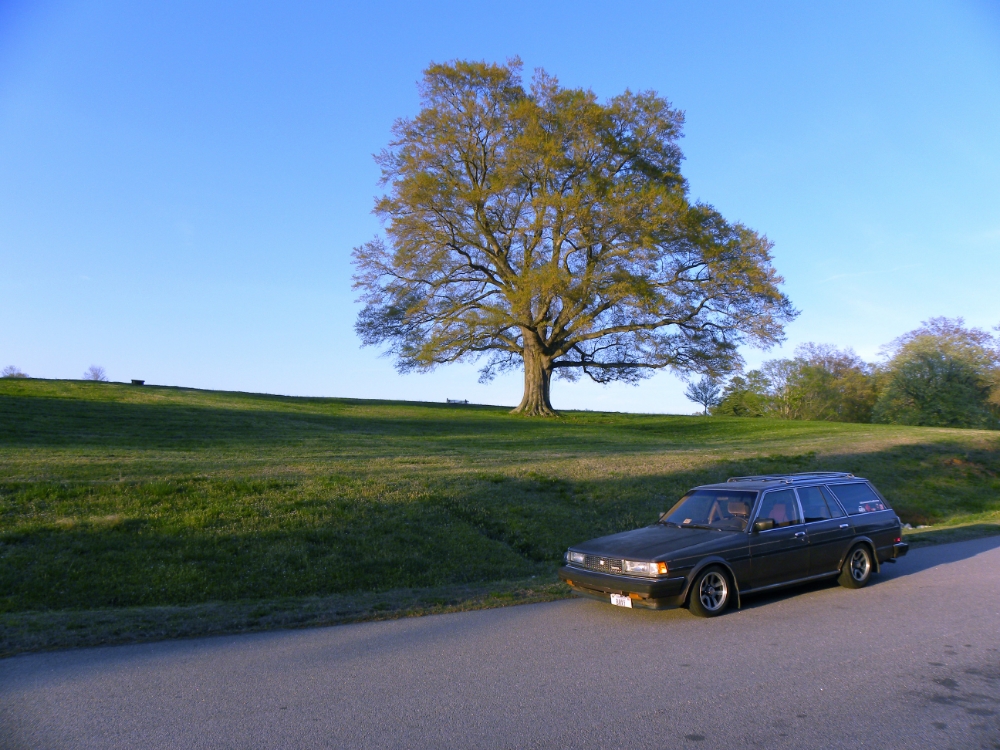
Last night I was depressed because of the whole "MR2 needs a rebuild" situation, so I went around the west end taking pictures and decided to try and hit the City and see what I could find in terms of photo spots. Let me just say boy am I glad I put my skid plate on because holy crap RVA has some of the worst "roads". Also, I apologize for my less-than stellar pics. I am not a photographer and my NIkon P90, while a very nice point and shoot, is nowhere near as nice as a DSLR.
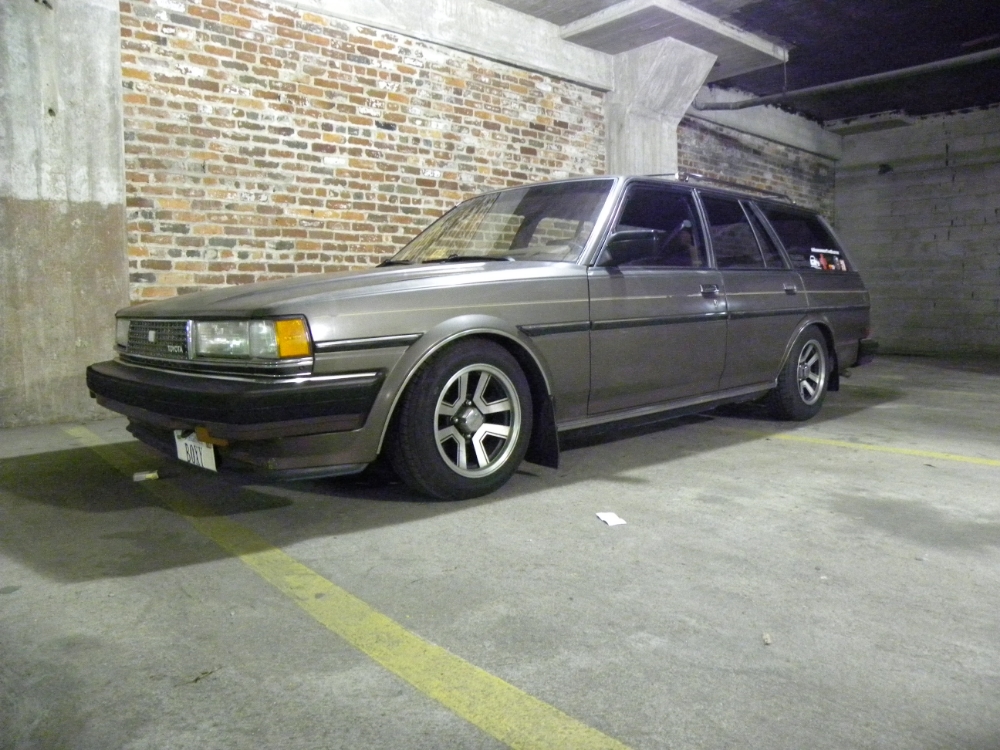
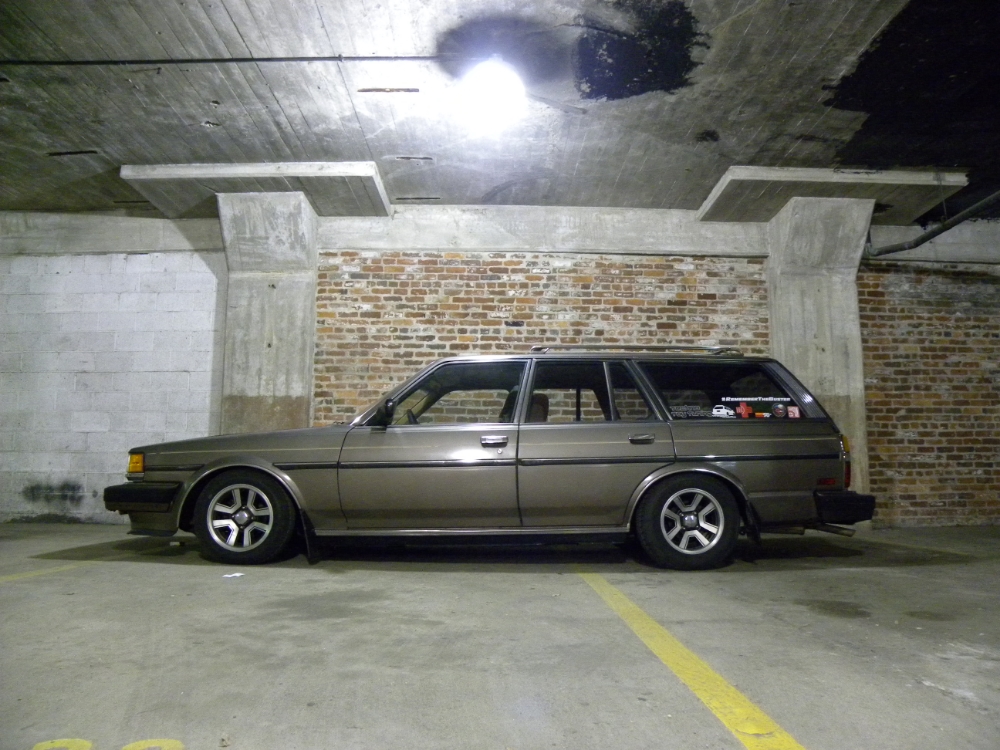
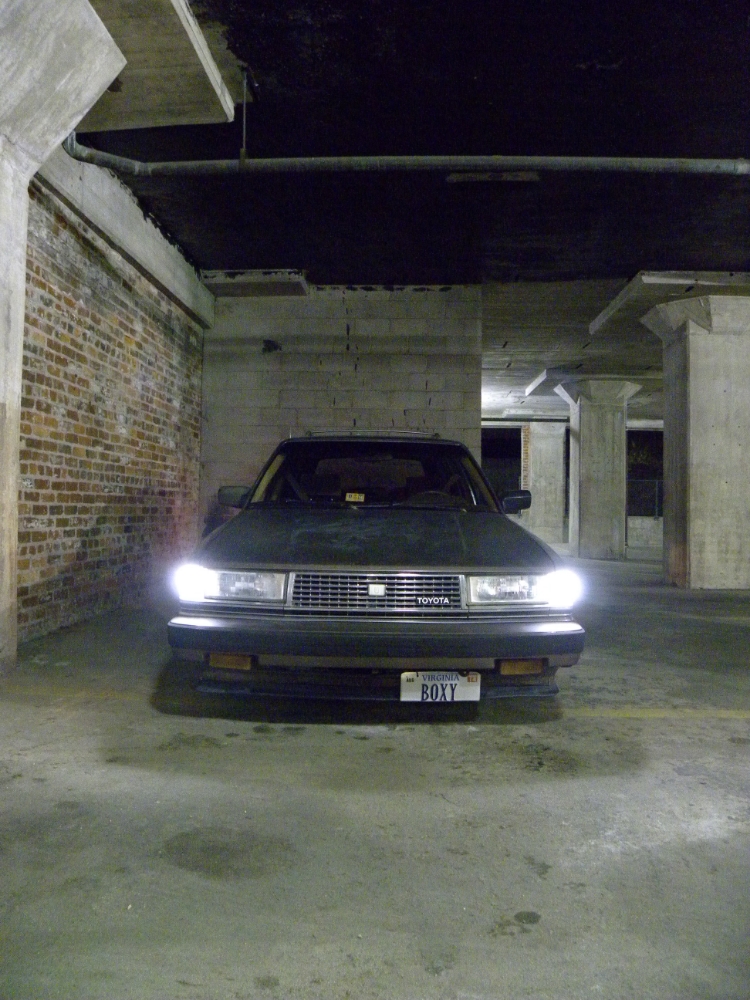
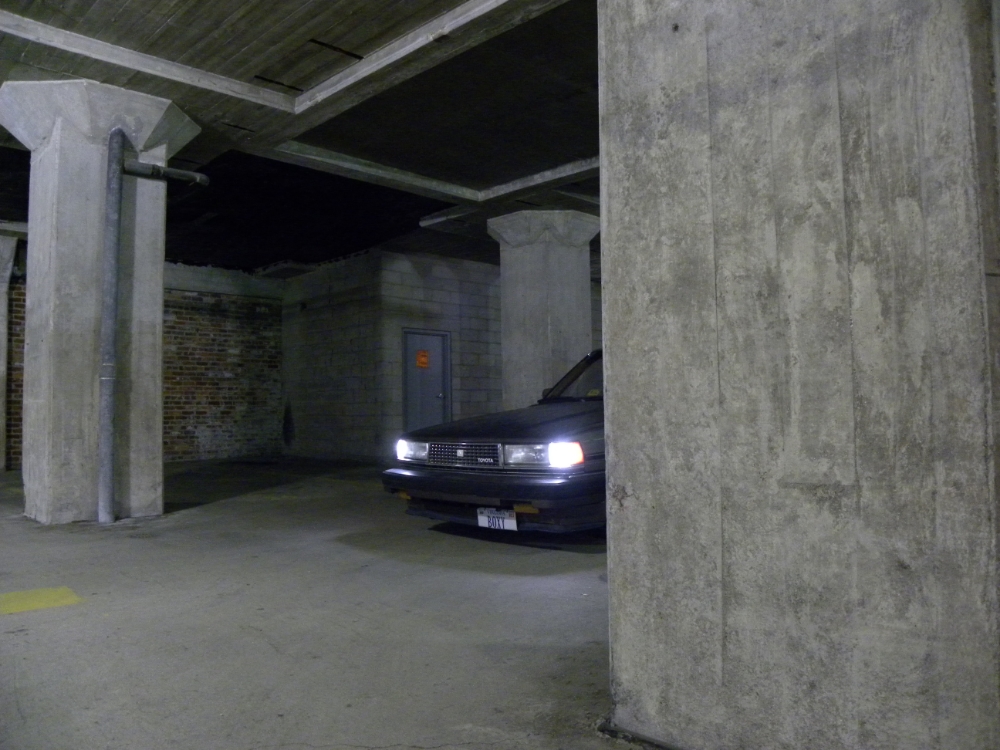





 Re: 1986 MX72 Cressida Wagon Build: "Joby"
Since my MR2 is down for an engine rebuild, this has become my daily driver. Being an old car it's starting to show some issues that are starting to pile up and really irritate me.
1. Front passenger window will go down, but not up.
2. Driver's rear window does nothing
3. Stereo tape player broke so no more ipod in the car
4. Rear speakers have never worked
5. Dome light doesn't come on when you open the door
6. Or the hatch
7. Rear window washer hose is broken somewhere in the rear pillar, causing massive internal leakage if you try to use it
8. Passenger door lock is insanely hard to move by hand and won't move with the key or power switch
9. Rear hatch lock won't turn
10. All window tracks need to be lubricated to speed up the slow ass rolling up/down
11. Speedometer cable broke AGAIN
12. Need to figure out how to get my fan to only work when the ignition is on so it doesn't potentially kill the battery
13. Rear end clunk still present. When the MR2 is back up, the diff will be coming back out and getting double shim stacked and/or welded to shut it the hell up
14. Headlights are still dim as well as being aimed way too low. The adjuster bolts are now comprised entirely of ferric oxide so I think to aim them higher will require shimming the brackets with washers
 Re: 1986 MX72 Cressida Wagon Build: "Joby"
OK not sure how or why, but the front right window works now. Left rear is still a no-go, again not sure why. I also found the wiring between the body and the hatch was in really bad shape with a couple wires broken. Soldered those back and now my hatch locks again.
 Re: 1986 MX72 Cressida Wagon Build: "Joby"
I can send you my old 87 tape radio player... Just pay shipping...
Page 4 of 6 •  1, 2, 3, 4, 5, 6
 Similar topics
» 1986 Cressida MX72 Wagon "project"
» 1986 Toyota Cressida Wagon MX72 FOR SALE
» FS: 1986 Cressida Wagon 5 speed LSD
» Rear Tail Light Assembly Passenger Side MX72 Cressida Wagon HELP!!!!!!!!!!!!
» custom 1-pice driveshaft for W58 MX72 wagon. Pittsboro, NC. pick up only.
» 1986 Toyota Cressida Wagon MX72 FOR SALE
» FS: 1986 Cressida Wagon 5 speed LSD
» Rear Tail Light Assembly Passenger Side MX72 Cressida Wagon HELP!!!!!!!!!!!!
» custom 1-pice driveshaft for W58 MX72 wagon. Pittsboro, NC. pick up only.
Page 4 of 6
Permissions in this forum:
You cannot reply to topics in this forum

